
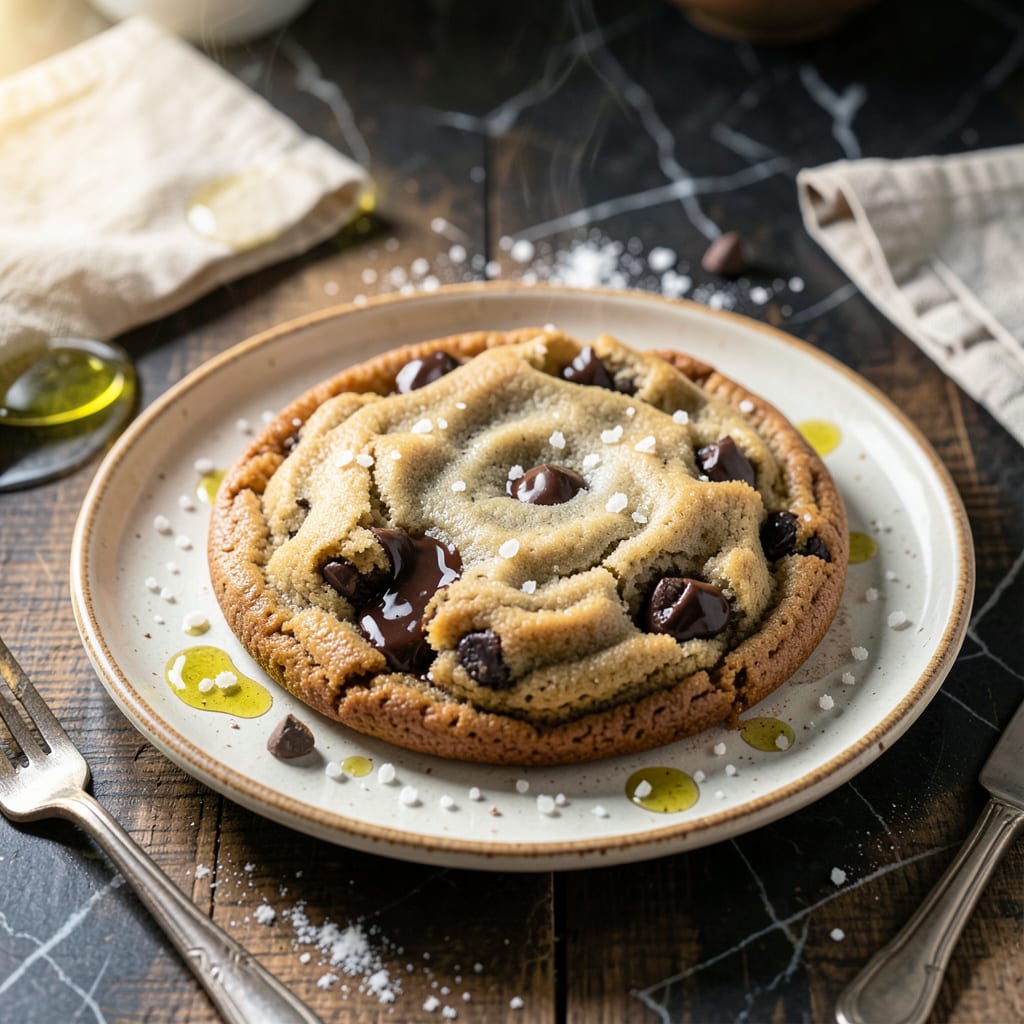
This recipe delivers the bakery-style cookies you crave—thick, soft, and packed with melty chocolate in every bite. The secret lies in chilled dough and a precise baking time to achieve that perfect fat texture.
You’ll get edges that are just crisp enough, with centers that stay gooey and rich. Simple ingredients, professional results. No special equipment required.
Ingredients for Fat Chocolate Chip Cookie
Classic pantry staples transformed into thick, bakery-style cookies with melty chocolate pockets.
| Ingredient | Amount | Notes |
|---|---|---|
| All-Purpose Flour 🌾 | 2 ½ cups | Spoon and level, no sifting |
| Baking Soda 🧂 | 1 tsp | Ensures proper rise |
| Baking Powder 🧂 | ½ tsp | Balances spread and lift |
| Kosher Salt 🧂 | 1 tsp | Diamond Crystal preferred |
| Unsalted Butter 🧈 | 1 cup | Cold, cubed for creaming |
| Granulated Sugar 🍚 | ¾ cup | Fine grain for even mixing |
| Light Brown Sugar 🍚 | ¾ cup | Packed firmly into cup |
| Large Eggs 🥚 | 2 whole | Room temperature for emulsification |
| Vanilla Extract 💧 | 2 tsp | Pure, not imitation |
| Semi-Sweet Chocolate Chips 🍫 | 2 cups | High-quality bars chopped work too |
| Dark Chocolate Chunks 🍫 | 1 cup | 70% cacao recommended |
| Walnuts 🌰 | ¾ cup | Toasted and chopped coarse |
The butter quality is non-negotiable here. European-style unsalted butter (like Plugrá or Kerrygold) has higher fat content, yielding richer texture. For flour, King Arthur all-purpose is the professional standard—consistent protein content ensures proper structure. Chocolate matters too: Ghirardelli or Guittard chips melt beautifully without that waxy aftertaste. Avoid pre-shredded chocolate; it’s coated in stabilizers that prevent proper melting.
No walnuts? Pecans or macadamia nuts add similar richness. For nut-free versions, toasted oats orpretzel pieces provide crunch. Brown sugar substitution: coconut sugar at one-to-one ratio works, though it may darken the cookies. Butter can be cold-pressed coconut oil (solid, not melted) for a dairy-free version, but expect slightly different texture. Vanilla extract is essential—Nielsen-Massey is the gold standard for depth of flavor.
Dough keeps in the fridge for up to 5 days—flavor actually improves. Freeze portions for 3 months in airtight containers. Baked cookies stay fresh for 4 days at room temperature in sealed containers. Pro tip: underbake by 1-2 minutes for maximum gooey centers. Always chill dough 24-48 hours for that signature fat texture.
Why You’ll Love This Recipe
- I’ll be real: I always double the batch because they freeze and reheat beautifully.
- One Bowl Wonder: I just dump, mix, and bake—no fancy gadgets, just a bowl and a spoon.
- Buttery Richness: That unsalted butter gives them a deep, golden flavor that’s hard to resist.
- Bake Sale Star: Honestly, these disappear faster than I can cool them at any gathering.
Step-by-Step Instructions for Fat Chocolate Chip Cookies
Master these techniques for thick, bakery-style cookies with crisp edges and gooey centers.
Step 1: Cream Butter and Sugars to Aerate
In a stand mixer with the paddle attachment, beat the 1 cup unsalted butter with the 0.75 cup granulated sugar and 0.75 cup light brown sugar on medium speed for 4-5 minutes. The mixture should become pale and nearly double in volume as air incorporates.
This creaming process creates microscopic air pockets that expand during baking, contributing to the cookie’s thickness. The butter must be cool but slightly pliable—if it’s too warm, the cookies will spread excessively. Scrape the bowl occasionally to ensure even mixing.
Step 2: Incorporate Eggs and Vanilla for Structure
Add the 2 whole large eggs, one at a time, mixing on low speed for 30 seconds after each addition. The mixture may appear slightly curdled initially, but will smooth out. Next, add the 2 tsp vanilla extract and mix for another 15 seconds.
Room temperature eggs emulsify better with the fats, creating a stable base for your dough. The vanilla enhances the chocolate flavor while adding depth. Avoid overmixing at this stage to prevent developing gluten prematurely.
Step 3: Combine Dry Ingredients for Balance
In a separate bowl, whisk together the 2.5 cups all-purpose flour, 1 tsp baking soda, 0.5 tsp baking powder, and 1 tsp kosher salt. This combination of leavening agents creates the perfect rise and spread for thick cookies.
Add the dry ingredients to the wet mixture in two additions, mixing on low speed for 20-25 seconds after each. Stop mixing as soon as the flour disappears—overworking the dough will make your cookies tough rather than tender.
Step 4: Fold in Chocolate and Walnuts
Using a silicone spatula, fold in the 2 cups semi-sweet chocolate chips, 1 cup dark chocolate chunks, and 0.75 cup walnuts by hand. This ensures even distribution without overmixing the dough.
The combination of chips and chunks creates pockets of melted chocolate throughout, while the walnuts add texture. Distribute them evenly so each bite contains a balance of chocolate and nut.
Step 5: Chill and Bake for Optimal Texture
Cover the dough and refrigerate for at least 1 hour (overnight is ideal). This resting period allows the flour to hydrate fully and the butter to firm up, preventing excessive spreading during baking.
When ready to bake, preheat the oven to 350°F. Scoop 3.5 oz portions of dough (about ⅓ cup) onto parchment-lined baking sheets, spacing them 3 inches apart. Bake for 14-16 minutes until edges are golden brown but centers still look slightly underdone.
Let the cookies cool on the baking sheet for 5 minutes before transferring to a wire rack. The centers will set as they cool, resulting in thick, gooey cookies with crisp edges.
Pro Tips For Making Fat Chocolate Chip Cookie
- Chill the Dough: After mixing, refrigerate the dough for at least 1 hour—24 is even better. I learned this the hard way when my first batches spread into flat, greasy puddles.
- Brown the Butter: Melt the unsalted butter until it turns golden and nutty, then cool it completely before mixing. Sounds weird, but it works: it adds depth and cuts the raw butter taste.
- Weigh Your Flour: Skip the measuring cup and use a scale for 14-16 oz of all-purpose flour. After burning three batches, I finally figured out that scooping flour packs it too densely.
- Underbake Slightly: Pull the cookies when the edges are set but the centers still look soft—they’ll firm up as they cool. My grandmother swore by this, and she was right: overbaking dries them out.
Storing and Reheating This Recipe
Room Temperature Storage
For best results, store cooked cookies in an airtight container at room temperature. They’ll stay fresh for 4-5 days with their soft centers intact. I like using glass containers with snap-tight lids for this.
Refrigerator Storage
If you need to extend freshness beyond 5 days, refrigerate in a sealed container with parchment between layers. Let them come to room temperature before serving—this takes about 30 minutes. The texture remains surprisingly good. ❄️
Freezing Baked Cookies
Freeze completely cooled cookies in a single layer first, then transfer to a ziplock freezer bag. They’ll keep for up to 3 months. To revive, thaw at room temperature for 1-2 hours or warm in a 300°F oven for 5-8 minutes. 🔥
Freezing Dough Balls
Scoop dough into 3.5 oz portions and freeze on a tray before transferring to a bag. This lets you bake fresh cookies anytime. Add 2-3 minutes to baking time when using frozen dough.
Reheating for Freshness
For that just-baked experience, warm cookies in a 350°F oven for 3-4 minutes. Microwave works too—10-15 seconds on a paper towel—but the oven method preserves texture better.
Pro Storage Tip
Add a slice of bread to your cookie container—it’ll absorb excess moisture and keep your treats soft longer. This old baker’s trick really works, and I use it for all my cookie batches.
Nutrition Facts
Frequently Asked Questions
Why do my cookies spread too much?
This usually happens if the butter is too warm or not chilled long enough. Ensure your dough rests for at least 1 hour before baking. Also, avoid over-creaming the butter and sugars.
Can I skip chilling the dough?
Skipping the chill results in thinner, flatter cookies. Chilling for 24-48 hours develops flavor and prevents spreading, giving you that desired thick texture.
What if I don’t have a stand mixer?
A hand mixer works fine, though it may take 1-2 extra minutes to cream the butter and sugars properly. Ensure everything is well combined for the best texture.
How do I get gooey centers every time?
Underbake slightly—pull cookies when edges are golden brown but centers still look soft. They’ll continue cooking as they cool on the baking sheet for 5 minutes.

- 8 Bean Soup Recipe Crock Pot: Hearty Vegetable Medley in One Pot - September 25, 2026
- 4C Bread Crumbs Meatballs Recipe: Crispy Crust and Juicy Centers - September 25, 2026
- 6 Oz Chocolate Chip Cookie Recipe: Perfectly Balanced Crispy Edges and Chewy Hearts - September 25, 2026