
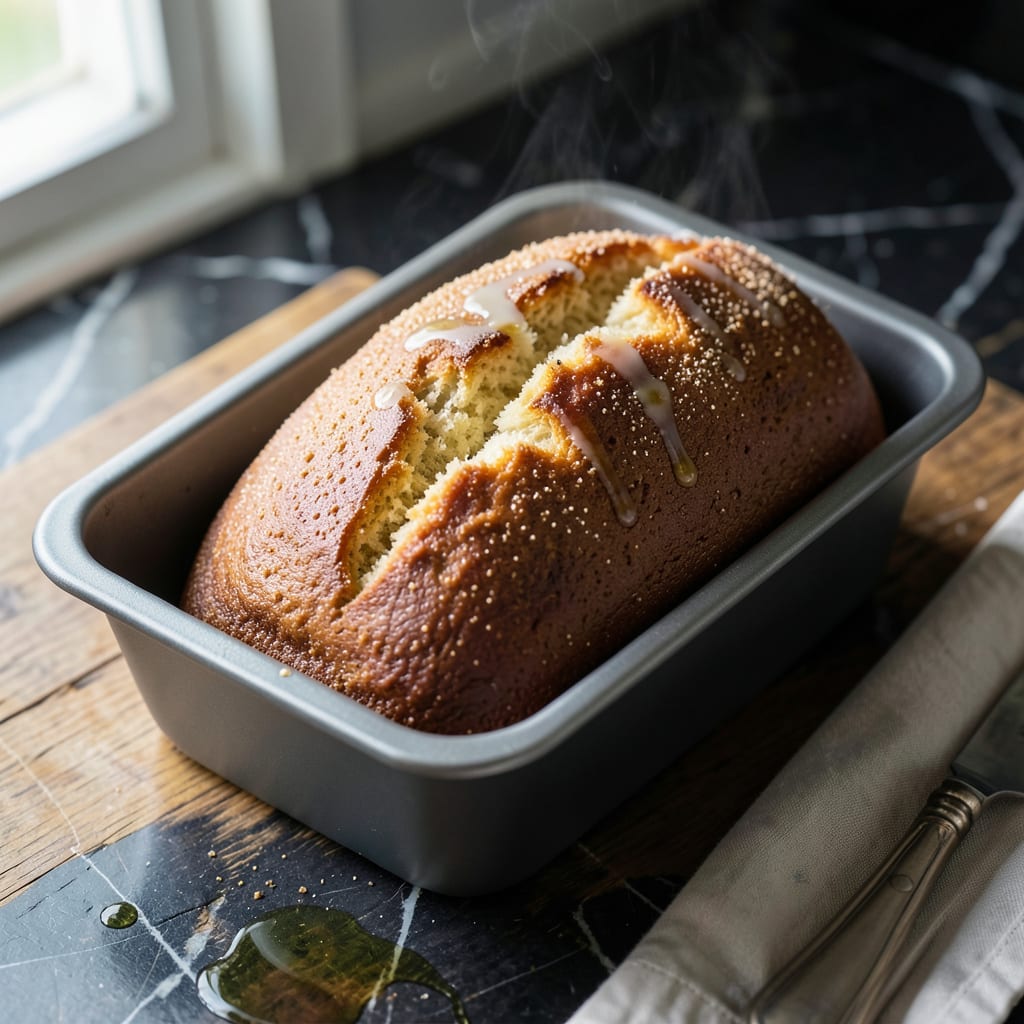
This bread machine recipe proves you can have soft, fluffy bread without any added fat. Using simple pantry staples, it delivers a light, airy loaf that rises beautifully every time.
The secret is in the precise liquid-to-flour ratio and the machine’s consistent kneading. In just 3 hours, you’ll have a warm, golden loaf ready to slice—completely guilt-free.
Ingredients for Fat Free Bread Machine
Simple pantry staples create that perfect light, airy loaf every single time.
| Ingredient | Amount | Notes |
|---|---|---|
| Bread Flour 🌾 | 3 ½ cups | All-purpose works in a pinch |
| Water 💧 | 1 ¼ cups | Warm, about 110°F |
| Sugar 🍚 | 2 tbsp | Granulated white or brown |
| Active Dry Yeast 🍞 | 2 ¼ tsp | One packet, check expiration |
| Salt 🧂 | 1 ½ tsp | Fine sea salt preferred |
| Non-Dairy Milk 🥛 | ¼ cup | Unsweetened almond or soy |
| Vital Wheat Gluten 🌾 | 1 tbsp | Optional for extra chew |
| Apple Cider Vinegar 🍏 | 1 tbsp | Helps with rise |
| Olive Oil 🫒 | 0 tbsp | Spray for pan only |
| Cornmeal 🌽 | 2 tbsp | For dusting pan |
The flour is the foundation here. King Arthur Bread Flour is my go-to for consistent results—high protein content means better structure. Most grocery stores carry it, but any unbleached bread flour works. The yeast needs to be fresh (check that expiration date!) and the water temperature matters—too hot kills the yeast, too cold slows the rise. A quick instant-read thermometer takes the guesswork out.
No bread flour? All-purpose plus 1 tbsp vital wheat gluten per cup gets you close. Swap the sugar for maple syrup or agave if you prefer. The non-dairy milk adds tenderness without fat—oat milk works great. Out of apple cider vinegar? White vinegar or lemon juice in the same amount does the trick. The cornmeal prevents sticking and adds a nice crunch to the crust.
Store flour in an airtight container (or freeze for 6 months to prevent bugs). Yeast keeps in the fridge for 4 months unopened, 1 month once opened. The loaf stays fresh for 3-4 days in a bread box or wrapped tightly at room temp—no need to refrigerate.
Why You’ll Love This Recipe
- Set and Forget: I dump the flour, yeast, water, sugar, and salt in the machine and walk away—no kneading, no fuss.
- Warm Comfort: The yeast and sugar work magic, filling my kitchen with that fresh-baked aroma I crave.
- Meal Prep Hero: A loaf on Sunday means sandwiches, toast, and garlic bread all week long.
- Penny Wise: Five basic pantry staples and zero oil or butter keep my wallet and my waistline happy.
Step-by-Step Instructions for Fat Free Bread Machine Loaf
Here’s the method I’ve perfected to create a light, airy loaf without any added fat.
Step 1: Prepare the Bread Machine Pan
Begin by lightly greasing your bread machine pan with cooking spray—this replaces the need for any oil in the recipe. Then dust the bottom and sides with the 2 tbsp Cornmeal. This creates a non-stick surface while adding a subtle crunch to the crust.
I’ve found that cornmeal works better than flour for dusting in fat-free recipes because it absorbs moisture differently, preventing the loaf from sticking without adding any fat. Make sure to coat all surfaces that will touch the rising dough.
Step 2: Add Wet Ingredients to the Pan
Pour in the 1.25 cups Water first, followed by the 0.25 cup Non-Dairy Milk. The water should be warm, about 110°F—test it with your finger; it should feel comfortably warm but not hot.
Next, add the 1 tbsp Apple Cider Vinegar. This might seem unusual, but it reacts with the baking process to improve the rise and create a lighter texture in fat-free bread. The vinegar won’t leave a taste—trust the chemistry here.
It’s important to add the wet ingredients first in a bread machine. This prevents the yeast from activating too early, which could cause uneven rising. The liquid ingredients should pool in the bottom of the pan.
Step 3: Layer in Dry Ingredients Strategically
Add the 3.5 cups Bread Flour on top of the wet ingredients, spreading it evenly to cover the liquid completely. Then sprinkle the 2 tbsp Sugar over the flour. The sugar feeds the yeast and helps with browning.
In one corner of the pan, add the 2.25 tsp Active Dry Yeast, making sure it doesn’t touch the liquid. In another corner, add the 1.5 tsp Salt. Keeping the yeast and salt separate at this stage prevents the salt from inhibiting the yeast’s activation.
Finally, add the 1 tbsp Vital Wheat Gluten on top of the flour. This is the secret to achieving good structure in fat-free bread, as it mimics the elasticity that fat would normally provide.
Step 4: Select and Start the Bread Machine Cycle
Insert the pan into your bread machine and select the basic white bread setting. If your machine has a crust color option, choose medium. The entire cycle should take about 3-4 hours, depending on your machine.
About 10 minutes into the cycle, check that the dough has formed into a smooth ball. If it appears too dry, add water 1 tsp at a time until it comes together. If it’s too sticky, add bread flour 1 tbsp at a time. The dough should be tacky but not stick to your finger when touched.
Resist the urge to open the lid during the baking phase. The machine maintains the perfect environment for rising and baking, and opening it can cause the loaf to collapse or develop unevenly.
Step 5: Cool Completely Before Slicing
When the cycle completes, carefully remove the pan from the machine using oven mitts—it will be hot. Turn the loaf out onto a wire rack and let it cool for at least 1 hour before slicing.
This cooling period is crucial. It allows the internal structure of the bread to set completely, preventing a gummy texture. The loaf should sound hollow when tapped on the bottom if it’s properly baked.
Once cooled, slice with a serrated knife using a gentle sawing motion. The bread should have a soft, open crumb and a thin, crisp crust. Store leftovers in an airtight container at room temperature for up to 3 days, or freeze for longer storage.
Pro Tips For Making Fat Free Bread Machine
- Warm the Water: Use water at 110°F—hot enough to activate the yeast but not so hot it kills it. I learned this the hard way after a few loaves that never rose.
- Measure Flour Right: Spoon bread flour into your measuring cup and level it off—don’t scoop directly from the bag. Packed flour makes dense, dry bread every time.
- Salt Last: Add salt to the corners of the bread pan, not directly on top of the yeast. Salt can inhibit yeast activation if they touch too soon.
- Check the Window: After 5 minutes of kneading, peek through the bread machine window to ensure the dough forms a smooth ball. If it’s too sticky or dry, add water or flour 1 tablespoon at a time.
Troubleshooting Perfect Results
Dense or Flat Loaf
If your bread turns out dense, the yeast may have been old or the water too hot. Always check yeast expiration and use water at exactly 110°F. I keep a ThermoWorks thermometer handy for precision. Too much flour can also cause this—measure by spooning into cups rather than scooping. 🌡️
Loaf Didn’t Rise
This often happens when yeast touches liquid too soon.
Crust Too Thick
Select the “light crust” setting if your machine offers it. For extra control, try the dough setting, then shape and bake in a conventional oven at 375°F for 25-30 minutes. This gives you more crust customization options.
Bread Sticks to Pan
Even with cornmeal, sticking can occur. Next time, use parchment paper cut to fit the pan bottom. I also recommend letting the loaf cool for 5 minutes in the pan before removing to help it release naturally.
Uneven Baking
If one side bakes faster, your machine’s heating element may be uneven. Rotate the pan 180 degrees halfway through the bake cycle. Also, avoid overfilling—this recipe should fill your pan no more than ⅔ full at the start.
Gummy Interior
This usually means the loaf wasn’t baked long enough. Use an instant-read thermometer to check the center reaches 190-200°F. If it’s still gummy, return the loaf to the machine for an additional 10-15 minutes. 💡
Nutrition Facts
Frequently Asked Questions
Can I use all-purpose flour instead of bread flour?
Yes, but add 1 tbsp vital wheat gluten per cup to compensate. Bread flour’s higher protein content helps create structure. Without it, your loaf may be slightly denser but still tasty.
Why does the recipe call for vinegar?
The apple cider vinegar reacts with baking to improve rise and texture. It neutralizes during baking, so there’s no vinegar taste. Think of it as a natural leavening helper.
How do I know when the loaf is done?
Use an instant-read thermometer to check the center reaches 190-200°F. The loaf should also sound hollow when tapped on the bottom. Never slice while hot.
Can I make this gluten-free?
This particular recipe won’t work with gluten-free flour blends. The structure depends on wheat gluten’s elasticity. For gluten-free, you’d need a specialized recipe with xanthan gum or similar binders.

- 8 Bean Soup Recipe Crock Pot: Hearty Vegetable Medley in One Pot - September 25, 2026
- 4C Bread Crumbs Meatballs Recipe: Crispy Crust and Juicy Centers - September 25, 2026
- 6 Oz Chocolate Chip Cookie Recipe: Perfectly Balanced Crispy Edges and Chewy Hearts - September 25, 2026