
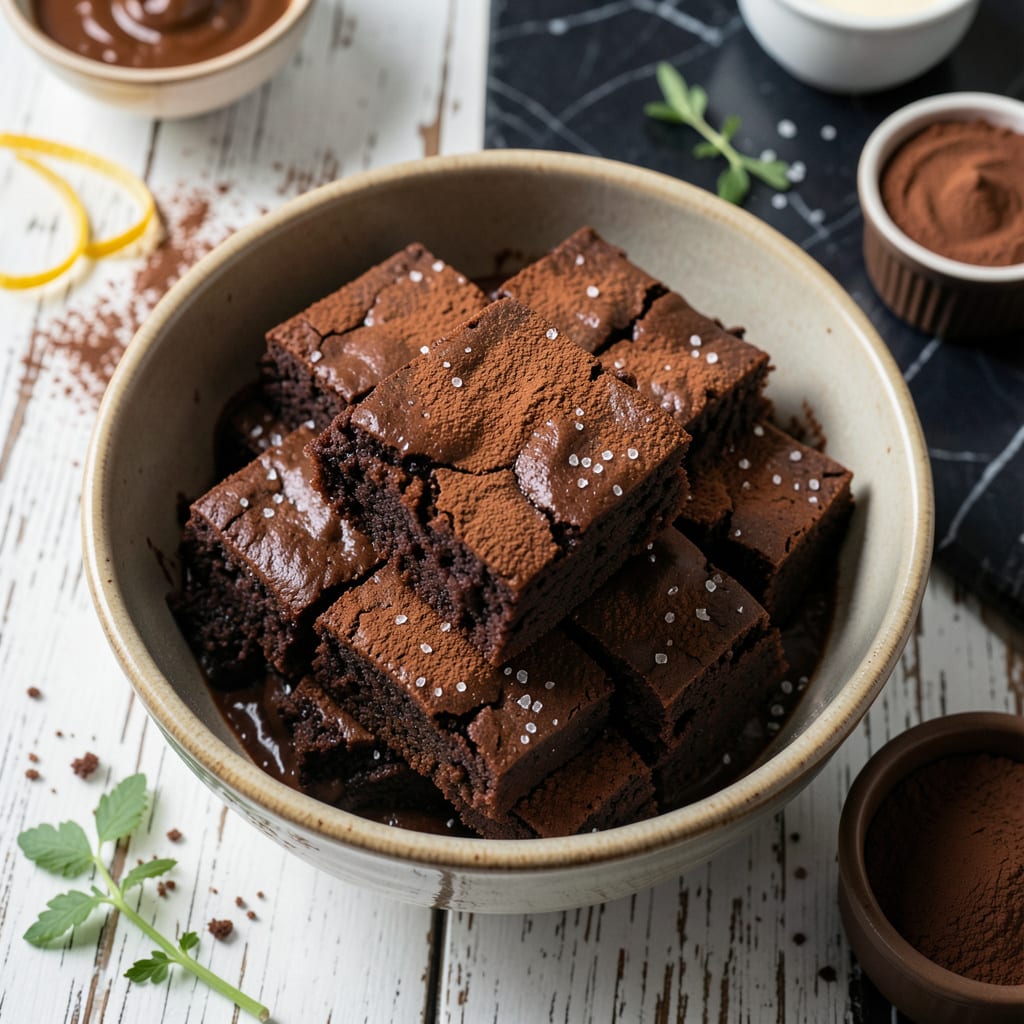
Achieving a fudgy chocolate brownie without butter is possible with the right approach. This proven method uses simple substitutions like applesauce or yogurt to replace fat while maintaining richness.
What results is a decadent treat with a dense, moist texture that rivals traditional versions. The recipe delivers on taste without compromising dietary goals, using standard pantry ingredients.
Ingredients for Fat Free Chocolate Brownie
Standard pantry ingredients create a rich, fudgy treat without any added fat.
| Ingredient | Amount | Notes |
|---|---|---|
| All-Purpose Flour 🌾 | 1 cup | Sifted for even texture |
| Unsweetened Cocoa Powder 🍫 | ¾ cup | Dutch-processed preferred |
| Granulated Sugar 🍚 | 1 ½ cups | Fine white sugar works best |
| Unsweetened Applesauce 🍎 | 1 cup | Natural, no added sugar |
| Vanilla Extract 🌿 | 2 tsp | Pure extract, not imitation |
| Baking Powder 🧂 | 1 tsp | Ensures proper rise |
| Salt 🧂 | ½ tsp | Fine sea salt |
| Non-Dairy Milk 🥛 | ¼ cup | Almond or soy preferred |
| Dark Chocolate Chips 🍫 | ½ cup | Dairy-free, 70% cocoa |
| Chopped Walnuts 🌰 | ½ cup | Optional for crunch |
The cocoa powder is critical here. Hershey’s Special Dark or Ghirardelli Dutch-processed works beautifully for that deep chocolate flavor. Applesauce replaces butter entirely—Mott’s or Musselman’s unsweetened are reliable. For the non-dairy milk, Silk almond milk or Oatly give the best texture without altering the taste profile significantly.
No applesauce? Unsweetened mashed banana at a 1:1 ratio works well (adds mild banana flavor). Out of non-dairy milk? Water works in a pinch but reduces richness. For extra fudginess, replace 2 tbsp flour with cornstarch. The chocolate chips can be omitted, but they add pockets of melted chocolate that elevate texture significantly.
Baked brownies keep 5 days at room temperature in an airtight container. For longer storage, freeze for up to 3 months. Slice before freezing for easy single-serving portions. The cocoa powder and baking powder should be stored in cool, dark places to maintain potency.
Why You’ll Love This Recipe
- One Bowl Wonder: I just dump everything in, stir, and pour—no mixer, no fuss. Honestly, the applesauce does all the work.
- Rich Without Guilt: That deep cocoa flavor hits just right, and the vanilla makes it taste indulgent even without butter.
- Kid Approved: My picky nephew devours these after school. Between us, I pack them in lunchboxes all week.
- Budget Bites: A box of cocoa and pantry staples turn into a batch for pennies. I’ll be real: I make these more than full-fat brownies now.
Step-by-Step Instructions for Fat Free Chocolate Brownies
Master these precise steps for rich, fudgy brownies that defy expectations without any added fat.
Step 1: Combine Dry Ingredients for Even Distribution
In a large mixing bowl, whisk together the 1 cup All-Purpose Flour, 0.75 cup Unsweetened Cocoa Powder, 1.5 cups Granulated Sugar, 1 tsp Baking Powder, and 0.5 tsp Salt until fully incorporated. Sifting the flour first ensures a lump-free batter with uniform texture.
The cocoa powder should be fully dissolved into the dry mixture—you shouldn’t see any dry pockets or streaks. This step builds the chocolate foundation that gives these brownies their intense flavor without relying on fat for richness.
Step 2: Incorporate Wet Ingredients for Moisture
In a separate bowl, combine the 1 cup Unsweetened Applesauce, 0.25 cup Non-Dairy Milk, and 2 tsp Vanilla Extract. The applesauce replaces traditional fat while maintaining moisture, and the non-dairy milk adds necessary liquid for the chemical reactions.
Pour the wet mixture into the dry ingredients and fold gently with a silicone spatula just until the batter comes together. Overmixing will develop gluten in the flour, resulting in cakey rather than fudgy brownies. The batter will be thick but pourable.
Step 3: Fold in Chocolate Chips and Walnuts
Add the 0.5 cup Dark Chocolate Chips and 0.5 cup Chopped Walnuts to the batter. Fold them in with a few gentle strokes to distribute evenly without crushing the add-ins. The chocolate chips will melt slightly during baking, creating pockets of gooey chocolate.
If you prefer a nut-free version, simply omit the walnuts—the brownies will still have excellent texture. The dark chocolate chips add depth of flavor and compensate for the lack of fat with their rich cocoa content.
Step 4: Bake to Fudgy Perfection
Preheat your oven to 350°F and line an 8×8-inch baking pan with parchment paper, leaving an overhang on the sides for easy removal. Pour the batter into the prepared pan and spread it evenly with the spatula.
Bake for 25-30 minutes until the edges are set and a toothpick inserted into the center comes out with a few moist crumbs clinging to it. Avoid overbaking—these brownies continue to set as they cool, and you want that signature fudgy texture.
The top should be glossy with a slightly cracked surface, a visual cue that the sugar has caramelized properly despite the absence of fat. Let the brownies cool completely in the pan before slicing—this ensures clean cuts and allows the structure to firm up.
Pro Tips For Making Fat Free Chocolate Brownie
- Preheat the Pan: Always preheat your baking pan in the oven for 5 minutes before adding the batter—I learned this the hard way after pulling out undercooked centers too many times.
- Use Dutch Cocoa: Swap regular cocoa powder for Dutch-processed; it dissolves smoother in fat-free batters and gives a deeper chocolate flavor without the bitterness.
- Don’t Overmix: Stir just until the flour disappears, or you’ll end up with tough, cakey brownies instead of fudgy ones—my first batch was so dense I could’ve used it as a doorstop.
- Boost with Coffee: Add 1 teaspoon of instant coffee to the dry ingredients; it won’t taste like coffee but makes the chocolate flavor pop, especially in fat-free recipes.
Common Mistakes When Making This Recipe
Overmixing the Batter
Fold wet and dry ingredients just until combined—about 10-12 strokes with a spatula. Overmixing develops gluten, turning your brownies cakey instead of fudgy. I stop as soon as I see no dry streaks. 💡
Skipping Parchment Paper
Always line your 8×8-inch pan with parchment, leaving overhang. This prevents sticking and lets you lift the whole batch out for clean slicing. Without it, you’ll lose half your brownies to the pan.
Overbaking
Pull them at 25-28 minutes when a toothpick has moist crumbs. They’ll keep cooking from residual heat. I check at 22 minutes—better under than over for that gooey center.
Wrong Applesauce
Use unsweetened—sweetened versions add too much sugar, throwing off the texture. Mott’s Natural is my go-to. Drain any excess liquid to prevent gummy brownies.
Ignoring Cocoa Quality
Dutch-processed cocoa gives that deep chocolate taste. Hershey’s Special Dark or Ghirardelli work perfectly. Natural cocoa can taste flat without fat to carry its acidity.
Slicing Too Soon
Wait until completely cool—about 1 hour. Slicing hot brownies smudges the texture. I speed this up by popping the pan in the fridge for 20 minutes. ✨
Nutrition Facts
Frequently Asked Questions
What can I use instead of applesauce?
Unsweetened mashed banana works as a 1:1 substitute, though it adds mild banana flavor. Greek yogurt is another option for moisture, but use fat-free to maintain the recipe’s intent.
Why do my brownies turn out cakey?
Overmixing develops gluten in the flour. Fold wet and dry ingredients just until combined—about 10-12 strokes. Using too much baking powder can also cause this.
Can I make these gluten-free?
Yes! Swap the all-purpose flour for a 1:1 gluten-free blend. Add 1/2 tsp xanthan gum if your blend doesn’t include it. Let the batter rest for 10 minutes before baking.
How do I store leftovers?
Keep in an airtight container at room temperature for up to 5 days. For longer storage, freeze for 3 months. Slice before freezing for easy portions.

- 8 Bean Soup Recipe Crock Pot: Hearty Vegetable Medley in One Pot - September 25, 2026
- 4C Bread Crumbs Meatballs Recipe: Crispy Crust and Juicy Centers - September 25, 2026
- 6 Oz Chocolate Chip Cookie Recipe: Perfectly Balanced Crispy Edges and Chewy Hearts - September 25, 2026