
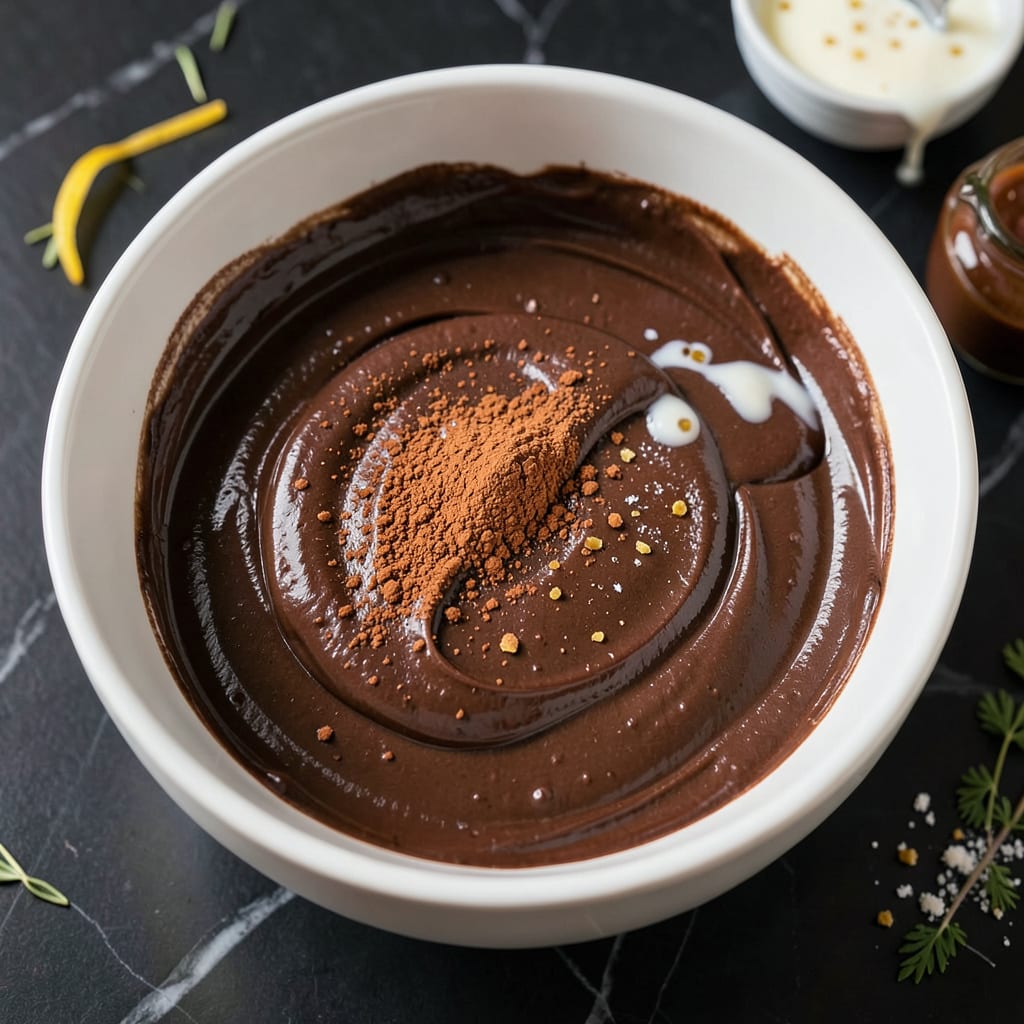
This fat-free chocolate icing delivers rich, velvety flavor without any butter or oil. The secret lies in using cocoa powder and a touch of vinegar to create that classic fudgy texture.
It whips up in 5 minutes with pantry staples and spreads beautifully on cakes, cupcakes, or even as a fruit dip. Store it in the fridge for up to a week.
Ingredients for Fat Free Chocolate Icing
Eight pantry staples blend into a rich, velvety chocolate spread with zero fat.
| Ingredient | Amount | Notes |
|---|---|---|
| Unsweetened Cocoa Powder 🍫 | ½ cup | Dutch-process for smoother flavor |
| Powdered Sugar 🧂 | 2 cups | Sifted for lump-free texture |
| Non-Dairy Milk 🥛 | ¼ cup | Almond or soy milk works best |
| Vanilla Extract 🌿 | 1 tsp | Pure for best flavor |
| White Vinegar 💧 | 1 tsp | Creates fudgy texture |
| Cornstarch 🌾 | 1 tbsp | Thickens the icing |
| Salt 🧂 | ¼ tsp | Enhances chocolate flavor |
| Maple Syrup 🍁 | 1 tbsp | Adds natural sweetness |
The cocoa powder is non-negotiable for that deep chocolate flavor. Hershey’s Special Dark or Ghirardelli are reliable grocery store options. Dutch-process gives a smoother taste, but natural cocoa works too (just add a pinch more vinegar). For the non-dairy milk, Silk almond milk or Oatly have the neutral flavor you need. Avoid vanilla-flavored versions—they can overpower the chocolate.
No powdered sugar? Blend granulated sugar until fine (about 1.75 cups for every 2 cups powdered). Out of vinegar? Lemon juice at the same amount works in a pinch. The cornstarch can be swapped for arrowroot powder at a 1:1 ratio. If you’re avoiding refined sugar, powdered coconut sugar can replace the powdered sugar, though the color will be lighter.
This keeps beautifully in an airtight container in the fridge for 1 week. Let it sit at room temperature for 10-15 minutes before using for easier spreading. Freezes for up to 3 months if you want to make a big batch.
Why You’ll Love This Recipe
- 5-Minute Whip: I just dump cocoa, powdered sugar, and non-dairy milk in a bowl—no mixer, no fuss, ready before the cake cools.
- Rich Without Guilt: Honestly, the cocoa and vanilla hit that deep chocolate flavor without a trace of heaviness.
- Crowd-Pleasing Spread: I’ve slathered it on birthday cakes, cupcakes, even graham crackers for a quick treat.
- Pantry Staples Only: Between us, I always have these ingredients on hand—no last-minute grocery runs.
Step-by-Step Instructions for Fat Free Chocolate Icing
Use this straightforward process to create a silky, rich icing that spreads beautifully every time.
Step 1: Whisk Dry Ingredients for Smooth Base
In a medium mixing bowl, combine the 0.5 cup Unsweetened Cocoa Powder, 2 cups Powdered Sugar, 1 tbsp Cornstarch, and 0.25 tsp Salt. I always sift the powdered sugar first to eliminate any lumps that could create a gritty texture in the finished product.
Whisk these dry ingredients together until fully combined and no streaks of cocoa remain visible. This ensures even distribution of flavors and prevents clumping when liquid is added. The cornstarch acts as a stabilizer, giving your icing a smoother consistency without adding fat.
Step 2: Add Wet Ingredients Gradually
Create a well in the center of your dry mixture. Pour in the 0.25 cup Non-Dairy Milk, 1 tsp Vanilla Extract, 1 tsp White Vinegar, and 1 tbsp Maple Syrup. The vinegar reacts with the baking soda in cocoa powder to create that characteristic fudgy texture.
Using a silicone spatula, begin incorporating the wet ingredients into the dry mixture, starting from the center and working outward. Add the liquids gradually to prevent splashing. You’ll notice the mixture thicken as the powdered sugar dissolves into the liquid components.
Step 3: Adjust Consistency to Desired Spreadability
Continue mixing until all ingredients are fully combined and the icing reaches a smooth, glossy consistency. If it appears too thick, add additional non-dairy milk 1 teaspoon at a time until it reaches your desired spreading consistency. The ideal texture should ribbon off your spatula and hold its shape briefly before melting back into the bowl.
If the icing is too thin, let it sit for 5-10 minutes to thicken naturally as the cornstarch absorbs the liquid. Avoid adding more powdered sugar at this stage, as it can make the icing grainy. The vinegar and maple syrup balance the sweetness while enhancing the chocolate flavor.
Step 4: Test and Use Immediately
To test the consistency, spread a small amount on a plate or cooled cake. It should hold its shape without running excessively. If spreading seems difficult, warm the icing slightly by placing the bowl in a larger bowl of warm water for 30-60 seconds, stirring occasionally.
Use the icing immediately while it’s at its optimal consistency. This icing sets up quickly, so work efficiently. For best results, apply to completely cooled baked goods. The flavor develops further as it sits, with the chocolate becoming more pronounced and the texture smoothing out completely.
Pro Tips For Making Fat Free Chocolate Icing
- Whisk Vigorously: Beat the mixture for at least 2-3 minutes—sounds tedious, but it’s the only way to get that smooth, glossy texture without fat to bind it.
- Sift the Cocoa: I learned this the hard way: lump-free cocoa powder blends better and prevents those annoying dry pockets in the icing.
- Skip Cold Milk: Use room-temperature non-dairy milk, otherwise the powdered sugar won’t dissolve completely and you’ll get a grainy mess.
- Add Vinegar Last: Stir in the white vinegar after everything else is smooth—adding it too early can make the icing thin and runny before it thickens up.
Make-Ahead Tips for This Dish
Prep Ahead Strategy
You can mix the dry ingredients up to 2 days in advance and store them in an airtight container at room temperature. I like using mason jars for this. Just whisk them together again before adding the wet components. 💡
Wet Ingredients Prep
Measure out the non-dairy milk, vanilla, vinegar, and maple syrup the night before and refrigerate them together in a small container. This saves 5 minutes of prep time when you’re ready to make the icing.
Doubling the Batch
This recipe scales perfectly for larger projects. I often double it for layer cakes, using 1 cup cocoa powder and 4 cups powdered sugar. The mixing time remains the same—just use a larger bowl.
Storage Containers
For fridge storage, I prefer glass containers with tight-fitting lids like Pyres or OXO. They keep the icing fresh and prevent it from absorbing other odors. The icing thickens slightly in the fridge but softens quickly at room temperature. ❄️
Freezing Portions
Divide leftovers into ¼ cup portions in silicone muffin cups before freezing. Once solid, transfer to a freezer bag. Thaw in the fridge overnight or at room temperature for 2 hours.
Reviving Frozen Icing
After thawing, give it a good stir. If it seems too thick, add 1-2 tsp non-dairy milk and mix until smooth. The texture and flavor remain identical to fresh.
Nutrition Facts
Frequently Asked Questions
Can I use regular milk instead of non-dairy?
Yes, but it changes the dietary profile. Regular milk works if you’re not avoiding dairy, though almond or soy milk keeps it vegan-friendly. The texture remains the same with either option.
Why does this recipe include vinegar?
The vinegar reacts with cocoa powder to create a fudgier texture without fat. It also balances sweetness. Don’t worry—the taste disappears in the final product.
How do I fix icing that’s too runny?
Let it sit for 5-10 minutes to thicken naturally. If still too thin, add 1 tsp powdered sugar at a time until it reaches spreading consistency. Avoid overmixing.
Can I make this ahead for a party?
Prepare it 1-2 days in advance and store in an airtight container. Let it warm to room temperature and stir before using for best results.

- 8 Bean Soup Recipe Crock Pot: Hearty Vegetable Medley in One Pot - September 25, 2026
- 4C Bread Crumbs Meatballs Recipe: Crispy Crust and Juicy Centers - September 25, 2026
- 6 Oz Chocolate Chip Cookie Recipe: Perfectly Balanced Crispy Edges and Chewy Hearts - September 25, 2026