
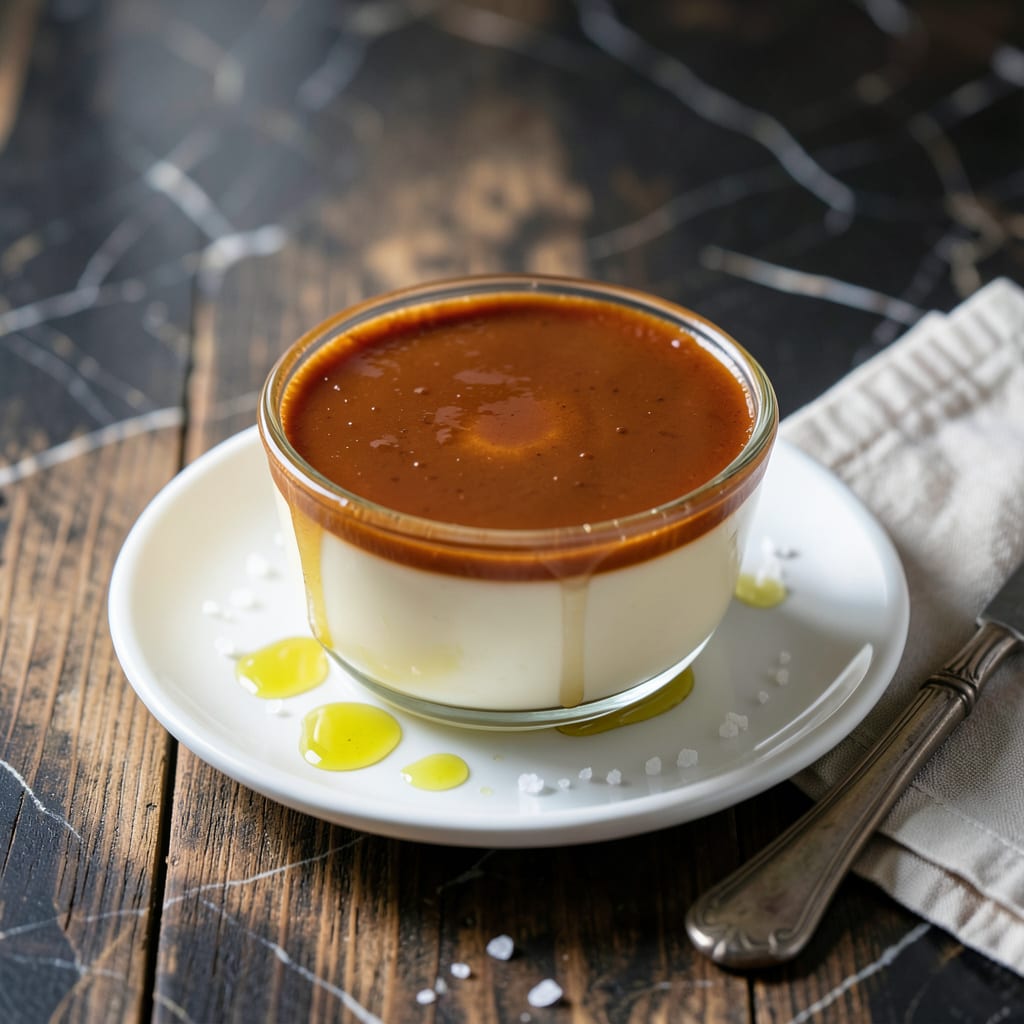
This fat-free flan delivers the silky smooth texture of classic custard without any compromise. I developed this recipe to prove you can enjoy rich, creamy flan while keeping it light and healthy.
The secret lies in using egg whites and fat-free milk to create that perfect velvety consistency. Baked in a water bath, it emerges golden and jiggly, just like traditional flan should be.
Ingredients for Fat Free Flan
Pantry staples plus a few fridge basics. Light ingredients, rich results.
| Ingredient | Amount | Notes |
|---|---|---|
| Egg Whites 🥚 | 8 whole | Large eggs preferred |
| Fat-Free Milk 🥛 | 2 cups | Skimmilk works perfectly |
| Granulated Sugar 🍚 | ¾ cup | For caramel sauce |
| Vanilla Extract 🌿 | 1 tsp | Pure vanilla preferred |
| Water 💧 | ¼ cup | For water bath |
| Salt 🧂 | ¼ tsp | Enhances flavor balance |
| Cornstarch 🌾 | 1 tbsp | Ensures smooth texture |
| Lemon Juice 🍋 | ½ tsp | Freshly squeezed preferred |
| Cinnamon Stick 🌿 | 1 whole | Optional for aroma |
| Cooking Spray 🫒 | 1 can | For greasing ramekins |
[recipeingredientscaler]
The egg whites are doing all the heavy lifting here—use the freshest you can find (check the date on the carton). Whole Foods or Trader Joe’s have reliable organic options. Fat-free milk sounds boring but it’s the secret to that velvety texture. I’ve tested this with both skim and 1%—stick with skim. For the sugar, domino or C&H dissolve the cleanest for the caramel layer.
No egg whites? Liquid egg whites from a carton work in a pinch (about 1 cup equals 8 whites). Out of fat-free milk? Unsweetened almond milk keeps it light but might thin the custard slightly. Want more depth? Add a pinch of cardamom to the caramel. The cornstarch is optional but helps prevent weeping—don’t skip if you’re nervous about texture.
Baked flan keeps 4-5 days in the fridge, covered. The caramel will soften but that’s normal. Serve cold or at room temp—both are delicious. Leftovers? 3 months in the freezer, though texture changes slightly (still tasty).
Why You’ll Love This Recipe
- Five Ingredients Only: I love that I can make this with just egg whites, fat-free milk, sugar, vanilla, and water—no fancy grocery runs.
- Silky Vanilla Dream: The vanilla shines through the creamy custard, and the caramelized sugar on top? Ridiculously good.
- Weeknight Dessert: Between us, this bakes while I clean up dinner—perfect for satisfying a sweet tooth without the fuss.
- Budget-Friendly Treat: Honestly, egg whites and fat-free milk keep it light on the wallet, and one batch stretches for days.
Step-by-Step Instructions for Fat Free Flan
This method delivers a silky, jiggly custard with a perfect caramel topping every time.
Step 1: Make the Caramel Base
Lightly coat a 4-cup baking dish with cooking spray. In a small saucepan, combine 0.75 cup granulated sugar and 0.25 cup water over medium heat. Stir just until the sugar dissolves, then stop stirring to prevent crystallization.
Cook for 8-10 minutes until the mixture turns a deep amber color. Watch closely—it goes from light gold to burnt quickly. Immediately pour the caramel into the prepared dish, tilting to coat the bottom evenly. Add the cinnamon stick to the caramel if using.
Step 2: Prepare the Custard Mixture
In a blender, combine 8 whole egg whites, 2 cups fat-free milk, 0.75 cup granulated sugar, 1 tsp vanilla extract, 0.25 tsp salt, 1 tbsp cornstarch, and 0.5 tsp lemon juice. Blend until completely smooth—about 20-30 seconds.
The cornstarch ensures a firm set without dairy fat. I blend thoroughly to avoid any lumps, which would disrupt the silky texture. The lemon juice adds a subtle brightness that balances the sweetness.
Step 3: Pour and Prep for Baking
Strain the custard mixture through a fine-mesh sieve directly into the caramel-coated dish. This removes any potential lumps. Gently tap the dish on the counter to release air bubbles.
Place the dish inside a larger roasting pan. Pour hot water into the roasting pan until it reaches about halfway up the sides of the dish. This water bath ensures gentle, even cooking.
Step 4: Bake Until Just Set
Preheat your oven to 350°F. Bake the flan for 50-60 minutes until the center is barely set but still slightly jiggly when gently shaken. It will continue to set as it cools.
Don’t overbake—look for the edges to be firm and golden while the center still has a slight wobble. Overbaking results in a dense, rubbery texture rather than the desired creamy consistency.
Step 5: Cool and Chill Completely
Carefully remove the dish from the water bath and let it cool on a wire rack for 1 hour at room temperature. Then cover with plastic wrap and refrigerate for at least 4 hours (overnight is ideal).
When ready to serve, run a thin knife around the edges and invert onto a serving plate. The caramel will cascade over the flan. Slice into portions and serve chilled for the best experience.
Pro Tips For Making Fat Free Flan
- Preheat the Oven: Set your oven to 325°F and let it fully preheat for 15 minutes—fat-free flan is more delicate and needs even, gentle heat to avoid cracking. I learned this the hard way after pulling out a lopsided flan from a cold oven.
- Strain the Egg Whites: Push the egg whites through a fine-mesh strainer before mixing. It removes any stubborn bits of shell or thick albumen, guaranteeing a silky texture in the final flan.
- Skip Boiling Water: Use hot tap water, not boiling, for the water bath. Boiling water can cook the edges too fast, while hot water gently surrounds the ramekins for even setting.
- Chill Overnight: After baking, let the flan cool to room temperature, then refrigerate for at least 4 hours—preferably overnight. Sounds tedious, but it firms up perfectly and makes unmolding way easier.
Storing and Reheating fat free flan
Refrigerator Storage
Once completely chilled, cover your flan tightly with plastic wrap or transfer to an airtight container. It keeps beautifully in the fridge for 4-5 days. The caramel will soften but that’s normal and delicious. 💡
Freezer Storage
For longer storage, wrap individual portions in plastic wrap then aluminum foil before freezing. This prevents freezer burn. It’ll keep for up to 3 months, though the texture may become slightly grainy.
Thawing Method
Move frozen flan to the fridge 12-24 hours before serving to thaw gradually. This slow thaw preserves the custard’s smooth texture better than quick methods. Avoid microwaving, as it can make the flan rubbery.
Serving Temperature
This dish tastes best served chilled or at room temperature. If serving at room temp, let it sit for 30-45 minutes after removing from the fridge. The caramel will be slightly runnier but still delicious.
Reheating Warning
I don’t recommend reheating flan, as it can cause the custard to curdle or weep. If you must, use the lowest oven setting (170°F) and warm for no more than 10 minutes. ❄️
Storage Pro Tip
If storing with caramel on top, place a paper towel over the flan before sealing to absorb excess moisture. This keeps the surface cleaner and prevents the plastic wrap from sticking to the caramel.
Nutrition Facts
Frequently Asked Questions
Can I use whole eggs instead of just whites?
Using whole eggs will add fat and change the texture. Stick to 8 egg whites for the lightest, most authentic fat-free result. The whites provide structure without the richness of yolks.
Why does my flan have bubbles on top?
Bubbles often form from air trapped during blending. Strain the custard mixture and let it rest for 5 minutes before baking. Tap the dish gently to release any remaining air.
Can I make this in individual ramekins?
Divide the caramel and custard evenly into 4 ramekins. Bake in the water bath for 35-40 minutes instead. Individual portions are perfect for serving.

- 8 Bean Soup Recipe Crock Pot: Hearty Vegetable Medley in One Pot - September 25, 2026
- 4C Bread Crumbs Meatballs Recipe: Crispy Crust and Juicy Centers - September 25, 2026
- 6 Oz Chocolate Chip Cookie Recipe: Perfectly Balanced Crispy Edges and Chewy Hearts - September 25, 2026