
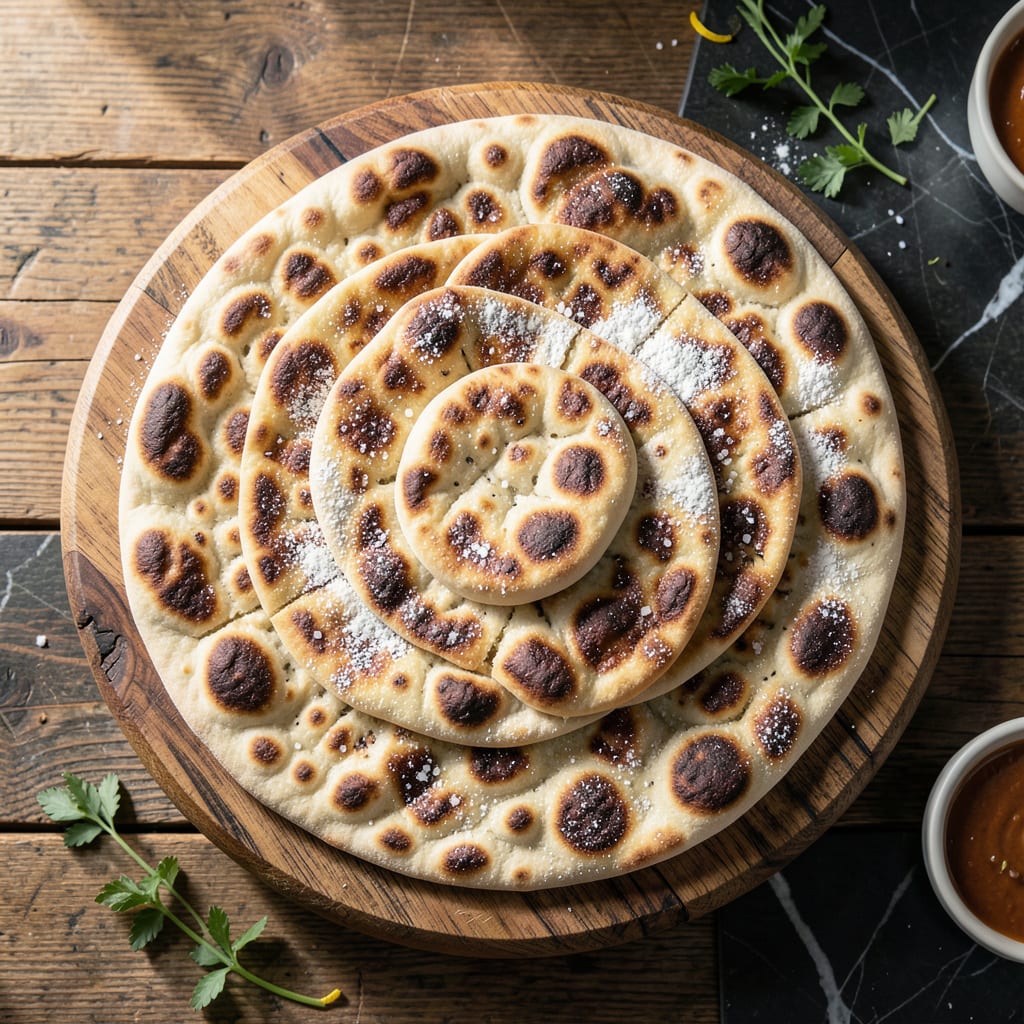
Forget everything you know about flatbread requiring oil—this recipe proves you can achieve a soft, pillowy texture without any fat at all. The secret lies in the perfect balance of hydration and resting time.
With just a few simple ingredients and a hot pan, you’ll create flatbread that’s tender yet sturdy enough to hold your favorite fillings. This method delivers consistent results every time, making it ideal for health-conscious cooks.
Ingredients for Fat Free Flatbread
Nine simple ingredients transform into oil-free flatbread that’s soft, pillowy, and ready for your fillings.
| Ingredient | Amount | Notes |
|---|---|---|
| All-Purpose Flour 🌾 | 3 cups | Unbleached preferred for texture |
| Active Dry Yeast 🍞 | 2 ¼ tsp | One packet, check expiration date |
| Granulated Sugar 🍚 | 1 tsp | Feeds the yeast for rising |
| Kosher Salt 🧂 | 1 ½ tsp | Diamond Crystal preferred |
| Lukewarm Water 💧 | 1 ¼ cups | 110°F to 115°F ideal |
| Vital Wheat Gluten 🌾 | 2 tbsp | Optional for extra chew |
| Apple Cider Vinegar 🍏 | 1 tbsp | Tenderizes the dough |
| Fresh Cilantro 🌿 | ¼ cup | Chopped, for serving |
| Nutritional Yeast 🧀 | 2 tbsp | Optional for cheesy flavor |
[recipeingredientscaler]
The flour is doing the heavy lifting here. King Arthur’s all-purpose has the right protein balance for that perfect chew without oil. Yeast needs to be fresh—check the expiration and store it in the freezer if you don’t bake often. Lukewarm water means just warm to the touch, not hot enough to kill the yeast (that’s 110°F to 115°F). I use a thermometer the first few times to get the feel.
No yeast? Instant yeast works at the same ratio and you can skip the proofing step. Vital wheat gluten boosts the structure if your flour is weak, but it’s not mandatory. Apple cider vinegar adds tenderness—white vinegar or lemon juice work too. Cilantro can be swapped for parsley or omitted entirely. Nutritional yeast is just for flavor depth.
Dough rests best covered with a damp towel at room temp. Cooked flatbread keeps 2-3 days wrapped at room temperature, but it’s best fresh. Freeze the dough balls for up to 1 month if you want to prep ahead.
Why You’ll Love This Recipe
- Minimal Effort: I just mix flour, yeast, sugar, salt, and warm water—no fancy steps or resting for hours.
- Crisp & Chewy: The yeast makes it puff just enough, with that perfect flatbread texture I crave.
- Endless Uses: I’ve stuffed it with veggies, used it for wraps, and even torn it up for soup dipping.
Step-by-Step Instructions for Fat Free Flatbread
Here’s my tested method for achieving soft, pillowy flatbread without a drop of oil.
Step 1: Activate the Yeast
In a large bowl, whisk together the 2.25 tsp Active Dry Yeast, 1 tsp Granulated Sugar, and 1.25 cups Lukewarm Water. Let this sit for 5-7 minutes until the surface becomes frothy and bubbly. This visual confirmation means your yeast is active and ready to work.
I always check my water temperature with a thermometer—it should be between 110°F and 115°F. Too hot will kill the yeast, too cold won’t activate it. The sugar here isn’t for sweetness; it’s food for the yeast to get that rise going strong.
Step 2: Mix and Knead the Dough
Add the 3 cups All-Purpose Flour, 1.5 tsp Kosher Salt, 2 tbsp Vital Wheat Gluten, and 1 tbsp Apple Cider Vinegar to the yeast mixture. Stir with a wooden spoon until a shaggy dough forms. The vinegar might seem odd, but it tenderizes the dough beautifully.
The vital wheat gluten is optional, but I highly recommend it—it gives these oil-free flatbreads that satisfying chew you’d normally get from fat. Turn the dough onto a clean surface and knead for 8-10 minutes until smooth and elastic. You’ll feel it transform from sticky to silky under your hands.
Step 3: First Rise Until Doubled
Place the dough in a lightly greased bowl (use a tiny bit of water if avoiding all fat), cover with a damp towel, and let rise in a warm place for 1 to 1.5 hours. You want it to at least double in size—sometimes mine even triples in warm weather.
Here’s the thing—I like to set my oven to 150°F, turn it off, then place the dough inside for this rise. The warm, controlled environment speeds up the process without cooking the dough. Watch for that beautiful domed shape and jiggly texture when gently poked.
Step 4: Shape and Second Rise
Punch down the risen dough and divide it into 4 equal portions. Roll each into a ball, then flatten into ¼-inch thick rounds on a lightly floured surface. Place these on a parchment-lined baking sheet.
Cover and let rise again for 30-45 minutes until puffy. Don’t skip this second rise—it’s what gives you that pillowy texture. The rounds should look noticeably thicker and softer, like little clouds waiting to bake.
Step 5: Cook and Finish
Heat a nonstick skillet over medium-high heat. Cook each flatbread for 2-3 minutes per side until golden brown spots appear and the bread sounds hollow when tapped. No oil needed—the natural moisture in the dough creates that perfect crust.
Transfer to a plate and brush with a little water if you want extra softness. Serve warm, topped with the 0.25 cup Fresh Cilantro and a sprinkle of 2 tbsp Nutritional Yeast for that cheesy flavor boost. The cilantro adds a fresh finish that cuts through the richness of the bread itself.
Pro Tips For Making Fat Free Flatbread
- Test Yeast First: I learned this the hard way—always bloom your active dry yeast in the lukewarm water with sugar for 5-10 minutes until frothy. If it doesn’t bubble, your flatbread won’t rise, no matter how long you wait.
- Knead Longer: After mixing, knead the dough for at least 8-10 minutes by hand (or 5-6 in a stand mixer). Sounds tedious, but it develops the gluten needed for that chewy, elastic texture.
- Skip Cold Water: Lukewarm water is non-negotiable—anything too hot kills the yeast, and anything too cold slows it down. Aim for 105-110°F, or just warm enough to feel comfortable on your wrist.
- Rest the Dough: Let the dough rise in a warm spot for 1-2 hours, or until doubled. I was skeptical until I tried it, but this step actually changes the outcome, making the flatbread lighter and airier.
Pro Cooking Tips for Perfect Results
Yeast Activation Precision
Always use a thermometer to verify your water hits 110-115°F—this range wakes the yeast without killing it. I learned this the hard way after several failed batches. The sugar feeds the yeast, but skip it if you’re avoiding all sweeteners. 🌡️
Kneading Technique
Knead for the full 8-10 minutes until the dough passes the windowpane test. Press a small piece between your fingers—if it stretches thin without tearing, you’re done. This develops the gluten that replaces oil’s structure.
Optimal Rise Conditions
For consistent results, create a proofing box by setting your oven to 150°F, turning it off, then placing the dough inside. The warm, draft-free environment ensures a steady rise in 1 to 1.5 hours. 💡
Second Rise Importance
Don’t rush the 30-45 minute second rise after shaping. This step creates those characteristic air pockets that make flatbread pillowy. I use a floured kitchen towel to prevent sticking during this stage.
Perfect Cooking Surface
A heavy cast iron skillet retains heat better than nonstick for even cooking. Heat it until a drop of water dances on the surface. Cook each side for 2-3 minutes until golden and hollow-sounding.
Storage Pro Tip
Stack cooled flatbreads with parchment between each to prevent sticking. They’ll keep at room temperature for 2-3 days in an airtight container, or freeze for up to 1 month wrapped tightly.
Frequently Asked Questions
Why does my dough not rise properly?
Your yeast may be expired or the water was too hot. Always check the expiration date and use a thermometer to ensure water is between 110°F and 115°F.
Can I make this without vital wheat gluten?
Yes, but it helps with texture. Without it, knead for the full 8-10 minutes to develop enough gluten for that perfect chew.
How do I store leftovers?
Keep in an airtight container at room temperature for 2-3 days. For longer storage, freeze tightly wrapped for up to 1 month.
Can I use whole wheat flour instead?
Yes, but add 1-2 tbsp extra water as whole wheat absorbs more liquid. The texture will be denser but still delicious.

- 8 Bean Soup Recipe Crock Pot: Hearty Vegetable Medley in One Pot - September 25, 2026
- 4C Bread Crumbs Meatballs Recipe: Crispy Crust and Juicy Centers - September 25, 2026
- 6 Oz Chocolate Chip Cookie Recipe: Perfectly Balanced Crispy Edges and Chewy Hearts - September 25, 2026