
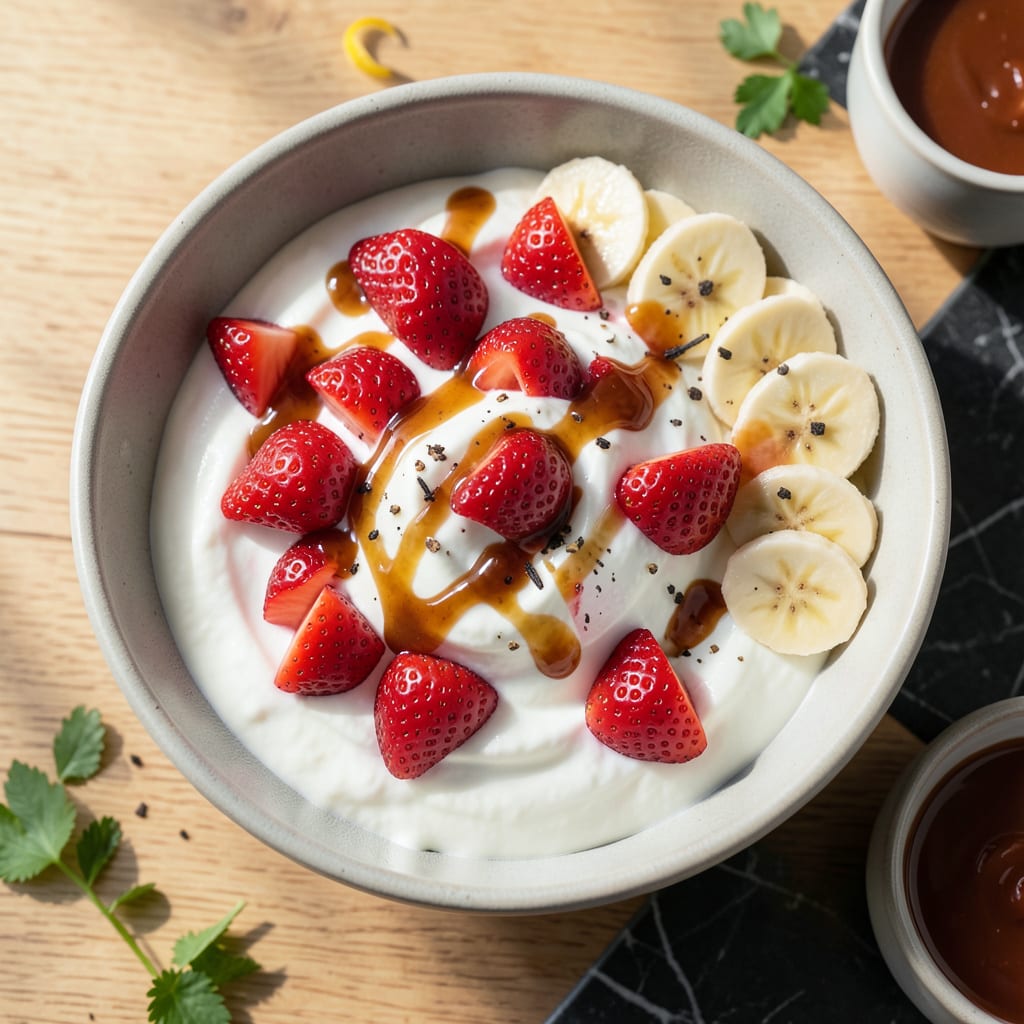
This frozen yogurt delivers silky smooth texture with zero guilt and maximum flavor. It’s the perfect treat when you crave something cold, creamy, and satisfying without the heavy calories or fat.
Using nonfat Greek yogurt as the base, this recipe transforms simple ingredients into a dessert that’s rich, tangy, and incredibly easy to make. Just mix, freeze, and enjoy.
Ingredients for Fat Free Greek Frozen Yogurt
Transform simple ingredients into a silky, guilt-free frozen treat with vibrant flavors.
| Ingredient | Amount | Notes |
|---|---|---|
| Nonfat Greek Yogurt 🥛 | 4 cups | Plain, unsweetened, full-fat not needed |
| Granulated Sugar 🍚 | ¾ cup | Adjust to taste preference |
| Honey 🍯 | 2 tbsp | Or agave for vegan option |
| Vanilla Extract 🌿 | 2 tsp | Pure extract for best flavor |
| Fresh Lemon Juice 🍋 | 1 tbsp | Brightens the flavor profile |
| Fresh Strawberries 🍓 | 1 cup | Diced, for natural sweetness |
| Fresh Blueberries 🫐 | 1 cup | Optional, for color and flavor |
| Banana 🍌 | 1 whole | Ripe, sliced for creaminess |
| Salt 🧂 | ¼ tsp | Enhances all the flavors |
| Fresh Mint Leaves 🌿 | 8 pieces | Chopped, for garnish |
The Greek yogurt is the foundation—Fage Total 0% or Chobani Non-Fat deliver the creamiest texture. Look for plain, unsweetened varieties with live cultures for that signature tang. Whole Foods and Trader Joe’s both carry high-quality options. Avoid brands with added thickeners, as they can make the yogurt icy once frozen. The sugar can be swapped for alternatives, but granulated dissolves most evenly.
No honey? Maple syrup or agave at a 1:1 ratio maintains sweetness and consistency. Fresh fruit is flexible—peaches, mangoes, or raspberries all work beautifully. If strawberries are out of season, frozen (thawed and drained) saves time without sacrificing flavor. The vanilla should always be pure extract; imitation can taste artificial in frozen applications.
This keeps well in an airtight container for up to 2 weeks in the freezer. For best texture, let it sit at room temperature for 5-10 minutes before scooping. Add toppings fresh when serving to prevent sogginess.
Why You’ll Love This Recipe
- 5-Minute Mix: I just stir the Greek yogurt, sugar, honey, vanilla, and lemon juice together—no cooking, no fuss.
- Bright & Tangy: That hit of fresh lemon juice cuts the sweetness perfectly, and the vanilla makes it taste like a real treat.
- Kid-Approved Snack: I pack it in little cups for after school, and they’re gone before I can even think about leftovers.
- Freezer Stash: Honestly, I double the batch so I always have a light, creamy dessert ready for unexpected cravings.
Step-by-Step Instructions for Greek Frozen Yogurt
Achieve perfect texture and balanced sweetness with this professional method for frozen yogurt.
Step 1: Prepare and Sweeten the Yogurt Base
In a large mixing bowl, whisk together the 4 cups Nonfat Greek Yogurt and 0.75 cup Granulated Sugar until the sugar fully dissolves. This step is critical—undissolved sugar creates ice crystals in the final product.
Add the 2 tbsp Honey, 2 tsp Vanilla Extract, 1 tbsp Fresh Lemon Juice, and 0.25 tsp Salt. Stir vigorously for 2-3 minutes until the mixture is completely smooth and homogeneous. The lemon juice brightens the flavor, while the salt enhances all the sweet notes.
Step 2: Incorporate Fresh Fruit for Natural Flavor
Dice the 1 cup Fresh Strawberries into small, uniform pieces. Slice the 1 whole Banana into thin coins. Gently fold these into the yogurt mixture along with the 1 cup Fresh Blueberries.
Use a spatula to combine everything, ensuring the fruit is evenly distributed without crushing the berries. The banana adds creaminess, while the strawberries and blueberries provide bursts of fresh, natural sweetness. Let the mixture rest for 10 minutes to allow flavors to meld.
Step 3: Chill for Optimal Texture
Cover the bowl with plastic wrap, pressing it directly onto the surface to prevent a skin from forming. Refrigerate for at least 4 hours, or preferably overnight. This chilling step is non-negotiable—it ensures the mixture freezes evenly and achieves a creamy, not icy, texture.
The longer it chills, the better the final consistency. I recommend preparing the base the night before you plan to churn it. When ready, the mixture should be very cold to the touch, around 40°F or below.
Step 4: Churn in an Ice Cream Maker
Transfer the chilled mixture to your ice cream maker and churn according to the manufacturer’s instructions, typically for 20-25 minutes. The yogurt base will thicken into a soft-serve consistency.
Watch for the mixture to pull away from the sides of the bowl and hold a defined shape when scooped. If it appears too soft, churn for an additional 5 minutes. The fruit pieces should remain suspended throughout, not sinking to the bottom.
Step 5: Freeze to Firm Perfection and Garnish
Transfer the churned yogurt to a freezer-safe container, smoothing the top with a spatula. Press plastic wrap directly against the surface to minimize ice crystals, then cover with a lid. Freeze for at least 4 hours or until firm.
When ready to serve, let it sit at room temperature for 10-15 minutes to soften slightly for easy scooping. Garnish with the 8 pieces Fresh Mint Leaves, finely chopped, for a refreshing finish and pop of color.
Pro Tips For Making Fat Free Greek Frozen Yogurt
- Chill the Base: Always refrigerate your yogurt mixture for at least 2 hours before churning—I learned this the hard way after ending up with icy, grainy texture because the sugar didn’t fully dissolve in cold liquid.
- Strain the Yogurt: Even nonfat Greek yogurt can have excess liquid; strain it through a cheesecloth for 10-15 minutes to guarantee a creamier, denser frozen yogurt.
- Skip the Overmixing: After adding lemon juice, stir just until combined—overworking the mixture can curdle the yogurt, and I’ve ruined a batch by getting too vigorous with the whisk.
- Sweeten to Taste: Start with half the sugar, taste, then adjust—honey adds its own sweetness, and I used to waste time fixing oversweetened batches by adding more yogurt.
Common Mistakes When Making This Recipe
Skipping the Chill
Never skip refrigerating your yogurt base for at least 4 hours. This step prevents ice crystals from forming. I once rushed it and ended up with a grainy texture instead of the silky swirl we all want.
Over-Sweetening
Resist the urge to add extra sugar beyond the 0.75 cup. The natural sweetness from the fruit intensifies as it freezes. Too much sugar makes it cloying and can alter the texture.
Overloading Fruit
Stick to the recommended 2 cups total fruit. More than that releases excess liquid, creating icy patches. I learned this the hard way when my blueberries turned the whole batch into a slushy mess. 🥗
Ignoring the Freeze Time
Don’t pull it out of the freezer too soon. The 4-hour freeze is essential for that perfect scoopable texture. Anything less and you’ll have a soft, soupy consistency instead of frozen yogurt.
Skipping the Plastic Wrap
Always press plastic wrap directly on the surface before freezing. This simple step prevents ice crystals from forming on top. I use Saran Wrap for a tight seal every time.
Using Low-Quality Yogurt
Avoid brands with additives or thickeners. Stick with Fage Total 0% or Chobani Non-Fat for the creamiest results. Cheaper yogurts often lead to a less smooth final product. 💪
Nutrition Facts
Frequently Asked Questions
Can I use regular yogurt instead of Greek?
No, Greek yogurt’s thickness is essential for creamy texture. Regular yogurt has more liquid and will create an icy result. Stick with nonfat Greek for best results.
How long can I store this in the freezer?
It keeps well for up to 2 weeks in an airtight container. Press plastic wrap on the surface to prevent ice crystals from forming.
Why does my frozen yogurt turn icy?
This usually happens from skipping the chilling step or using too much fruit. Ensure the base is very cold before churning and stick to 2 cups total fruit.
Can I make this without an ice cream maker?
Yes! Freeze in a shallow pan, stirring vigorously with a fork every 30-45 minutes for 3-4 hours to break up ice crystals.

- 8 Bean Soup Recipe Crock Pot: Hearty Vegetable Medley in One Pot - September 25, 2026
- 4C Bread Crumbs Meatballs Recipe: Crispy Crust and Juicy Centers - September 25, 2026
- 6 Oz Chocolate Chip Cookie Recipe: Perfectly Balanced Crispy Edges and Chewy Hearts - September 25, 2026