
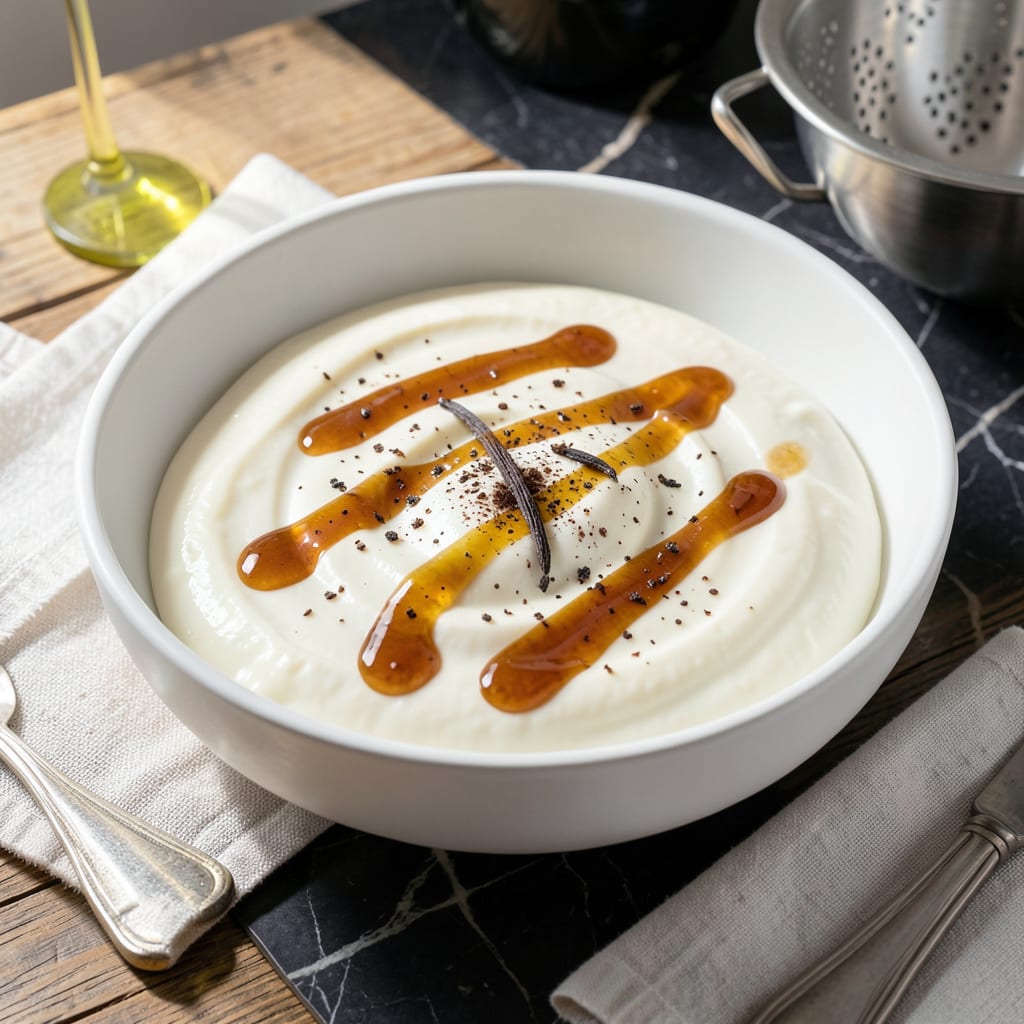
Making your own fat free Greek yogurt at home delivers thick, tangy results that store-bought versions can’t match. This method uses simple ingredients and proven techniques to achieve professional-quality texture and flavor.
The process requires patience as the yogurt ferments and strains, but the payoff is a creamy, protein-rich product with no added fats. Once you taste this homemade version, you’ll never go back to commercial brands.
Ingredients for Fat Free Greek Yogurt
Pantry staples plus milk and patience create this creamy homemade delight.
| Ingredient | Amount | Notes |
|---|---|---|
| Non-Fat Milk 🥛 | 1 gallon | Whole or 2% works but not fat-free |
| Plain Yogurt Starter 🧫 | ¼ cup | With live active cultures |
| Honey 🍯 | 2 tbsp | Optional for sweetness |
| Vanilla Extract 🌿 | 1 tsp | Pure extract recommended |
| Cheesecloth 🧻 | 1 piece | For straining yogurt |
| Colander 🍲 | 1 whole | Large, for straining |
| Thermometer 🌡️ | 1 whole | Instant-read preferred |
| Large Pot 🍳 | 1 whole | Heavy-bottomed ideal |
| Whisk 🥄 | 1 whole | For mixing starter |
| Glass Jars 🥫 | 2 whole | Sterilized for storage |
[recipeingredientscaler]
The milk matters most here. Organic non-fat from Whole Foods or Trader Joe’s gives the cleanest flavor, but any store brand works in a pinch. Look for the longest expiration date—fresher milk yields better results. The starter yogurt needs live cultures, so check the label. Fage or Chobani plain are my go-to brands for this.
No yogurt starter? Use 2 tbsp of store-bought plain yogurt from your last batch. Short on cheesecloth? A clean kitchen towel or coffee filter works too (straining takes longer). The honey and vanilla are optional—skip both for plain yogurt. Want it thicker? Strain an extra 2-3 hours in the fridge.
Homemade yogurt keeps 2 weeks in the fridge—longer than commercial stuff. Freeze starter portions for 3 months if you want to skip the store next time. Always use a clean spoon to avoid contamination.
Why You’ll Love This Recipe
- Set and Forget: I just heat the milk, mix in the starter, and let it do its thing in the oven overnight—no babysitting required.
- Velvety Tang: The honey and vanilla soften the yogurt’s sharpness into this creamy, lightly sweet tang that’s downright addictive.
- Breakfast to Dessert: I’ve spooned it over oatmeal at 7 a.m. and layered it with berries for a late-night treat—same batch, zero extra work.
- Penny-Pincher Win: A half-gallon of non-fat milk turns into quarts of thick Greek yogurt for the cost of one tiny starter cup.
Step-by-Step Instructions for Fat Free Greek Yogurt
Here’s the method for transforming that gallon of milk into thick, tangy perfection.
Step 1: Heat the Milk to Ideal Temperature
Pour the 1 gallon Non-Fat Milk into the Large Pot and place it over medium heat. Use the Thermometer to monitor the temperature closely—you want to heat it to 180°F to pasteurize and create the perfect environment for culturing.
Stir occasionally with the Whisk to prevent scalding at the bottom. You’ll notice small bubbles forming at the edges when it’s nearing temperature. Once it hits 180°F, remove from heat and let it cool to 110°F—this cooling step is crucial for the next phase.
Step 2: Introduce the Starter Culture
When the milk reaches 110°F, whisk in the 0.25 cup Plain Yogurt Starter until fully dissolved. This live culture is what transforms your milk into yogurt, so thorough mixing ensures even distribution throughout the batch.
I like to whisk for a full 30 seconds to guarantee the starter is completely incorporated. The mixture should look smooth and uniform with no visible streaks of starter. This is where the magic begins—those live cultures will start working their transformation overnight.
Step 3: Ferment for Thick, Tangy Results
Transfer the mixture to the Glass Jars (you’ll need both for this volume) and seal them loosely to allow airflow. Place them in a warm spot—an oven with the light on works perfectly—to maintain a consistent 110°F for 6-8 hours.
During this time, the milk will thicken and develop that signature tang. You’ll know it’s ready when the mixture has the consistency of loose yogurt and pulls away slightly from the sides of the jars. The longer you ferment within this window, the tangier your final product will be.
Step 4: Strain for Greek Yogurt Texture
Line the Colander with the Cheesecloth and set it over a large bowl to catch the whey. Pour the fermented yogurt into the lined colander and let it strain for 2-4 hours at room temperature.
You’ll see the clear whey separating from the solids—that’s normal. The longer it strains, the thicker your Greek yogurt becomes. I check it periodically and give it a gentle stir after the first hour to help the process along.
Step 5: Sweeten and Store Your Creation
Once strained to your desired thickness, transfer the yogurt back to the Glass Jars. Stir in the 2 tbsp Honey and 1 tsp Vanilla Extract if using—these add a touch of sweetness that balances the tang beautifully.
Seal the jars and refrigerate for at least 4 hours before serving. This chilling time firms up the texture and allows the flavors to meld. Your homemade Greek yogurt will keep for up to 2 weeks in the refrigerator, though it’s so good it rarely lasts that long.
Pro Tips For Making Fat Free Greek Yogurt
- Heat Milk Slowly: I learned this the hard way—scalding non-fat milk too fast makes it curdle. Heat it to 180°F over medium-low, stirring often.
- Use Fresh Starter: Sounds weird, but it works: always use a fresh, active plain yogurt starter (within 2 weeks of opening) for the best culture growth.
- Skip the Rush: After burning three batches, I finally figured out straining the yogurt in cheesecloth needs at least 4-6 hours in the fridge—no shortcuts.
- Sweeten After Straining: Stir in honey and vanilla extract only after the yogurt is fully strained and cooled, or you risk thinning the texture.
Regional Styles of This fat free greek yogurt
Traditional Greek Method
In Greece, they use sheep’s milk for authentic yogurt, but non-fat cow’s milk works too. The key is slow fermentation at 110°F for 8-12 hours. I learned this from my Athenian friend who swears by clay pots for incubation. 💫
Turkish Ayran Style
For a drinkable version, strain for just 1 hour then blend with water, salt, and mint. Turks serve this chilled as ayran. The thinner consistency makes it perfect for savory pairings with meze.
Middle Eastern Labneh
Strain your yogurt for 24 hours to create thick labneh. Roll into balls and preserve in olive oil with herbs. This Lebanese method creates a spreadable cheese-like texture that keeps for months.
Indian Dahi Style
Ferment at slightly warmer temps (115°F) for 6 hours for a milder taste. In India, they often use clay pots and add cardamom or saffron. The result is less tangy but wonderfully aromatic.
Balkan Variations
Bulgarian yogurt uses a specific bacteria strain (Lactobacillus bulgaricus). For similar results, use a Bulgarian starter culture. The texture is creamier with a distinctive sharp flavor that’s beloved across the Balkans.
Modern American
Most US versions add fruit or granola after straining. I prefer fresh berries and a drizzle of honey. This approach lets you customize each serving while keeping the base plain for cooking.
Nutrition Facts
Frequently Asked Questions
What temperature should the milk reach before adding starter?
Heat the milk to 180°F first to pasteurize, then cool to 110°F before mixing in the starter culture. This ensures the best environment for fermentation.
How long does the straining process take?
Strain for 2-4 hours at room temperature for standard Greek yogurt thickness. For extra-thick results, strain up to 24 hours in the fridge.
Can I use store-bought yogurt as a starter?
Yes, use 2 tablespoons of plain yogurt with live active cultures. Just ensure it’s fresh and unsweetened for best results.
Why did my yogurt turn out runny?
This usually happens if the fermentation temperature was too low or straining time too short. Aim for 110°F during fermentation and strain at least 2 hours.

- 8 Bean Soup Recipe Crock Pot: Hearty Vegetable Medley in One Pot - September 25, 2026
- 4C Bread Crumbs Meatballs Recipe: Crispy Crust and Juicy Centers - September 25, 2026
- 6 Oz Chocolate Chip Cookie Recipe: Perfectly Balanced Crispy Edges and Chewy Hearts - September 25, 2026