
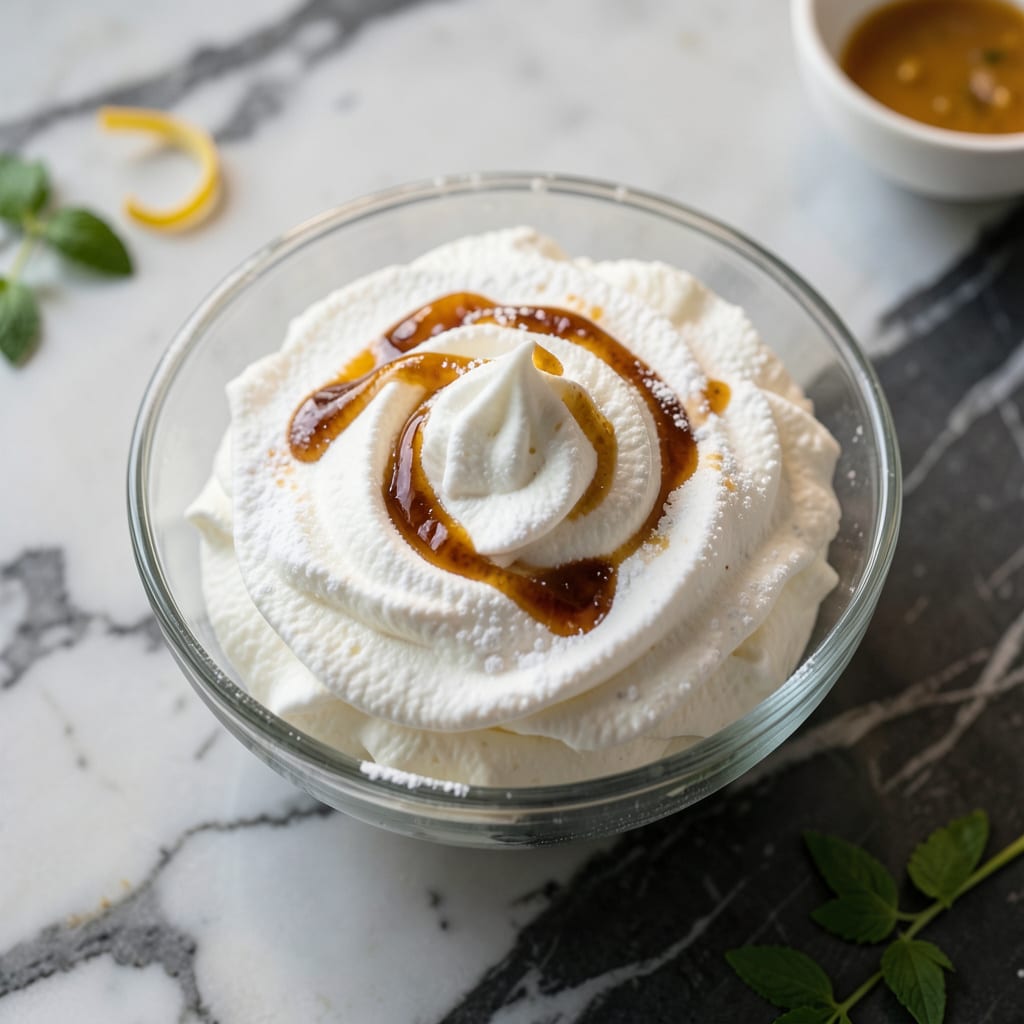
I’ve cracked the code for light-as-air whipped cream using fat free half and half as the base. The trick is chilling everything—bowl, beaters, and cream—to near freezing before whipping.
With a touch of stabilizer, this creates a smooth, fluffy topping that holds its shape beautifully. Perfect for desserts when you want richness without the calories.
Ingredients for Fat Free Half and Half Whipped Cream
Light, fluffy, and guilt-free with just a few ingredients. Whip it up in minutes.
| Ingredient | Amount | Notes |
|---|---|---|
| Fat Free Half and Half 🥛 | 1 ½ cups | Ice cold, near freezing |
| Powdered Sugar 🍚 | 2 tbsp | Adjust to taste preference |
| Vanilla Extract 🌿 | 1 tsp | Pure extract recommended |
| Unflavored Gelatin 💧 | 1 tsp | Dissolved in cold water |
| Cold Water 💧 | 2 tbsp | For dissolving gelatin |
| Cornstarch 🌾 | ½ tsp | Optional stabilizer |
| Salt 🧂 | 0.125 tsp | Enhances sweetness |
[recipeingredientscaler]
The half and half must be ice cold—near freezing is ideal. I grab Land O’Lakes fat free from most grocery stores, but any brand works. Chill your mixing bowl and beaters too (15 minutes in the freezer does the trick). The gelatin is key for stability—Knox unflavored is my go-to. Don’t skip the chilling step or it won’t hold peaks.
No gelatin? Agar agar at half the amount works for vegetarians. Want it sweeter? Add another tablespoon of powdered sugar. For flavor twists, swap vanilla for almond extract or add a pinch of cinnamon. The cornstarch is optional but helps with structure (especially in warm kitchens). If your cream starts deflating, rechill everything and try again.
Best used fresh but holds 2-3 hours in the fridge. Freezing isn’t recommended—it separates. For longer storage, whip just the base without sugar, then sweeten to order. Keeps 1 week unwhipped in the fridge.
Why You’ll Love This Recipe
- 5-Minute Whip: I just pour, mix, and chill—no heavy lifting, no fancy tools, just my hand mixer and these five ingredients.
- Sweet Vanilla Cloud: The vanilla and powdered sugar give it that classic whipped cream taste, but with fat free half and half it feels lighter.
- Topping All-Star: I’ve dolloped this on pies, hot cocoa, even fresh berries, and it holds its shape beautifully thanks to the gelatin.
- Budget-Friendly Batch: A single carton of fat free half and half makes enough for multiple desserts, and it costs pennies compared to store-bought.
Step-by-Step Instructions for Fat Free Half and Half Whipped Cream
Here is the method. Straightforward, tested, works every time.
Step 1: Bloom the Gelatin
Sprinkle the 1 teaspoon unflavored gelatin evenly over the surface of 2 tablespoons cold water in a small bowl. Let it sit undisturbed for 5 minutes to bloom. You’ll notice the gelatin absorbs the water and transforms into a thick, rubbery consistency.
This step is crucial for providing structure to your whipped cream, especially when using fat free half and half which lacks the natural stabilizers of heavy cream. Don’t stir the mixture—just let it sit until fully hydrated.
Step 2: Heat and Dissolve the Gelatin Mixture
After blooming, microwave the gelatin mixture for 5-10 seconds or place the bowl in a saucepan with 1 inch of simmering water until the gelatin dissolves completely. The liquid should become clear with no visible granules.
Be careful not to overheat, as boiling can reduce the gelatin’s thickening power. Once dissolved, set aside to cool slightly but use it while still warm. This warm gelatin will incorporate smoothly into the cold half and half without causing lumps.
Step 3: Whip the Chilled Half and Half
Pour the 1.5 cups ice cold fat free half and half into a chilled mixing bowl. Using an electric mixer, beat on medium-high speed until the liquid begins to thicken slightly, about 2-3 minutes. The mixture should form soft ripples when you lift the beaters.
At this stage, gradually add the 2 tablespoons powdered sugar, 0.125 teaspoon salt, and 1 teaspoon vanilla extract. The powdered sugar dissolves more easily than granulated, ensuring a smooth texture. Continue whipping until soft peaks form.
Step 4: Stabilize and Finish Whipping
With the mixer running on medium speed, slowly pour in the warm gelatin mixture and the 0.5 teaspoon cornstarch. The cornstarch acts as an additional stabilizer, helping the whipped cream hold its shape longer, especially important with the lower fat content.
Increase the speed to high and whip for another 3-5 minutes until stiff peaks form. You’ll know it’s ready when the cream holds its shape firmly and the beaters leave clear tracks in the mixture. Be careful not to overwhip, as it can cause the cream to separate.
Step 5: Chill Before Serving
Transfer the whipped cream to a serving bowl or piping bag. For best results, refrigerate for at least 30 minutes before serving. This chilling time allows the gelatin to fully set, creating a stable, cloud-like texture that holds its shape beautifully.
Use immediately to top desserts, fruits, or hot beverages. The stabilized whipped cream will maintain its volume for 2-3 days in the refrigerator, though it’s best enjoyed fresh. Each serving delivers light, airy texture without the guilt of traditional heavy cream versions.
Pro Tips For Making Fat Free Half And Half Whipped Cream
- Chill Everything First: I learned this the hard way—warm half and half won’t whip properly. Keep your mixing bowl, beaters, and fat free half and half in the fridge for at least 30 minutes before starting.
- Bloom Gelatin Slowly: Sprinkle the unflavored gelatin over cold water and let it sit for 5 minutes to soften completely. Rushing this step leaves you with lumpy whipped cream.
- Whip at High Speed: Start on medium to dissolve the gelatin, then switch to high speed for the final 2-3 minutes. Fat free half and half needs that extra power to hold peaks.
- Sweeten Last: Add powdered sugar and vanilla only after the cream starts thickening. Folding them in too early weighs it down and slows the whipping process.
Troubleshooting Perfect Results
Gelatin Won’t Bloom
If your gelatin isn’t thickening after 5 minutes, the water might be too warm. Always use ice cold water straight from the fridge. I’ve found Knox unflavored gelatin dissolves most reliably when the water is truly chilled. 💡
Cream Won’t Thicken
This usually means your half and half isn’t cold enough or your bowl/beaters are warm. Return everything to the freezer for 10-15 minutes before trying again. Also, check that your mixer speed is at medium-high—too slow and it’ll never peak.
Grainy Texture
Undissolved gelatin or sugar causes this. Make sure gelatin is fully clear before adding and use powdered sugar instead of granulated. If it happens, stop mixing and let it sit for 5 minutes—sometimes it smooths out on its own.
Collapsing Peaks
This happens when the gelatin cools too much before incorporating. Keep it warm (but not hot) when adding to the cream. If peaks still fall, add an extra ½ tsp cornstarch while whipping. The extra stabilizer often saves the batch.
Overwhipped Cream
Once you see the cream starting to separate or look curdled, stop immediately. Unfortunately, there’s no fixing this—you’ll need to start over with fresh ingredients. Next time, watch for stiff peaks forming at about 8-10 minutes total whipping time.
Storage Separation
If your whipped cream weeps liquid after refrigeration, it wasn’t stabilized enough. Next batch, increase gelatin to 1½ tsp or add 1 tsp cornstarch. Use within 2 hours for best texture, as fat free versions deflate faster than traditional.
Nutrition Facts
Frequently Asked Questions
Can I use regular half and half instead?
Yes, but the texture will be heavier and richer. The fat in regular half and half whips more easily than the fat free version, which needs stabilizers like gelatin.
Why does my whipped cream turn watery?
This usually happens when the mixture isn’t cold enough or the gelatin wasn’t properly dissolved. Ensure everything is ice cold and gelatin is fully clear before adding.
How long can I store leftover whipped cream?
Stabilized fat free whipped cream holds for 2-3 days in the fridge. For best results, store in an airtight container and rewhip briefly before using.
Can I make this dairy-free?
Try using a dairy-free half and half alternative, but add 1 extra tsp gelatin for stability. Coconut cream often works better for dairy-free whipping.

- 8 Bean Soup Recipe Crock Pot: Hearty Vegetable Medley in One Pot - September 25, 2026
- 4C Bread Crumbs Meatballs Recipe: Crispy Crust and Juicy Centers - September 25, 2026
- 6 Oz Chocolate Chip Cookie Recipe: Perfectly Balanced Crispy Edges and Chewy Hearts - September 25, 2026