
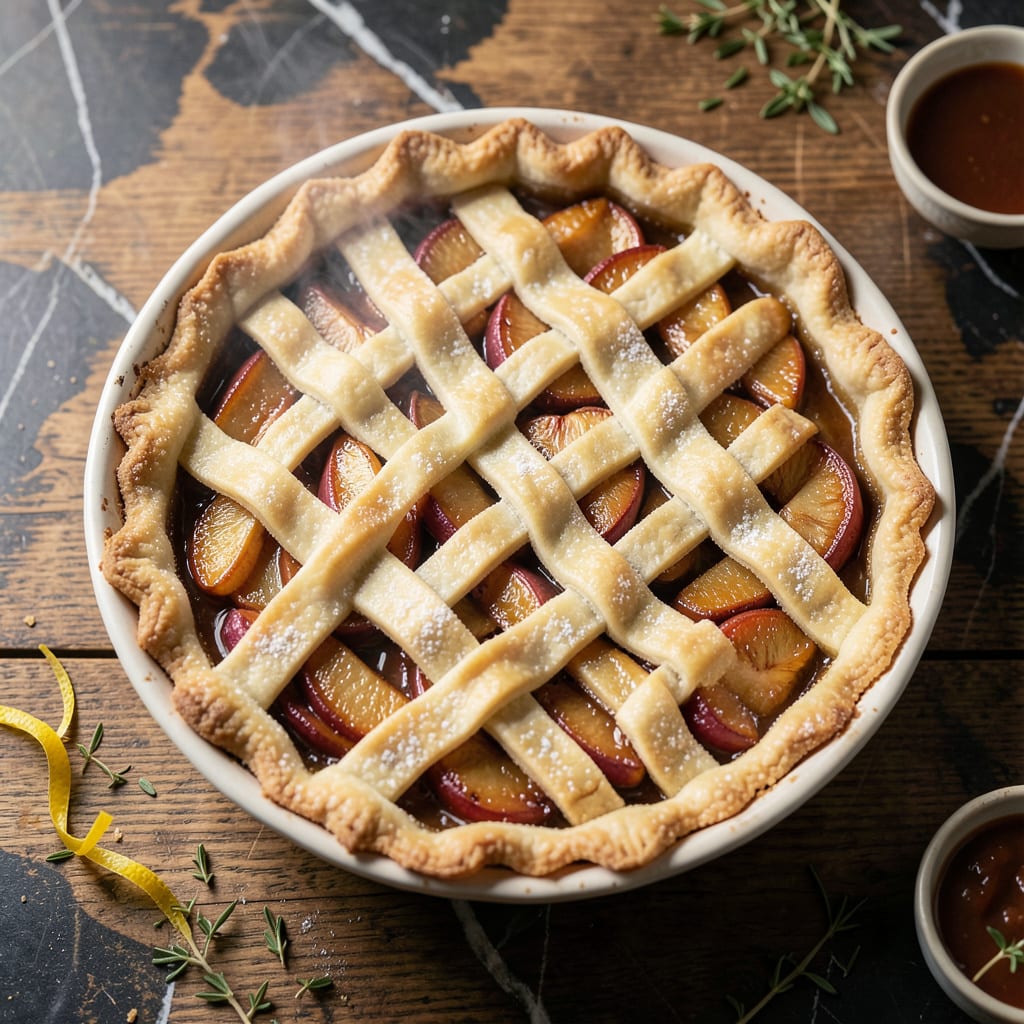
This pie delivers all the comfort of traditional dessert without the guilt. A carefully tested method ensures the crust stays flaky while keeping it completely fat free.
The filling achieves perfect texture through smart ingredient choices and precise baking. You’ll get the same satisfying experience with every bite, proving that light can still mean indulgent.
Ingredients for Fat Free Pie
Every ingredient here serves a purpose, keeping this dessert light yet perfectly indulgent.
| Ingredient | Amount | Notes |
|---|---|---|
| All-Purpose Flour 🌾 | 2 cups | For flaky crust texture |
| Baking Powder 🧂 | 1 tsp | For crust lift |
| Salt 🧂 | ¼ tsp | Fine grain preferred |
| Fat-Free Milk 🥛 | ½ cup | Cold, for crust binding |
| White Vinegar 💧 | 1 tbsp | For dough tenderness |
| Apple Slices 🍎 | 4 cups | Thinly sliced for filling |
| Granulated Sugar 🍚 | ¾ cup | For filling sweetness |
| Cornstarch 🌾 | 2 tbsp | For filling thickening |
| Ground Cinnamon 🌿 | 1 tsp | For warm spice |
| Vanilla Extract 💧 | 1 tsp | Pure for best flavor |
| Lemon Juice 🍋 | 1 tbsp | Freshly squeezed preferred |
| Egg Whites 🥚 | 2 whole | For crust structure |
The flour is your foundation here. King Arthur all-purpose is my go-to for consistent results—it’s the industry standard for a reason. Look for fine grain salt (like Diamond Crystal) to avoid any grittiness in the crust. The milk must be fat-free (skim) to meet the dietary promise, and it needs to be ice cold when mixing into the dough.
No all-purpose flour? Pastry flour at a 1:1 ratio works, but it yields a slightly more tender crust. For the filling, pears or peaches can stand in for apples—just adjust sugar based on fruit sweetness. If you’re avoiding eggs, aquafaba (3 tbsp = 1 egg white) is the best substitution for binding the crust.
The crust dough can rest in the fridge for up to 2 days before rolling. Once baked, the pie keeps at room temperature (covered) for 2 days or in the fridge for 4 days.
Why You’ll Love This Recipe
- Five-Minute Mix: I just stir flour, baking powder, salt, fat-free milk, and vinegar—no rolling, no resting, no fuss.
- Flaky Without Fat: The vinegar and milk trick gives layers that fool everyone into thinking there’s butter.
- Any-Filling Ready: Sweet or savory, this crust handles fruit, custard, even pot pie without complaint.
- Pantry Staples: All-purpose flour and milk I already have mean I can bake a pie on a whim.
Step-by-Step Instructions for Fat Free Pie
Here’s the method. Precise, tested, and designed to deliver exceptional texture without fat.
Step 1: Prepare the Fat-Free Crust Dough
In a large bowl, whisk together the 2 cups All-Purpose Flour, 1 tsp Baking Powder, and 0.25 tsp Salt until evenly combined. This dry mixture forms the structural base of your crust, so ensure it’s completely lump-free.
In a separate bowl, combine the 0.5 cup Fat-Free Milk and 1 tbsp White Vinegar. Let this mixture sit for 5 minutes to curdle slightly—this creates a buttermilk-like effect that adds tenderness to the crust without fat.
Pour the milk mixture into the dry ingredients and stir with a wooden spoon until just combined. The dough will be shaggy but should hold together when pressed. Avoid overmixing, as this can develop gluten and make the crust tough.
Step 2: Assemble and Pre-Bake the Crust
Press the dough evenly into a 9-inch pie dish, using your fingers to create a smooth, uniform layer that extends up the sides. For a flakier texture, dock the bottom with a fork by pricking it all over—this prevents air bubbles from forming during baking.
Preheat your oven to 375°F. Once heated, blind-bake the crust for 10-12 minutes until the edges just begin to turn light golden brown. This pre-baking step ensures the crust remains crisp when filled with the moist apple mixture.
Remove from the oven and brush the crust with the 2 whole Egg Whites, which will create a seal to prevent sogginess. Return to the oven for 2-3 minutes to set the egg wash.
Step 3: Prepare the Apple Filling
In a large bowl, toss the 4 cups Apple Slices with the 0.75 cup Granulated Sugar, 2 tbsp Cornstarch, 1 tsp Ground Cinnamon, 1 tsp Vanilla Extract, and 1 tbsp Lemon Juice. Stir until the apples are evenly coated and the mixture begins to macerate slightly.
The lemon juice not only adds brightness but also prevents the apples from browning. The cornstarch will thicken the natural juices released during baking, creating a luscious, glossy filling that clings to each slice.
Step 4: Fill and Bake the Pie
Pour the apple filling into the pre-baked crust, distributing the apples evenly. There’s no need for a top crust—this is an open-faced pie that lets the filling shine. If desired, create a decorative edge by crimping with a fork or your fingers.
Bake at 375°F for 40-45 minutes, until the filling is bubbling vigorously at the edges and the apples are tender when pierced with a knife. If the crust begins to over-brown, tent the edges with aluminum foil.
Step 5: Cool and Serve
Allow the pie to cool on a wire rack for at least 2 hours before slicing. This resting period lets the filling set completely, ensuring clean slices with a filling that holds its shape.
Serve at room temperature for the best texture. The crust should be crisp and flaky, while the filling offers a perfect balance of sweet, spiced apples with just the right amount of thickness. Each bite delivers the lightness promised by the fat-free preparation.
Pro Tips For Making Fat Free Pie
- Chill the Dough: After mixing the flour, baking powder, salt, fat-free milk, and vinegar, let the dough rest in the fridge for 20-30 minutes—it makes it easier to roll out and prevents shrinking during baking.
- Use Cold Milk: I learned this the hard way: warm fat-free milk can make the crust tough, so pull it straight from the fridge before mixing.
- Roll Evenly: Don’t rush rolling the dough—aim for a consistent 1/8-inch thickness to avoid uneven baking and a lopsided crust.
- Preheat the Oven: Sounds obvious, but a fully preheated oven (375°F is ideal here) guarantees the crust sets quickly and stays flaky without fat.
Health Benefits of fat free pie
Lower Calorie Indulgence
This dessert cuts calories significantly by eliminating butter and oil, saving about 150 calories per slice compared to traditional pie. Yet it retains the satisfying texture you expect from a well-made crust and filling. 💪
Heart-Healthy Choice
With zero saturated fat, this version supports cardiovascular health while still delivering comfort-food satisfaction. The fat-free milk provides calcium without adding any dietary fat to your meal.
Fiber-Rich Filling
Apples bring natural fiber to the filling—about 4 grams per serving—which aids digestion and helps you feel full longer. The skin-on slices maximize this benefit, so I recommend using organic apples when possible.
Reduced Sugar Impact
The recipe uses 0.75 cup sugar for the entire pie, which is about 25% less than many traditional recipes. Paired with the natural sweetness of apples, this creates a balanced dessert that won’t spike blood sugar as dramatically.
Nutrient-Packed Ingredients
Egg whites add high-quality protein to the crust without fat, while apples provide vitamin C and various antioxidants. Together, these create a dessert that actually contributes to your daily nutrient needs rather than just empty calories.
Allergy-Friendly Option
By omitting butter and oil, this pie is suitable for those with dairy allergies or sensitivities. The crust relies on egg whites and fat-free milk for structure, making it a safer option for many dietary restrictions. 🥗
Nutrition Facts
Frequently Asked Questions
What can I use instead of egg whites in the crust?
Aquafaba works perfectly as a 1:1 replacement. Use 3 tbsp for each egg white. It binds just as well while keeping the recipe fat free and vegan-friendly.
Why does the crust need to rest before baking?
Resting for 2 hours allows the gluten to relax, preventing toughness. This step ensures a flaky texture without any fat, which is trickier to achieve than traditional crusts.
Can I make this with a different fruit?
Try pears or peaches instead of apples. Adjust sugar based on fruit sweetness, and keep the cornstarch amount the same for proper thickening.
How do I prevent a soggy bottom crust?
Pre-bake the crust for 10-12 minutes and brush with egg whites. This creates a moisture barrier so the filling won’t make the crust limp.

- 8 Bean Soup Recipe Crock Pot: Hearty Vegetable Medley in One Pot - September 25, 2026
- 4C Bread Crumbs Meatballs Recipe: Crispy Crust and Juicy Centers - September 25, 2026
- 6 Oz Chocolate Chip Cookie Recipe: Perfectly Balanced Crispy Edges and Chewy Hearts - September 25, 2026