
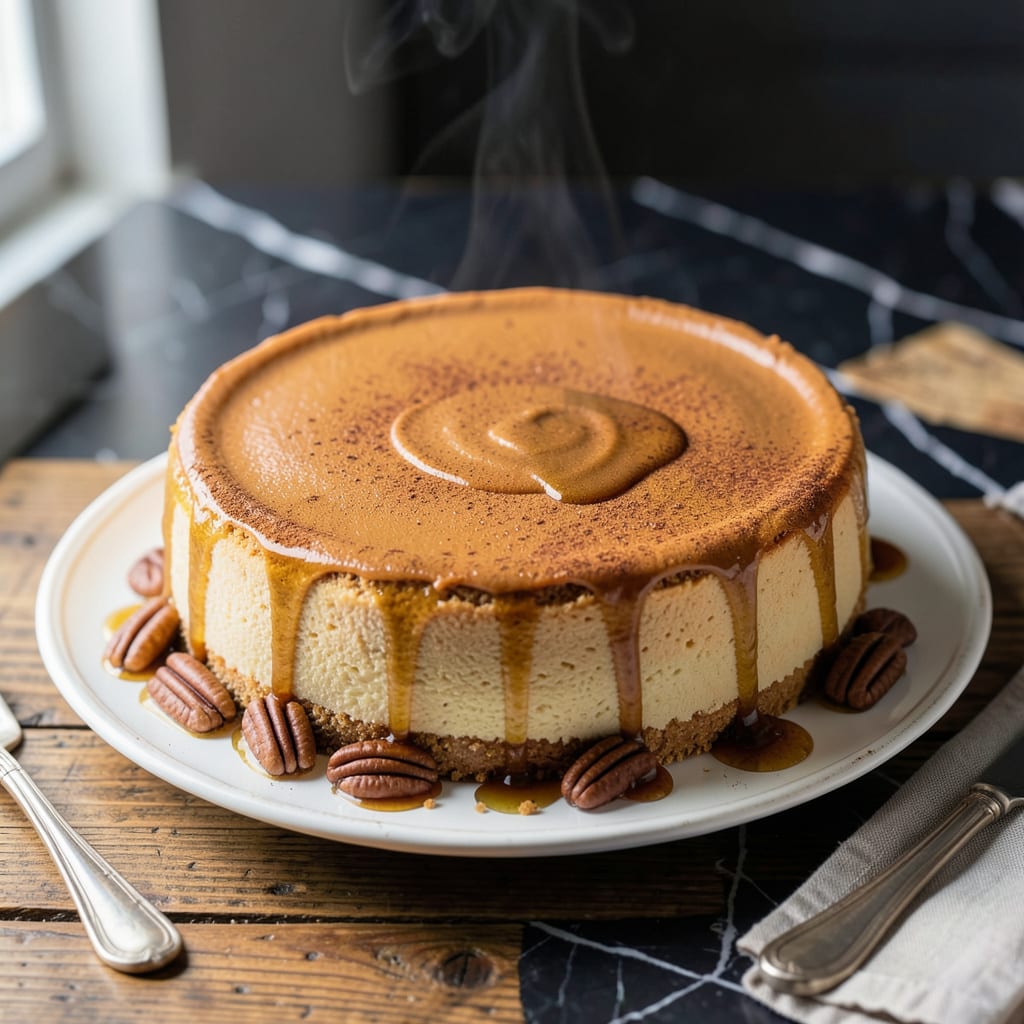
This dessert proves you can have rich, velvety texture without any fat. I developed this recipe to deliver the classic pumpkin cheesecake experience while keeping it light and guilt-free.
Using simple ingredient swaps and precise baking techniques, it achieves a smooth, spiced filling in a crustless version. The result is a creamy dessert that satisfies without compromise.
Ingredients for Fat Free Pumpkin Cheesecake
Velvety texture without the guilt—these simple ingredients create a luscious crustless dessert.
| Ingredient | Amount | Notes |
|---|---|---|
| Canned Pumpkin Puree 🎃 | 1 ½ cups | Unsweetened, not pumpkin pie filling |
| Low-Fat Cottage Cheese 🧀 | 2 cups | Blended until smooth |
| Non-Fat Greek Yogurt 🥛 | 1 cup | Plain, unsweetened |
| Granulated Sugar 🍚 | ¾ cup | Or sugar substitute blend |
| Brown Sugar 🟤 | ¼ cup | Light or dark variety |
| Large Eggs 🥚 | 2 whole | Room temperature |
| Vanilla Extract 🌿 | 1 tsp | Pure vanilla preferred |
| Pumpkin Pie Spice 🌶️ | 2 tsp | Or DIY spice blend |
| Ground Cinnamon 🌿 | ½ tsp | Freshly ground for best flavor |
| All-Purpose Flour 🌾 | ¼ cup | For structure and stability |
| Cornstarch 🌽 | 1 tbsp | Helps set the filling |
| Salt 🧂 | ¼ tsp | Fine sea salt |
| Lemon Juice 🍋 | 1 tbsp | Freshly squeezed |
The cottage cheese is key here—Nancy’s or Daisy brands blend up ultra-smooth (the good stuff, not the watery kind). I grab mine from Whole Foods since they always have fresh stock. The Greek yogurt needs to be thick—Fage or Siggi’s are my go-tos. For pumpkin, Libby’s is the standard, but any plain puree works. Just don’t grab pumpkin pie filling by mistake—it’s pre-sweetened.
No cottage cheese? Ricotta at the same amount works, but strain it first to remove excess liquid. Swap the sugars for monk fruit or erythritol blends if cutting calories. Missing pumpkin pie spice? Use 1 tsp cinnamon + 0.5 tsp ginger + 0.25 tsp each nutmeg and cloves. The cornstarch can be replaced with arrowroot powder in a pinch.
This keeps beautifully—5 days in the fridge, tightly covered. Freezes for up to 3 months (thaw overnight). Best served chilled, but honestly I’ve eaten slices straight from the freezer (don’t skip this part).
Why You’ll Love This Recipe
- No-Blender Needed: I just dump the cottage cheese, yogurt, pumpkin, and sugars in a bowl—no fancy equipment, no fuss.
- Spiced Pumpkin Perfection: The brown sugar caramelizes the pumpkin’s natural sweetness, while the cottage cheese keeps it creamy without the guilt.
- Feeds a Crowd: One batch gives me 12 generous slices—ideal for potlucks or freezing extras for later cravings.
- Budget-Friendly Win: Canned pumpkin and cottage cheese are pantry staples that won’t break the bank, and I’ll bet you already have them.
Step-by-Step Instructions for Fat Free Pumpkin Cheesecake
Here’s the method. Straightforward, tested, works every time.
Step 1: Blend the Cottage Cheese Base
Start by blending the 2 cups Low-Fat Cottage Cheese in a food processor until completely smooth—this eliminates any curds and creates that signature creamy texture. I’ve found this step takes about 2-3 minutes of blending to achieve the right consistency.
Transfer the blended cottage cheese to a large mixing bowl. Add the 1 cup Non-Fat Greek Yogurt, 0.75 cup Granulated Sugar, 0.25 cup Brown Sugar, and 1 tablespoon Lemon Juice. Whisk vigorously until all ingredients are fully incorporated and the mixture looks uniform.
Step 2: Incorporate Pumpkin and Spices
Add the 1.5 cups Canned Pumpkin Puree, 2 whole Large Eggs, 1 teaspoon Vanilla Extract, 2 teaspoons Pumpkin Pie Spice, and 0.5 teaspoon Ground Cinnamon to the bowl. Mix gently but thoroughly to combine—you want to avoid overworking the eggs which could incorporate too much air.
The batter should look thick and velvety with a rich orange hue from the pumpkin. Here’s the thing—if it seems too thin, don’t worry. The next step will thicken it up perfectly. The spices should be evenly distributed, with no visible streaks of spice.
Step 3: Add Dry Ingredients for Structure
In a small bowl, whisk together the 0.25 cup All-Purpose Flour, 1 tablespoon Cornstarch, and 0.25 teaspoon Salt. Sift this mixture directly into the wet ingredients to prevent clumping. This is the moment that matters: fold the dry ingredients in gently using a spatula until just combined.
You’ll notice the batter thicken slightly as the flour and cornstarch absorb some moisture. The cornstarch is particularly important here—it helps set the filling without adding fat. Don’t overmix; a few small lumps are fine and will dissolve during baking.
Step 4: Bake Until Set with a Slight Wobble
Pour the batter into a prepared 9-inch springform pan lined with parchment paper. Smooth the top with a spatula. Bake at 325°F for 45-50 minutes until the edges are set but the center still has a slight wobble when gently shaken.
This visual checkpoint is crucial—overbaking will cause cracks. The center should look slightly shiny but not liquid. Turn off the oven and crack the door open 1 inch, allowing the cheesecake to cool gradually inside for 1 hour to prevent sudden temperature changes that could cause cracking.
Step 5: Chill Completely Before Serving
After the hour in the oven with the door cracked, transfer the cheesecake to the refrigerator and chill for at least 4 hours, preferably overnight. This resting period allows the filling to fully set and develop its creamy texture.
When ready to serve, run a thin knife around the edge to loosen it from the pan, then release the springform ring. The cheesecake should hold its shape perfectly while still being silky smooth when sliced. Serve chilled for the best texture and flavor.
Pro Tips For Making Fat Free Pumpkin Cheesecake
- Blend Cottage Cheese Smooth: Pulse the low-fat cottage cheese in a food processor for 2-3 minutes until completely smooth—I learned this the hard way after my first cheesecake had an unfortunate cottage cheese texture.
- Drain Pumpkin Puree: Place the canned pumpkin puree in a fine-mesh strainer for 10 minutes to remove excess liquid, or your cheesecake will be watery no matter how long it bakes.
- Skip the Overmix: Fold the Greek yogurt in by hand just until combined—overmixing adds air that can crack the surface during baking, and nobody wants that.
- Cool Gradually: Turn off the oven after baking and let the cheesecake sit inside for 1 hour with the door cracked—this prevents the dreaded sudden collapse in the center.
Storing and Reheating This Dish
Refrigerator Storage
Let your cheesecake cool completely, then cover tightly with plastic wrap or transfer to an airtight container. It keeps beautifully in the fridge at 40°F or below for up to 5 days. The flavors deepen as it chills. ❄️
Freezer Storage
For longer storage, wrap individual slices or the whole cake in plastic wrap, then aluminum foil. Freeze for up to 3 months without texture loss. I recommend slicing before freezing for easy single servings.
Thawing Properly
Transfer frozen slices to the fridge and let thaw overnight—about 8-10 hours. Never thaw at room temperature, as this can cause condensation that makes the texture watery. Patience here ensures the best results.
Reheating Option
While best served chilled, you can warm slices in the microwave at 50% power for 20-30 seconds. Add a paper towel cover to prevent drying. Honestly, I prefer it straight from the fridge. 💡
Storage Tips
Always use parchment paper between layers if stacking slices to prevent sticking. Label with the date so you remember when it was made. This dessert keeps so well you might forget it’s there!
Frequently Asked Questions
Why use cottage cheese instead of cream cheese?
Cottage cheese provides the creamy texture with 0g fat when using low-fat varieties. Blending it smooth removes curds, mimicking traditional cream cheese perfectly. It sets beautifully without heavy ingredients.
Can I make this without eggs?
Yes! Substitute 2 flax eggs (2 tbsp ground flax + 6 tbsp water) for structure. Let it sit 5 minutes before mixing. The texture will be slightly denser but still delicious.
What causes cracks on top?
Overbaking or rapid cooling. Bake until edges are set but center still jiggles slightly. Cool gradually in the oven with the door cracked 1 hour. This prevents sudden temperature changes.
How do I know when it’s done?
The edges should be firm with a slight wobble in the center. A toothpick inserted 1 inch from the edge should come out clean. Avoid overbaking—it continues setting as it cools.

- 8 Bean Soup Recipe Crock Pot: Hearty Vegetable Medley in One Pot - September 25, 2026
- 4C Bread Crumbs Meatballs Recipe: Crispy Crust and Juicy Centers - September 25, 2026
- 6 Oz Chocolate Chip Cookie Recipe: Perfectly Balanced Crispy Edges and Chewy Hearts - September 25, 2026