
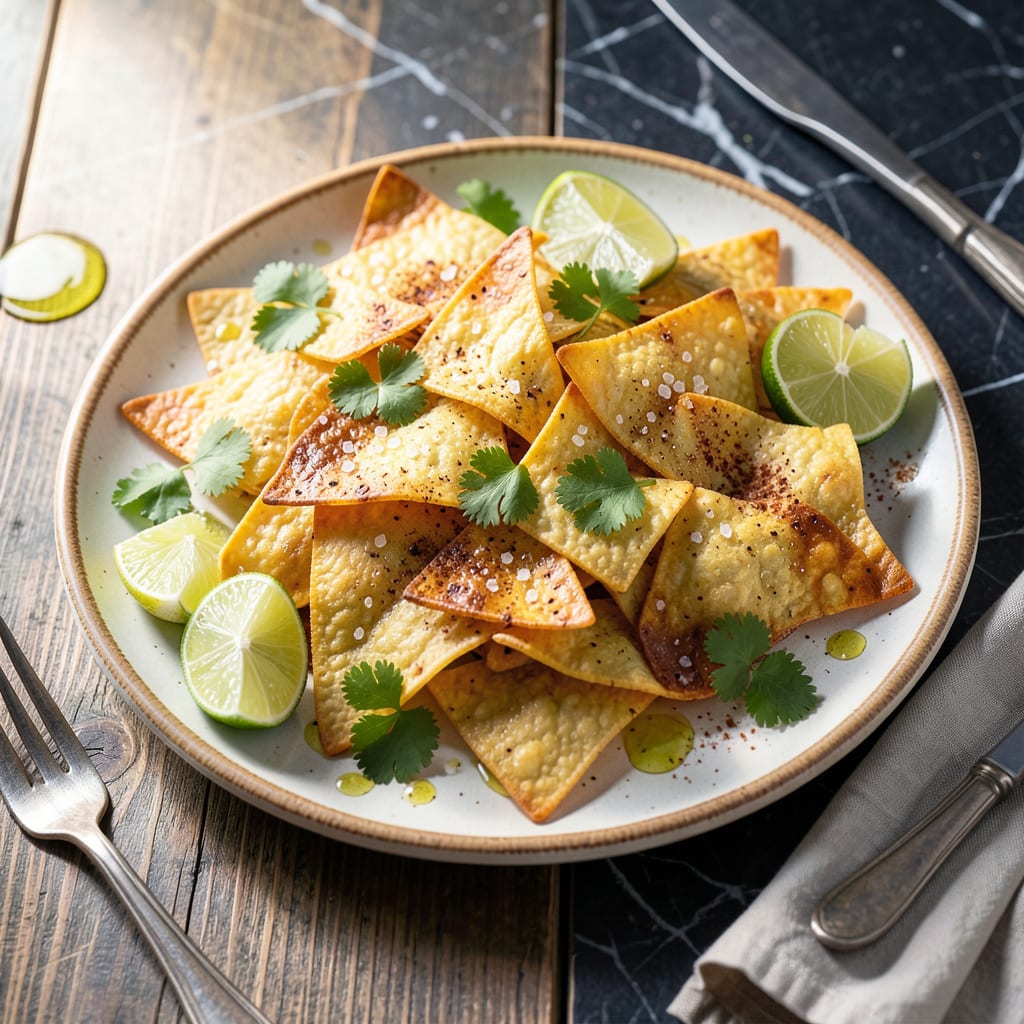
I’ve perfected a method for making fat free tortilla chips that are just as crispy as the store-bought kind. The trick lies in using the oven’s dry heat to achieve that satisfying crunch without any oil.
With just corn tortillas and a bit of patience, you’ll have golden, lightweight chips ready in under 15 minutes. They’re ideal for dipping or snacking guilt-free.
Ingredients for Fat Free Tortilla Chips
Just tortillas and a few pantry spices for oil-free crunch. Simple as that.
| Ingredient | Amount | Notes |
|---|---|---|
| Corn Tortillas 🌮 | 12 pieces | Stale or day-old preferred |
| Fine Sea Salt 🧂 | ½ tsp | Or to taste for serving |
| Lime 🍋 | 1 whole | Cut into wedges for serving |
| Fresh Cilantro 🌿 | ¼ cup | Chopped, optional garnish |
| Chili Powder 🌶️ | ½ tsp | Optional for seasoning |
| Ground Cumin 🌿 | ¼ tsp | Optional for seasoning |
| Garlic Powder 🧄 | ¼ tsp | Optional for seasoning |
| Smoked Paprika 🌶️ | ¼ tsp | Optional for seasoning |
The tortillas are everything here. Day-old or slightly stale corn tortillas (the kind without lard—check labels) crisp up best because they’ve lost moisture already. Mission or La Tortilla Factory brands are reliable and widely available. If using fresh tortillas, pat them dry with a towel first. Look for 100% corn—no wheat flour, no added fats. That’s your base for the perfect crunch.
No corn tortillas? Don’t bother with flour—they won’t get crispy enough. Seasoning is flexible: swap chili powder for Tajín or just use salt. The lime wedges are non-negotiable for that bright finish (trust me on this). If you’re out of fresh cilantro, dried oregano works in a pinch. But honestly, these chips are so good plain you might skip the extras.
Store in an airtight container once cooled—they’ll keep for 3-4 days but are best fresh out of the oven. Freezing isn’t ideal (they’ll soften). Double or triple the batch for a crowd, but bake in single layers so they crisp evenly. No reheating needed—just eat straight from the pan.
Why You’ll Love This Recipe
- One Pan Wonder: I just stack, slice, and bake—no frying, no mess, one sheet pan does it all.
- Zesty Crunch: The lime and chili powder give that bright, tangy kick with every crispy bite.
- Party Ready: Honestly, I make a double batch for game nights and they vanish before halftime.
- Pocket Friendly: A bag of corn tortillas and a few pantry staples cost less than store-bought chips.
Step-by-Step Instructions for Fat Free Tortilla Chips
Here’s the method I use to achieve perfectly crispy chips without any oil at all.
Step 1: Prep and Season the Corn Tortillas
Start by preheating your oven to 375°F. While it heats, stack the 12 pieces Corn Tortillas and cut them into 6 wedges each. I find stale or day-old tortillas work best here—they crisp up more reliably than fresh ones.
Arrange the wedges in a single layer on two large baking sheets. Lightly mist them with water (just a fine spray) and sprinkle evenly with 0.5 tsp Fine Sea Salt. This tiny bit of moisture helps the seasoning adhere while promoting even crisping.
Step 2: Add Optional Spices for Extra Flavor
For basic chips, the salt alone works, but I love adding a flavor boost. In a small bowl, combine 0.5 tsp Chili Powder, 0.25 tsp Ground Cumin, 0.25 tsp Garlic Powder, and 0.25 tsp Smoked Paprika. This blend adds warmth and depth without any fat.
Sprinkle this mixture evenly over the tortilla wedges. Gently toss them on the baking sheet to ensure full coverage. The spices will toast slightly during baking, intensifying their aroma. Distribute the wedges back into a single layer, leaving a little space between each for proper air circulation.
Step 3: Bake Until Perfectly Crisp
Place both baking sheets in the preheated oven. Bake for 12-15 minutes, then rotate the pans and switch their positions on the racks. Continue baking for another 8-10 minutes until the chips are golden brown and completely crisp.
Watch them closely after the 20-minute mark—ovens vary, and these can go from perfect to burnt quickly. You’ll know they’re done when they’re uniformly crisp and slightly curled at the edges. Remove them from the oven and let cool completely on the baking sheets—they’ll crisp up even more as they cool.
Step 4: Serve with Fresh Accompaniments
Once cooled, transfer the chips to a serving bowl. Cut the 1 whole Lime into wedges and arrange them on the side. The bright acidity cuts through the richness of dips or salsas beautifully.
Chop the 0.25 cup Fresh Cilantro and sprinkle it over the chips or use it as a garnish for your serving platter. The fresh herb adds a vibrant contrast to the crispy, spiced chips. Serve immediately while they’re at peak crunch, or store in an airtight container for up to 3 days.
Pro Tips For Making Fat Free Tortilla Chips
- Dry Tortillas First: Spread tortillas in a single layer on a baking sheet and let them sit uncovered for 10-15 minutes before baking—this removes excess moisture so they crisp up properly instead of turning chewy.
- Cut Evenly: Stack 2-3 tortillas at a time and slice into consistent triangles with a sharp knife. Uniform pieces bake at the same rate, so you won’t end up with some burnt and others still soft.
- Skip the Overcrowding: I learned this the hard way—leave at least ½ inch between each piece on the baking sheet. Crowding traps steam, and you’ll get limp chips instead of crispy ones.
- Season While Warm: Spritz the baked chips lightly with lime juice and dust with salt, chili powder, and chopped cilantro right after they come out of the oven. The warmth helps the seasoning stick better and the flavors meld.
Health Benefits of This Dish
Low-Calorie Crunch
A 1-ounce serving of these chips contains just 110-120 calories, about half what you’d find in traditional fried tortilla chips. The oil-free method eliminates roughly 7-10 grams of fat per serving, making them a guilt-free snack option. I love that I can enjoy the crunch without the calorie overload. 💪
Fiber-Rich Goodness
Corn tortillas provide about 2 grams of fiber per 1-ounce serving, which supports digestive health. The whole-grain corn used in traditional tortillas also offers a bit of plant-based protein at around 2-3 grams per serving. This makes them more satisfying than many processed snacks.
Sodium Control
By controlling the salt yourself, you can keep sodium in check. A light sprinkle of 0.5 tsp Fine Sea Salt across the entire batch adds just 290mg sodium per serving. Compare that to store-bought chips, which often contain 180-250mg per 1-ounce serving. I find this makes a noticeable difference in how I feel after snacking.
Gluten-Free Advantage
Since these chips are made from 100% corn tortillas, they’re naturally gluten-free. This makes them safe for anyone with celiac disease or gluten sensitivity. Just be sure to check your tortilla labels to confirm they’re certified gluten-free, as some brands may have cross-contamination. 🌾
No Artificial Additives
Unlike many commercial chips, this recipe contains no preservatives, artificial flavors, or questionable additives. You’re getting pure corn, seasonings, and a touch of salt. The simplicity means you know exactly what you’re eating, which I appreciate more as I’ve learned about food processing.
Vegan and Allergy-Friendly
These chips are completely plant-based, making them suitable for vegan diets. They’re also free from common allergens like dairy, eggs, and nuts. The only ingredient to watch for is the tortillas themselves—just ensure they’re made without lard, which some traditional brands use. I always keep a pack of Mission corn tortillas on hand for this reason.
Nutrition Facts
Frequently Asked Questions
Can I use flour tortillas instead?
Flour tortillas won’t crisp up properly without oil. Stick to 100% corn tortillas for the best crunch. They’re also naturally gluten-free, making them a better choice overall.
Why do stale tortillas work better?
Stale or day-old tortillas have less moisture, which helps them crisp faster in the oven. Fresh ones can work too—just pat them dry first to remove excess dampness.
How do I keep them crispy after baking?
Let chips cool completely on the baking sheet before storing. Keep in an airtight container for up to 3 days—any longer and they’ll start to soften.
Can I make these in an air fryer?
Yes! Cook at 375°F for 6-8 minutes, shaking the basket halfway. Watch closely to prevent burning, as air fryers cook faster than ovens.

- 8 Bean Soup Recipe Crock Pot: Hearty Vegetable Medley in One Pot - September 25, 2026
- 4C Bread Crumbs Meatballs Recipe: Crispy Crust and Juicy Centers - September 25, 2026
- 6 Oz Chocolate Chip Cookie Recipe: Perfectly Balanced Crispy Edges and Chewy Hearts - September 25, 2026