
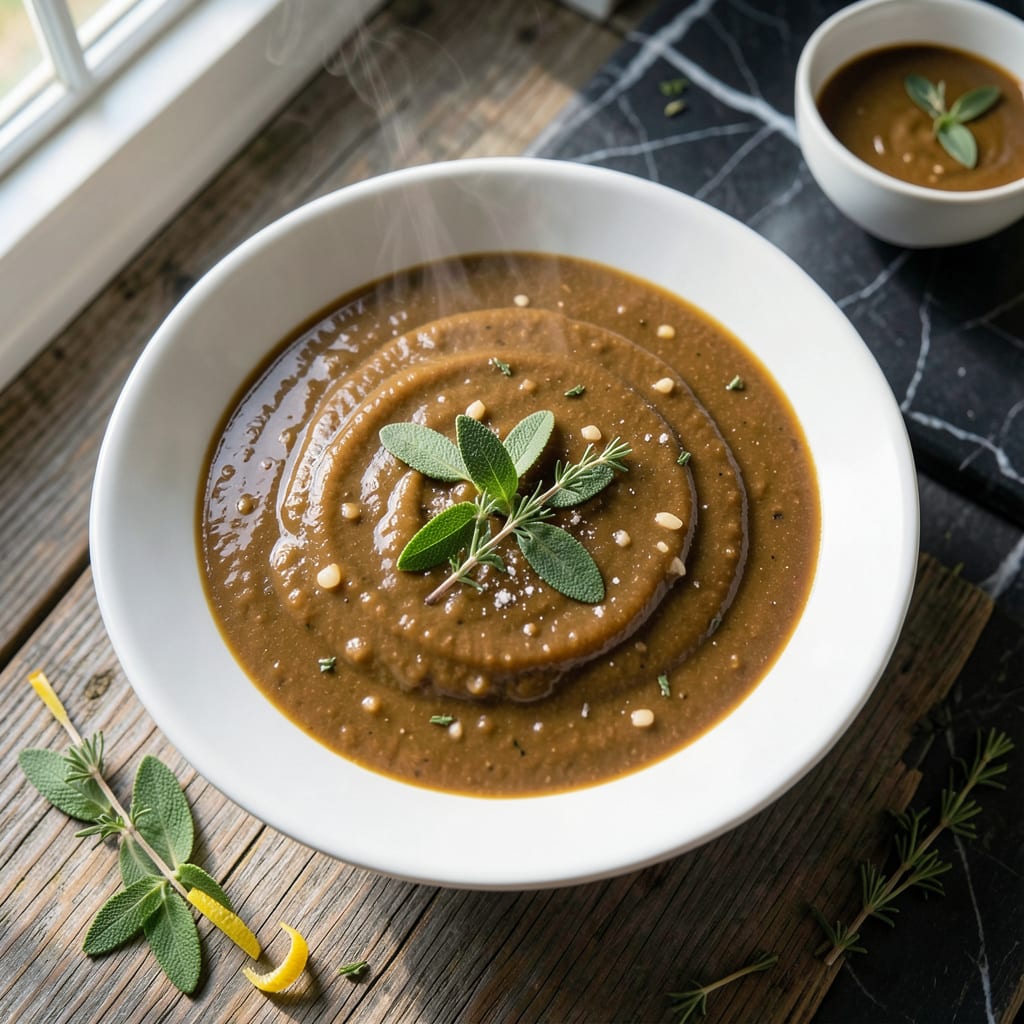
This gravy delivers silky smoothness without any of the fat. I’ve refined the technique to create a rich, flavorful sauce using turkey drippings and broth, thickened to perfection.
Perfect for holiday meals or Sunday dinners, this version keeps all the depth of traditional gravy while staying completely fat free. It’s a simple, reliable method that never sacrifices taste.
Ingredients for Fat Free Turkey Gravy
Defatted drippings and broth create rich, smooth gravy without compromise.
| Ingredient | Amount | Notes |
|---|---|---|
| Turkey Drippings 🍗 | 2 cups | Defatted, strained clear liquid |
| Low-Sodium Chicken Broth 🥣 | 1 ½ cups | Or turkey broth for depth |
| All-Purpose Flour 🌾 | ¼ cup | For thickening the gravy |
| Cornstarch 🌽 | 1 tbsp | Alternative thickener option |
| Fresh Sage Leaves 🌿 | 6 pieces | Chopped fine for aroma |
| Fresh Thyme Sprigs 🍃 | 4 pieces | Leaves stripped from stems |
| Garlic Cloves 🧄 | 2 cloves | Minced for flavor base |
| Onion Powder 🧅 | ½ tsp | Enhances savory depth |
| Black Pepper 🌶️ | ½ tsp | Freshly ground preferred |
| Salt 🧂 | ½ tsp | To taste, adjust carefully |
The drippings are everything here. Use a fat separator to remove every trace of oil—this is non-negotiable for true fat-free results. Most grocery stores carry commercial fat separators, but a simple gravy separator pitcher works too. I source low-sodium broth from Trader Joe’s or Whole Foods—their organic versions have the cleanest flavor. The herbs should be fresh; dried won’t deliver the same aromatic punch.
No turkey drippings? Vegetable broth with a splash of soy sauce mimics the depth. Swap fresh herbs for dried at one-third the amount, but fresh is ideal. If avoiding gluten, cornstarch at double the flour quantity works perfectly—just whisk it into cold liquid first. For extra richness without fat, a dash of Maggi seasoning adds umami without compromising the diet.
Gravy thickens as it cools. Store in an airtight container in the fridge for up to 4 days. Reheat gently, adding a splash of broth to thin if needed. Freezes beautifully for 3 months—portion into ice cube trays for easy single servings.
Why You’ll Love This Recipe
- One Pot Wonder: I can make this gravy right in the roasting pan while the turkey rests—no extra dishes.
- Rich Without Guilt: The fresh sage and turkey drippings pack in flavor without a drop of fat.
- Holiday Hero: It’s my secret for stress-free Thanksgiving prep, and it pairs with everything from mashed potatoes to stuffing.
- Budget Stretcher: I use every last bit of the turkey drippings, so nothing goes to waste.
Step-by-Step Instructions for Fat Free Turkey Gravy
This streamlined technique ensures a velvety texture while maintaining the rich flavor profile of traditional gravy.
Step 1: Infuse Aromatics in Defatted Drippings
In a medium saucepan, combine the 2 cups Turkey Drippings with the 6 pieces Fresh Sage Leaves (finely chopped), 4 pieces Fresh Thyme Sprigs (leaves stripped), and 2 cloves Garlic Cloves (minced). Heat over medium heat until the mixture just begins to simmer.
Allow the aromatics to infuse for 5-7 minutes until the liquid takes on a golden hue and the herbs release their fragrance. This step builds the flavor foundation. Avoid boiling, as this can make the gravy bitter. Strain out the solids before proceeding to the next step.
Step 2: Create a Smooth Slurry for Thickening
In a small bowl, whisk together the 0.25 cup All-Purpose Flour with 1.5 cups Low-Sodium Chicken Broth until no lumps remain. For a gluten-free alternative, replace the flour with the 1 tbsp Cornstarch and mix it with 2 tablespoons of the broth to form a smooth slurry.
This slurry method prevents clumping and ensures even thickening. The key is to fully dissolve the thickener in cold liquid before introducing it to the hot drippings. This guarantees a silky, lump-free gravy every time.
Step 3: Thicken and Season the Gravy
Gradually pour the slurry into the infused drippings while whisking constantly. Bring the mixture to a gentle boil over medium-high heat, then reduce to medium-low heat. Continue whisking for 5-8 minutes until the gravy thickens enough to coat the back of a spoon.
Stir in the 0.5 tsp Onion Powder, 0.5 tsp Black Pepper, and 0.5 tsp Salt. Taste and adjust the seasoning carefully, as the low-sodium broth allows you to control the salt content precisely. The gravy should have a smooth, velvety consistency and a rich, savory flavor.
Step 4: Simmer and Refine the Consistency
Once thickened, reduce the heat to low and let the gravy simmer for an additional 3-5 minutes. This final step allows the flavors to meld together beautifully. Stir occasionally to prevent sticking and to monitor the consistency.
If the gravy becomes too thick, thin it with a small amount of additional low-sodium chicken broth, 1 tablespoon at a time, until the desired texture is achieved. The finished gravy should be pourable but substantial enough to cling to mashed potatoes or turkey slices.
Pro Tips For Making Fat Free Turkey Gravy
- Skim the Drippings: Use a fat separator or a spoon to remove every last bit of fat from the turkey drippings before starting—this is the only way to guarantee a truly fat-free gravy.
- Bloom the Flour: Whisk the flour into a small amount of cold broth first to create a smooth slurry, then slowly add it to the hot drippings to prevent lumps.
- Skip the Boiling: Once the gravy thickens, keep it at a gentle simmer—boiling can break down the cornstarch and turn your gravy thin again.
- Strain the Sage: After infusing the gravy with fresh sage, strain it out before serving for a smoother texture—no one wants chewy bits in their gravy.
Make-Ahead Tips for This Recipe
Prep Drippings Early
Start by defatting your turkey drippings immediately after roasting. I use a fat separator pitcher from OXO—it’s a game-changer. Let the drippings sit for 10 minutes so the fat rises to the top, then pour off the clear liquid. This gives you a head start on gravy prep. 💡
Make the Slurry Ahead
Whisk together your 0.25 cup flour and 1.5 cups broth the night before. Store this slurry in a sealed container in the fridge. Cold slurry blends more smoothly into hot drippings, eliminating lumps. This small step saves 5 minutes on cooking day.
Infuse Flavors Overnight
Combine your sage, thyme, and garlic with the defatted drippings in a pot. Cover and refrigerate for up to 24 hours. The next day, just warm and strain before adding your slurry. Overnight infusion deepens the herb flavors dramatically.
Portion for Freezing
Cool your finished gravy completely, then portion into ice cube trays. Once frozen, transfer cubes to a freezer bag. This lets you thaw only what you need—2-3 cubes reheat perfectly in 1 minute in the microwave. 🔥
Reheat with Care
Gravy thickens when stored. To reheat, add 1 tbsp broth per cup and warm over low heat, whisking constantly. Avoid boiling, which can break the sauce. A double boiler works wonderfully for gentle, even reheating.
Last-Minute Adjustments
After reheating, taste and adjust seasoning. You may need an extra pinch of salt or pepper as flavors concentrate during storage. I always keep white wine on hand—a splash brightens the gravy if it tastes flat.
Nutrition Facts
Frequently Asked Questions
How do I remove all fat from turkey drippings?
Use a fat separator or let drippings settle for 10 minutes. The fat will rise to the top—skim it off carefully. For extra insurance, chill drippings first to solidify remaining fat.
Can I make this gravy gluten-free?
Yes! Replace flour with 1 tbsp cornstarch mixed with 2 tbsp cold broth. Whisk this slurry into hot drippings just like the original recipe.
Why did my gravy turn out lumpy?
Lumps form when thickener isn’t fully dissolved in cold liquid first. Always create a smooth slurry before adding to hot drippings, and whisk constantly.
How long can I store leftover gravy?
Keep in an airtight container in the fridge for up to 4 days. For longer storage, freeze for up to 3 months.

- 8 Bean Soup Recipe Crock Pot: Hearty Vegetable Medley in One Pot - September 25, 2026
- 4C Bread Crumbs Meatballs Recipe: Crispy Crust and Juicy Centers - September 25, 2026
- 6 Oz Chocolate Chip Cookie Recipe: Perfectly Balanced Crispy Edges and Chewy Hearts - September 25, 2026