
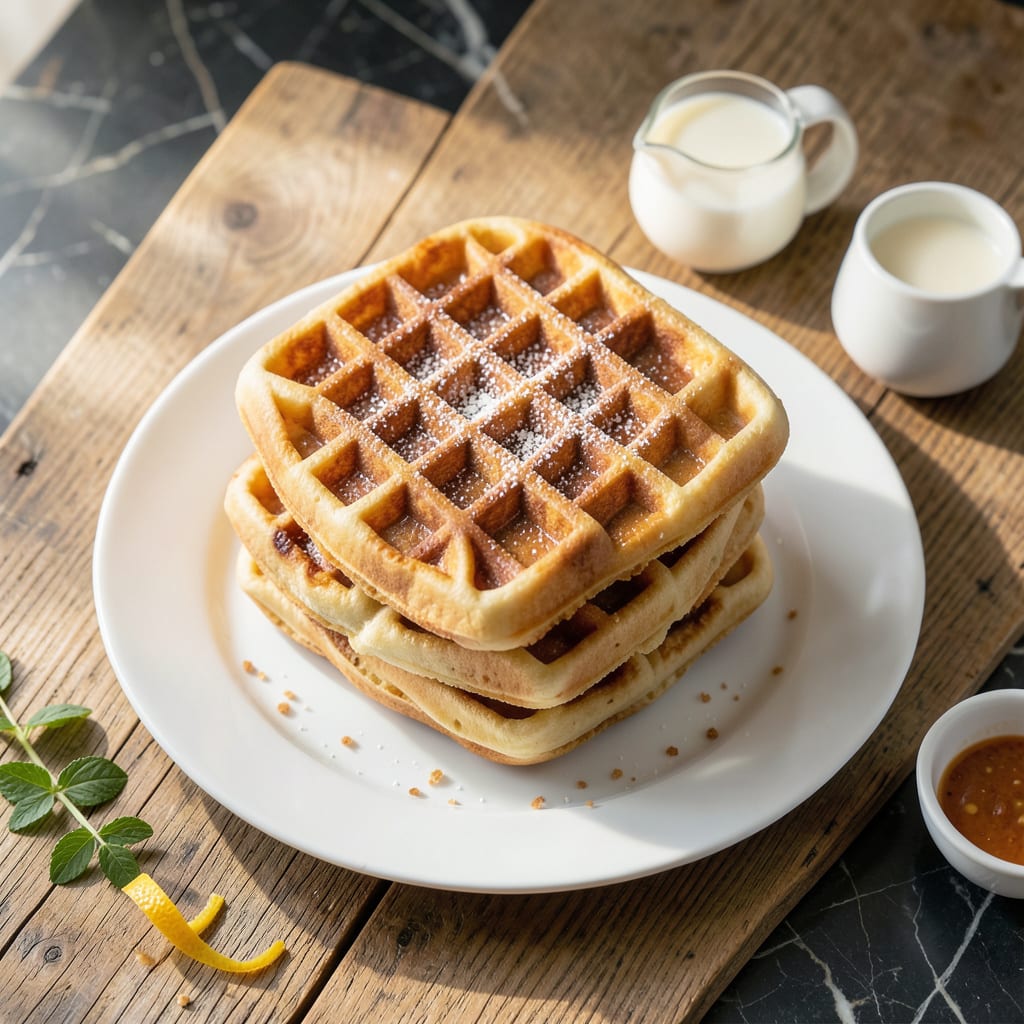
I’ve perfected a way to make fluffy waffles without a single gram of fat, and the results are surprisingly delicious. This method uses simple swaps to keep the texture light and airy.
The secret lies in the right balance of ingredients and a hot waffle iron. You’ll get golden, crisp edges with a tender interior, all while staying completely fat free.
Ingredients for Fat Free Waffle
Pantry staples and a few eggs create magic in your waffle iron.
| Ingredient | Amount | Notes |
|---|---|---|
| All-Purpose Flour 🌾 | 2 cups | Sifted for lighter texture |
| Baking Powder 🧂 | 2 tbsp | For maximum rise |
| Granulated Sugar 🍚 | 2 tbsp | White or raw works |
| Salt 🧂 | ½ tsp | Enhances all flavors |
| Large Egg Whites 🥚 | 4 whole | Whipped to stiff peaks |
| Skim Milk 🥛 | 1 ½ cups | Zero-fat dairy milk |
| Vanilla Extract 🌿 | 1 tsp | Pure extract preferred |
| White Vinegar 💧 | 1 tbsp | Helps stabilize egg whites |
| Lemon Juice 🍋 | 1 tbsp | Fresh or bottled |
| Cream of Tartar 🧂 | ½ tsp | Boosts egg white volume |
The egg whites are doing all the heavy lifting here—fresh is best, but carton whites work in a pinch (just check for no added oils). I grab mine from Trader Joe’s when I’m not separating whole eggs myself. The flour doesn’t need to be fancy—Gold Medal or King Arthur all-purpose are my go-tos. Sift it if you’ve got the patience (worth it for extra fluffiness).
No cream of tartar? Lemon juice or vinegar at the same amount gets you close. Out of skim milk? Any dairy milk works, but the lower fat, the lighter the texture. Want it sweeter? Add another tablespoon of sugar. The vinegar might sound weird, but it’s just for the chemistry—you won’t taste it.
Whipped egg whites don’t hold forever—use within 30 minutes of whipping. Leftovers keep 2-3 days in the fridge, but they’re best fresh. Freeze extras for up to 1 month, then toast straight from frozen.
Why You’ll Love This Recipe
- No-Fuss Mixing: I just dump the dry ingredients, whip the egg whites, and fold—no fancy steps or equipment.
- Light and Sweet: The sugar caramelizes just enough to give that classic waffle taste without any heavy fats.
- Breakfast or Snack: Honestly, I make a double batch on Sunday and toast them all week for quick breakfasts.
- Pantry Staples Only: Between us, I always have these basics on hand, so it’s my go-to when the fridge is bare.
Step-by-Step Instructions for Fat Free Waffles
Simple steps to light, airy waffles that prove you don’t need fat for incredible flavor.
Step 1: Whip the Egg Whites to Stiff Peaks
In a clean, grease-free bowl, combine the 4 whole large egg whites with the 0.5 tsp cream of tartar. I always add the cream of tartar first—it stabilizes the egg whites and helps them reach maximum volume.
Beat with an electric mixer on high speed until you see stiff, glossy peaks form. This usually takes 3-4 minutes. The peaks should hold their shape when you lift the beaters, and the bowl should be cool to the touch. Don’t stop early; under-whipped egg whites won’t give you that signature fluffiness.
Step 2: Mix the Dry Ingredients Thoroughly
In a separate large bowl, whisk together the 2 cups all-purpose flour, 2 tbsp baking powder, 2 tbsp granulated sugar, and 0.5 tsp salt. Sifting the flour first helps prevent lumps, but whisking vigorously for 30 seconds does the same job if you’re in a hurry.
This dry mix creates the structure for your waffles. The baking powder is your leavening agent, so make sure it’s fresh—old baking powder loses its potency and your waffles won’t rise properly. The sugar adds a touch of sweetness that balances the tang from the other ingredients.
Step 3: Combine Wet Ingredients and Create the Batter
In another bowl, whisk together the 1.5 cups skim milk, 1 tsp vanilla extract, 1 tbsp white vinegar, and 1 tbsp lemon juice. The vinegar and lemon juice react with the baking powder to create extra lift, while the vanilla adds depth of flavor.
Pour the wet ingredients into the dry ingredients and stir until just combined. The batter will be thick and slightly lumpy—that’s perfect. Overmixing develops gluten, which makes waffles tough instead of tender. Leave those lumps alone.
Step 4: Fold in Egg Whites and Cook Immediately
Gently fold the whipped egg whites into the batter using a silicone spatula. Use a J-folding motion—scoop from the bottom, lift, and turn—this preserves as much air as possible. The batter should look light and airy with visible streaks of egg white at first, but fully incorporated by the final fold.
Preheat your waffle iron to medium-high heat. Lightly grease it with non-stick spray (even if it’s non-stick) to prevent sticking. Pour about ½ cup of batter onto the hot iron and spread it slightly toward the edges. Close the lid and cook for 4-5 minutes until golden brown and crisp.
Step 5: Serve Warm with Your Favorite Toppings
Remove the waffle carefully and transfer to a wire rack. Don’t stack them directly on a plate—the steam will make them soggy. If making a batch, keep finished waffles warm in a 200°F oven while you cook the rest.
Each waffle should be crisp on the outside with a light, airy interior. Serve immediately with fresh fruit, a drizzle of maple syrup, or a dusting of powdered sugar. These are best enjoyed fresh, but leftovers freeze beautifully for quick breakfasts.
Pro Tips For Making Fat Free Waffle
- Whip Egg Whites Stiff: Beat the egg whites to stiff peaks before folding them in—I learned this the hard way after my first few waffles came out dense instead of light and airy.
- Preheat the Iron: Always preheat your waffle iron for at least 5 minutes. After burning three batches, I finally figured out that a hot iron guarantees even cooking without sticking.
- Skip Overmixing: Stir the batter just until the dry ingredients disappear; overmixing deflates the egg whites and makes the waffles tough.
- Use Nonstick Spray: Even with no fat in the batter, a quick spray on the iron prevents sticking and makes cleanup easier—sounds obvious, but I skipped it once and regretted it.
Common Mistakes When Making Great fat free waffle
Overmixing the Batter
Once you combine wet and dry ingredients, stir just until the flour disappears. Overmixing develops gluten, making your waffles tough instead of tender. A few lumps are perfectly fine and won’t affect the final result.
Underwhipping Egg Whites
Your egg whites must reach stiff, glossy peaks for maximum lift. Stopping early at soft peaks means less air in your waffles, resulting in a dense texture. Use a clean, grease-free bowl and beat for 3-4 minutes on high. 💡
If your peaks droop, you haven’t beaten them long enough. The bowl should feel cool, and the whites should hold their shape when the beaters are lifted.
Cold Waffle Iron
Always preheat your waffle iron to medium-high heat before adding batter. A cold iron causes the batter to spread unevenly and cook slowly, leading to gummy, pale waffles. Most irons need 5-7 minutes to reach the right temperature.
Skipping the Non-Stick Spray
Even non-stick waffle irons benefit from a light coating of spray. Fat-free batters can stick more than traditional ones. Use a non-stick cooking spray with zero calories to keep them perfectly crisp without adding fat.
Opening the Iron Too Soon
Resist the urge to peek! Opening the iron before 4-5 minutes releases steam and can cause the waffle to tear. Wait until the steam slows and the iron’s indicator light signals it’s ready. Patience ensures a clean release.
Nutrition Facts
Frequently Asked Questions
Can I use whole eggs instead of just whites?
No, whole eggs add fat. Stick to 4 large egg whites for a truly fat-free result. The yolks contain all the fat, so using them would compromise your goal.
Why does the recipe include vinegar and lemon juice?
They react with the baking powder to create extra lift. This helps compensate for the lack of fat, ensuring your waffles stay light and airy. You won’t taste the acidity in the final product.
Can I make these ahead and reheat?
Yes! Cook and cool completely, then freeze for up to 1 month. Reheat in a toaster or 200°F oven to restore crispness. Avoid microwaving, as it will make them soggy.

- 8 Bean Soup Recipe Crock Pot: Hearty Vegetable Medley in One Pot - September 25, 2026
- 4C Bread Crumbs Meatballs Recipe: Crispy Crust and Juicy Centers - September 25, 2026
- 6 Oz Chocolate Chip Cookie Recipe: Perfectly Balanced Crispy Edges and Chewy Hearts - September 25, 2026