
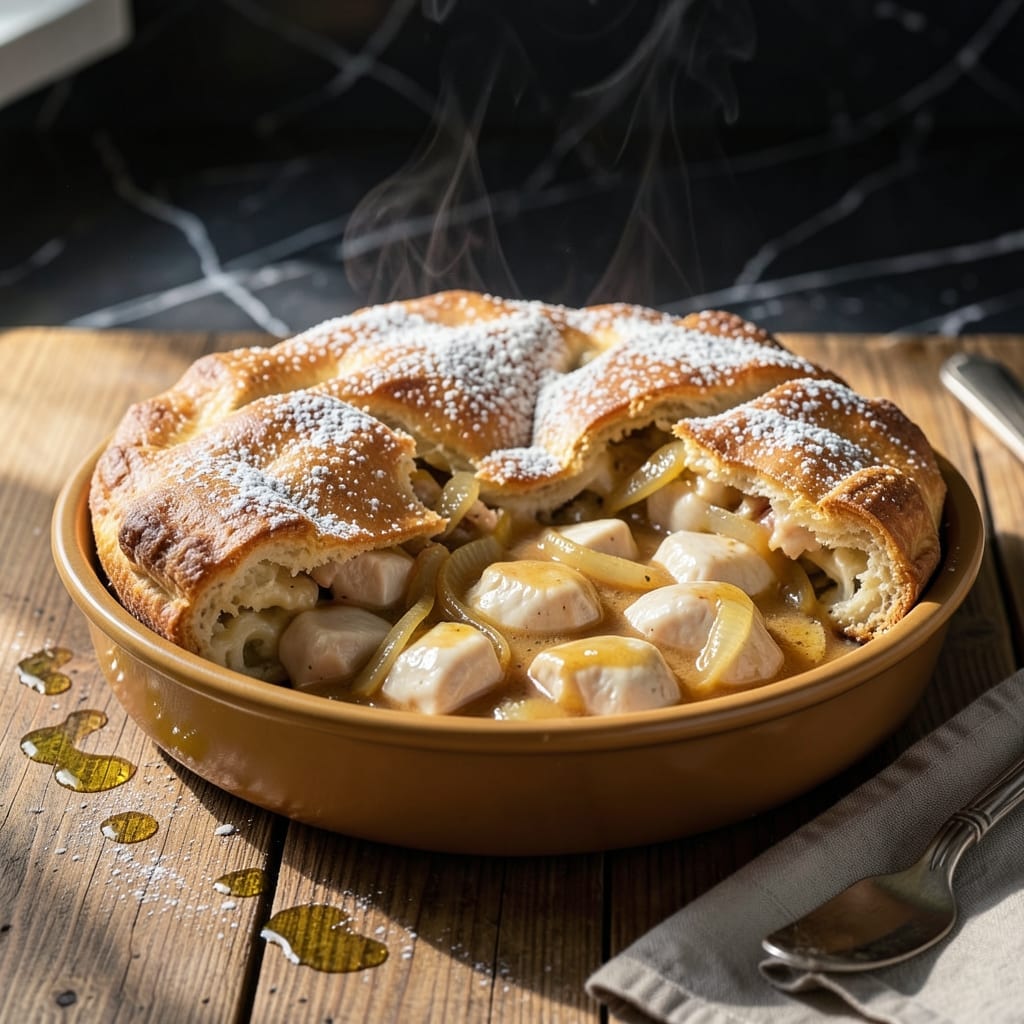
There’s a reason chicken pot pie remains a comfort food classic—this version elevates it to restaurant quality. The secret lies in the perfect balance between a flaky buttery crust and a rich, herb-infused filling that bursts with flavor in every bite.
I developed this recipe after testing countless variations to achieve that ideal texture contrast. The filling comes together with tender chicken, fresh vegetables, and a velvety sauce that’s both hearty and sophisticated without being heavy.
What sets this apart is the attention to detail: a golden crust that shatters at the touch, and a filling where each ingredient maintains its identity while contributing to the whole. The herbs add depth without overpowering the natural flavors.
This is the kind of dish that turns a simple dinner into something memorable. The process is straightforward, but the results are anything but ordinary.
Ingredients for Five Star Chicken Pot Pie
Restaurant-quality ingredients create that perfect balance of flaky crust and rich, herb-infused filling.
| Ingredient | Amount | Notes |
|---|---|---|
| All-Purpose Flour 🌾 | 2 ½ cups | Plus extra for dusting surface |
| Unsalted Butter 🧈 | 1 cup | Cold, cubed for crust |
| Ice Water 💧 | ½ cup | For pie dough hydration |
| Salt 🧂 | 1 tsp | Divided for dough and filling |
| Boneless Skinless Chicken Breasts 🍗 | 1 ½ lb | Diced into bite-sized pieces |
| Yellow Onion 🧅 | 1 whole | Medium, finely diced |
| Carrots 🥕 | 2 whole | Medium, peeled and diced |
| Celery Stalks 🌿 | 2 whole | Diced for mirepoix |
| Fresh Thyme 🍃 | 2 tsp | Leaves stripped from stems |
| Fresh Rosemary 🌿 | 1 tsp | Finely chopped |
| Garlic Cloves 🧄 | 3 cloves | Minced for filling |
| All-Purpose Flour 🌾 | ¼ cup | For sauce roux |
| Whole Milk 🥛 | 1 cup | For velvety sauce |
| Chicken Broth 💧 | 1 ½ cups | Low-sodium preferred |
| Frozen Peas 🌱 | ¾ cup | No need to thaw |
| Black Pepper 🌶️ | ½ tsp | Freshly ground preferred |
The butter is non-negotiable for that shatteringly flaky crust. European-style butter (like Plugrá or Kerrygold) has higher fat content, which creates superior layers. For the chicken, air-chilled breasts (sold at Whole Foods and Trader Joe’s) stay juicier than water-chilled. Fresh thyme and rosemary make all the difference—look for vibrant green stems at the market, not wilted bunches.
No fresh herbs? Dried thyme at one-third the amount works, but fresh is ideal. Swap chicken breasts for thighs if you prefer darker meat (they stay moister). The milk can be whole or 2%—avoid skim as it won’t create the same richness. For a vegetarian version, replace chicken with cremini mushrooms and use vegetable broth. The peas can be swapped for diced potatoes if preferred.
The unbaked pie keeps in the fridge for 1 day (cover tightly). Baked pie is best eaten the same day but reheats well—350°F for 15 minutes brings back the crisp. Leftovers keep 3-4 days refrigerated, though the crust softens. Freeze unbaked pie for up to 2 months (thaw overnight before baking).
Why You’ll Love This Recipe
- One Bowl Magic: That buttery, flaky crust comes together right in the bowl—no fancy gadgets, just flour, cold butter, and a splash of ice water.
- Melt-in-Your-Mouth Filling: The chicken stays juicy, and the velvety sauce soaks into every bite. Honestly, the first time I made it, my picky nephew went back for thirds.
- Feeds a Hungry Table: Birthdays, potlucks, or just a cozy Tuesday—this pot pie disappears fast. I’ll be real: I always double the batch.
- Dinner and Tomorrow’s Lunch: Leftovers taste even better the next day. One pie, two meals, and my wallet thanks me.
Step-by-Step Instructions for Chicken Pot Pie
Master these essential techniques to create a restaurant-quality pie with flaky crust and rich herb filling.
Step 1: Prepare the Pie Dough
In a food processor, pulse the 2.5 cups All-Purpose Flour with ½ teaspoon Salt to combine. Add the 1 cup Unsalted Butter (cold and cubed) and pulse until the mixture resembles coarse crumbs with pea-sized butter pieces visible.
With the processor running, drizzle in the 0.5 cup Ice Water through the feed tube until the dough just begins to come together. I stop just before it forms a complete ball—overworking develops gluten and makes the crust tough. Turn the dough out onto a lightly floured surface and shape into a disk.
Wrap in plastic and refrigerate for 1 hour to relax the gluten and firm the butter. This chilling step ensures a flaky, layered crust when baked.
Step 2: Cook the Filling Base
In a large skillet over medium-high heat, cook the diced 1.5 lb Boneless Skinless Chicken Breasts until just cooked through and lightly browned, about 6-8 minutes. Remove to a plate and set aside.
In the same skillet, add the finely diced 1 whole Yellow Onion, 2 whole Carrots, and 2 whole Celery Stalks. Sauté for 5-7 minutes until the vegetables soften and the onion becomes translucent. Add the 3 cloves Garlic Cloves, 2 tsp Fresh Thyme, and 1 tsp Fresh Rosemary, cooking for 1 minute until fragrant.
Step 3: Create the Velouté Sauce
Sprinkle the 0.25 cup All-Purpose Flour over the vegetable mixture and stir to coat. Cook for 1-2 minutes to remove the raw flour taste. This creates a roux that will thicken your sauce beautifully.
Gradually whisk in the 1 cup Whole Milk and 1.5 cups Chicken Broth, ensuring no lumps form. Bring to a simmer and cook for 5-7 minutes until the sauce thickens enough to coat the back of a spoon. The consistency should be rich but pourable.
Step 4: Assemble and Bake
Return the cooked chicken to the skillet along with the 0.75 cup Frozen Peas and ½ teaspoon Black Pepper. Stir to combine and remove from heat. This filling should be thick, glossy, and packed with visible herbs and vegetables.
Roll out the chilled dough to a 12-inch circle and transfer to a 9-inch pie dish. Pour in the filling, then cover with a second rolled dough circle. Crimp the edges, cut several slits in the top for steam to escape, and brush with a bit of milk.
Bake at 375°F for 45-50 minutes until the crust is golden brown and the filling bubbles through the vents. Let rest for 10 minutes before serving to allow the filling to set.
Pro Tips For Making Five Star Chicken Pot Pie
- Chill the Dough: After mixing the flour, butter, and ice water, wrap the dough and refrigerate for at least 30 minutes—this prevents the butter from melting into the flour, which is what gives you that flaky crust.
- Poach the Chicken: Instead of boiling, gently poach the chicken breasts in salted water or broth for 12-15 minutes; it keeps them tender and stops them from drying out in the pie.
- Avoid Soggy Bottom: Brush the bottom crust with a thin layer of egg wash or melted butter before adding the filling; it creates a barrier against the moisture in the filling.
- Use Cold Butter: Cut the unsalted butter into small cubes and keep it ice-cold until you mix it with the flour—this is non-negotiable for a crust that’s actually crispy and layered.
Pro Cooking Tips for Great five star chicken pot pie
Crust Perfection
Keep your butter ice cold and work quickly to prevent it from melting into the flour. I cut my 1 cup unsalted butter into ½-inch cubes and freeze for 15 minutes before starting. The colder the butter, the flakier your layers will be. 💡
Roux Mastery
Cook your roux for the full 1-2 minutes after adding the ¼ cup flour. This removes the raw flour taste and develops a nutty depth. Whisk constantly to prevent browning—you want a blonde roux, not a dark one.
Sauce Consistency
Your sauce should coat the back of a spoon but still drip slowly. If it’s too thick, add ¼ cup additional chicken broth. If too thin, simmer for 2-3 more minutes. I test by dragging my finger through the sauce on the spoon—it should hold the line.
Venting the Top
Cut 4-5 slits in the top crust, not just one or two. This allows steam to escape evenly, preventing a soggy bottom. I use a sharp knife to make clean cuts, then brush with milk for that golden finish.
Resting Time
That 10-minute rest after baking is non-negotiable. It lets the filling thicken so it doesn’t run out when sliced. I set a timer—cutting too soon means a messy plate, no matter how good it tastes. ⏰
Equipment Tip
Use a glass pie dish to monitor the bottom crust. You’ll see when it turns golden brown through the glass. I prefer Pyex for even heat distribution and easy cleanup.
Nutrition Facts
Frequently Asked Questions
Can I use store-bought pie crust?
Yes, but the texture won’t be as flaky. If using pre-made, opt for an all-butter variety and bake at 375°F for best results. Homemade crust is worth the effort for that perfect shatter.
What if my filling is too runny?
Simmer it for 2-3 extra minutes before baking. If already assembled, bake for 5-10 additional minutes to evaporate excess moisture. A thick filling holds its shape when sliced.
How do I prevent a soggy bottom?
Pre-bake the bottom crust for 10 minutes and cut 4-5 steam vents in the top. This keeps moisture from collecting underneath.
Can I make this ahead?
Assemble the pie completely and refrigerate for up to 1 day. Bake as directed, adding 5 minutes if cold. Freeze unbaked for up to 2 months.

- 6 Oz Chocolate Chip Cookie Recipe: Perfectly Balanced Crispy Edges and Chewy Hearts - September 25, 2026
- 6-Inch Coffee Cake Recipe: Vanilla Bean Swirls and Buttery Streusel Topping - September 25, 2026
- 1 Hour Soup Recipe: Velvety Richness Without the Wait - September 25, 2026