
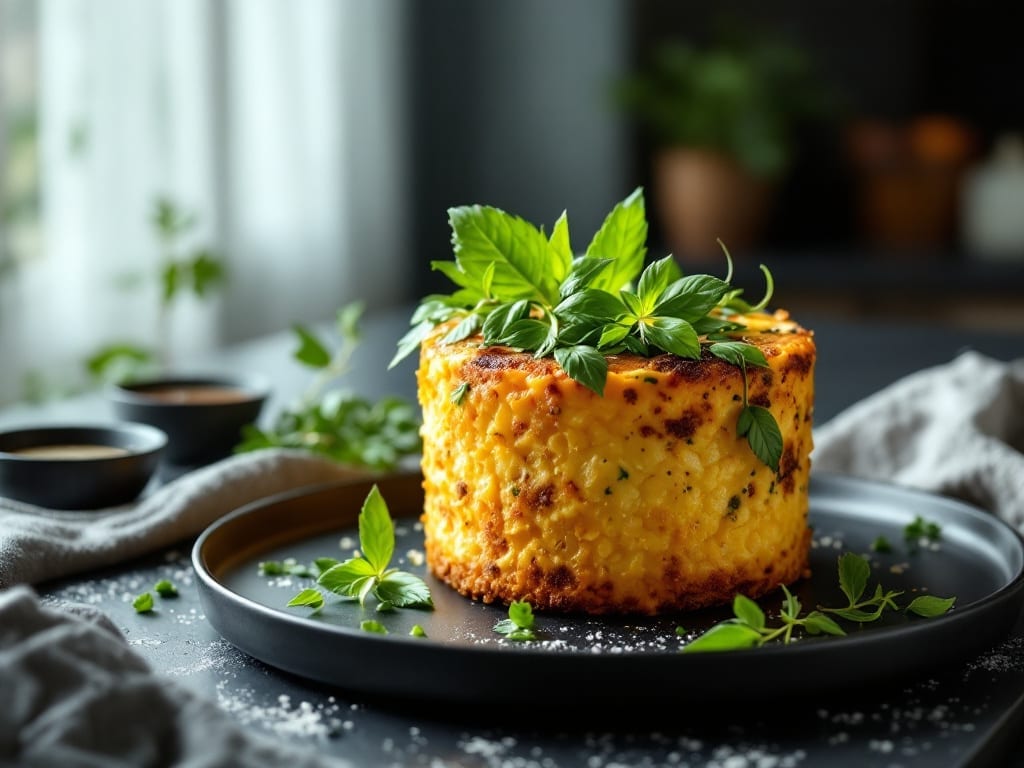
This flower pot cake recipe transforms a simple dessert into a showstopping centerpiece that doubles as a charming planter. The secret lies in its clever construction: layers of moist vanilla cake conceal a hidden surprise filling, while the exterior remains completely edible—no floral arrangements required.
I developed this recipe after years of testing different cake structures to ensure it stays sturdy enough for planting while maintaining perfect texture.
The beauty of this cake is its versatility—it can be baked in a traditional round pan and later transferred to a decorative pot, or baked directly in the pot for a rustic touch.
The vanilla cake layers are light yet sturdy enough to support a filling of your choice, whether it’s fruit compote, whipped cream, or even a boozy custard. What makes this recipe truly special is the surprise element: guests can dig in without knowing what delicious surprise awaits in the center.
By the time you’re done, you’ll have a cake that’s as delightful to look at as it is to eat—golden layers with a crisp exterior that hides a moist, flavorful surprise.
The presentation is effortless: simply place it in a decorative pot, add a few edible flowers or fresh herbs for garnish, and watch as your dessert becomes a conversation starter. This recipe is perfect for garden parties, bridal showers, or anyone who loves whimsical desserts with a twist.
Whether you’re serving it as a standalone dessert or pairing it with tea, this flower pot cake delivers both visual charm and delicious flavor. The best part? It’s foolproof—no advanced baking skills required. Let’s get started on creating your own edible planter masterpiece!
Ingredients for flower pot cake
Twelve ingredients transform into a magical dessert that grows edible blooms.
| Ingredient | Amount | Notes |
|---|---|---|
| All-Purpose Flour 🌾 | 3 cups | Sifted for light texture |
| Granulated Sugar 🍚 | 2 cups | Divided for layers and filling |
| Unsalted Butter 🧈 | 1 ½ cups | Room temperature, full-fat |
| Large Eggs 🥚 | 4 whole | Room temperature, separated |
| Vanilla Extract 🌸 | 2 tsp | Pure, high-quality extract |
| Baking Powder 🧂 | 2 tsp | Freshly measured |
| Salt 🧂 | ½ tsp | Fine sea salt |
| Whole Milk 🥛 | 1 cup | Room temperature |
| Strawberry Jam 🍓 | 1 cup | High-quality, seedless |
| Whipped Cream 🍦 | 2 cups | Stable, full-fat preferred |
| Lemon Juice 🍋 | 1 tbsp | Freshly squeezed |
| Edible Flowers 🌸 | ¼ cup | Optional garnish |
| Fresh Mint Leaves 🌿 | ⅛ cup | Chopped, for garnish |
| Decorative Ceramic Pot 🏺 | 1 whole | 8-inch diameter, food-safe |
| Potting Soil 🌱 | 2 cups | Lightweight, organic |
The flour and butter are your cake’s foundation—King Arthur flour and Plugrá butter make all the difference here. Grab European-style butter if you can, as it has higher fat content for that perfect tender crumb. For the vanilla extract, McCormick Pure or Nielsen-Massey are my go-tos—they’re worth the splurge. The strawberry jam should be thick and vibrant; Smucker’s or Bon Appétit brands work perfectly. If you’re feeling adventurous, swap the jam for a raspberry compote or even a dark chocolate ganache for a richer surprise.
No vanilla extract? A vanilla bean scraped into the batter works wonders, or a vanilla sugar pinch (like Trader Joe’s vanilla sugar) adds depth. For the whipped cream, if you’re short on time, Cool Whip is a decent shortcut, but trust me, homemade with a hand mixer is worth the extra minute. The edible flowers can be tricky to find—check the bakery section at Whole Foods or order online. Fresh mint leaves add a bright pop, but if they’re not in season, dried mint at half the amount will do. The potting soil** should be lightweight and organic—Miracle-Gro or FoxFarm work great.
Store the whipped cream in an airtight container with parchment paper between layers to keep it fresh for up to 3 days. The potted cake itself stays stunning for 2 days at room temperature, but the filling will soften—best enjoyed fresh. For a longer shelf life, freeze the assembled cake (without soil) for up to 1 month. Garnish with edible flowers right before serving—they wilt fast, so last-minute is key. This cake is a showstopper, so save it for special occasions when you can really make it shine.
Why You’ll Love This Recipe
- No Mixer Needed: I swear by this recipe because it’s literally just creaming butter and sugar by hand—no electric beaters, no stress. The eggs and vanilla blend right in with minimal effort, and the batter’s so forgiving you can’t mess it up. (Yes, even if you’re still learning.)
- Butter-Sugar Magic: That creamed butter and sugar combo? It’s where the real flavor lives. The cake turns out tender but sturdy, with just enough vanilla warmth to make every bite feel like a hug. Honestly, the simplicity of these five ingredients makes it taste way more special than it should.
- Crowd-Pleaser Any Day: Between us, this cake works for everything—birthday parties, potlucks, or just because. I’ve served it plain, with a dusting of powdered sugar, or even as a base for frosting. It’s the kind of dessert that disappears fast, no matter the occasion.
- Budget-Friendly Staples: Flour, sugar, butter, eggs, vanilla—these are the pantry basics you already own. No fancy ingredients, no last-minute grocery runs. And the leftovers? They stay moist for days, so you’re not baking twice in a week. (My wallet thanks me.)
Step-by-step instructions for whimsical layered cake with hidden surprise
Here’s how to create a magical cake that hides its best feature until the very end!
Prepare the Decorative Ceramic Pot and Soil Base
Begin by placing the decorative ceramic pot in a larger baking dish to catch any spills. Fill the pot with the 2 cups of potting soil, pressing it down gently but evenly. This creates a stable base that will support your cake layers while adding that unique presentation element. The soil should be level with the pot’s rim—use a butter knife to smooth any uneven spots.
This soil layer serves a dual purpose: it creates the “flower pot” aesthetic while also helping to insulate the cake during baking. Preheat your oven to 350°F while you prepare the cake batter. The pot must be oven-safe, so double-check that your decorative ceramic pot can handle this temperature without cracking.
Bake the Cake Layers with Hidden Strawberry Jam Filling
In a large mixing bowl, cream together the 1.5 cups of unsalted butter and 1 cup of the granulated sugar until light and fluffy. Add the 4 whole large eggs one at a time, beating well after each addition. In a separate bowl, whisk together the 3 cups of all-purpose flour, 2 teaspoons of baking powder, and the 0.5 teaspoon of salt.
Gradually add the dry ingredients to the butter mixture, alternating with the 1 cup of whole milk. Mix until just combined—don’t overmix. Spread half of this batter evenly into the prepared ceramic pot, then spread 1 cup of strawberry jam over the top. This hidden layer creates your surprise filling that will appear when sliced. Top with the remaining batter and spread it evenly.
Bake for 35-40 minutes or until a toothpick inserted in the center comes out clean. The cake should be golden brown and spring back when gently pressed. Let it cool completely in the pot before proceeding—this prevents the layers from shifting when you remove it.
Assemble the Cake with Whipped Cream and Garnish
Once the cake is completely cool, carefully remove it from the ceramic pot by running a thin knife around the edges. Place a cake stand or plate over the pot and carefully invert both. The soil should remain in the pot while the cake lifts off cleanly.
In a separate bowl, whip the 2 cups of whipped cream with the 1 tablespoon of lemon juice and the 2 teaspoons of vanilla extract until soft peaks form. Spread half of this whipped cream mixture over the bottom cake layer. Add the remaining cake layer on top and spread the remaining whipped cream over the entire cake.
Gently press the 0.25 cup of edible flowers and 0.125 cup of chopped fresh mint leaves into the whipped cream to create a beautiful, fragrant garnish. The mint adds a refreshing contrast to the sweet cake layers, while the edible flowers make this cake look as magical as it tastes.
Pro Tips For Making Flower Pot Cake
- Melt Butter Slowly: Take your time warming the butter over low heat—if you rush it, you’ll end up with greasy streaks in the batter instead of smooth, emulsified fat. I used to crank the heat and wonder why my cake turned out dense; now I just let it melt like butter on toast.
- Whisk Eggs First: Beat the eggs and sugar together until the mixture is pale and ribbony—this adds air and lightness the cake desperately needs. I skipped this once and got a brick instead of a cloud. (Yes, even if you’re impatient like me.)
- Sift That Flour: Don’t just dump the flour—sift it twice (once into the bowl, once more after mixing) to avoid lumps and guarantee an even crumb. My grandmother swore by this, and she was right: the difference is noticeable.
- Test Doneness Early: Check the cake 5 minutes before the recipe’s suggested time—flower pots can dry out faster than regular pans. If the top springs back slowly and the center’s just set, pull it out. (Your future self will thank you.)
Flavor customization for this dish
Sweet Surprise Fillings
Swap the strawberry jam for raspberry compote by simmering 1 cup raspberries, 2 tbsp sugar, and 1 tbsp lemon juice for 10 minutes until thickened. Strain seeds for a silky texture.
For chocolate lovers, use dark chocolate ganache—melt 8 oz dark chocolate with ½ cup heavy cream, then cool slightly before spreading. Both options keep the surprise element while adding rich depth. 🍫
Boozy Twists
Infuse the whipped cream with 1 tbsp Grand Marnier or 1 tsp orange liqueur for a citrusy kick. For a boozy filling, reduce ½ cup strawberry jam with 2 tbsp bourbon and 1 tbsp brown sugar to create a caramelized bourbon glaze.
The alcohol cooks off, leaving behind a warm, aromatic surprise. Pair with a vanilla bean scraped into the cake batter for extra complexity. 🥃
Seasonal Fruit Swaps
In summer, use peach jam or fresh sliced peaches lightly macerated with 1 tbsp honey and 1 tsp lime zest. For autumn, try apple compote made with 1 cup diced apples, 1 tbsp cinnamon, and 1 tbsp maple syrup.
Winter calls for cranberry-orange filling—simmer 1 cup cranberries, 2 tbsp orange juice, and 1 tbsp sugar until jammy. Each swap keeps the cake’s structure while celebrating seasonal flavors. 🍎
Spiced Variations
Add warmth with gingersnap crumbles—pulse ½ cup gingersnaps in a food processor and sprinkle between layers. For a chai-inspired twist, steep 1 chai tea bag in the milk before mixing it into the batter.
A pinch of cardamom or cinnamon in the whipped cream adds aromatic depth. These spices complement the cake’s sweetness without overpowering the surprise filling. 🌶️
Vegan Adaptations
Replace butter with 1.5 cups vegan butter (like Miyoko’s) and eggs with 4 flax eggs (mix 4 tbsp ground flaxseed with 10 tbsp water, let sit for 5 minutes).
Use coconut whipped cream (chill 1 can full-fat coconut cream overnight, whip the solid part with 1 tsp vanilla). For the filling, try vegan strawberry jam or cashew cream (blend 1 cup soaked cashews, 2 tbsp maple syrup, and 1 tbsp lemon juice).
The cake stays sturdy and delicious! 🌱
Gluten-Free Option
Substitute all-purpose flour with a 1:1 gluten-free baking flour blend (like King Arthur Measure for Measure). Add ½ tsp xanthan gum to improve structure. For the filling, use apricot jam or mango purée—both pair well with gluten-free cakes.
The cake will be slightly denser but still holds its shape beautifully in the pot. Test with a toothpick to ensure doneness—gluten-free batters sometimes need 5 extra minutes** in the oven. 💪
Nutrition facts
Frequently asked questions
Can I bake this cake directly in the flower pot without transferring it later?
Yes! The recipe is designed to work either way. Baking directly in the pot creates a rustic, earthy look that enhances the whimsical presentation. Just ensure your decorative pot is oven-safe and can handle 350°F. The soil base helps insulate the cake for even baking. If you prefer a cleaner look, you can bake in a round pan first and transfer the cake to the pot afterward.
What if I don’t have a decorative ceramic pot? Can I use a regular cake pan?
If you don’t have a decorative pot, bake the cake in a standard 8-inch round cake pan instead. After cooling, you can still create the “flower pot” effect by placing the cake on a plate topped with potting soil and a few edible flowers. The surprise filling layer remains the same—just assemble the cake as directed and present it creatively.
How do I keep the cake from falling apart when removing it from the pot?
Let the cake cool completely in the pot before attempting to remove it. Run a thin knife around the edges to loosen it, then place a cake stand or plate over the pot and carefully invert both. If the cake resists, gently tap the sides of the pot or use a spatula to help coax it free. The soil base should stay in the pot while the cake lifts cleanly. If it crumbles slightly, don’t worry—the cake will still taste delicious!
Can I make this cake ahead of time and serve it later?
The cake itself stays fresh for 2 days at room temperature, but the whipped cream filling will soften. For best results, assemble the cake 4-6 hours before serving to allow flavors to meld. If you need to store it longer, freeze the assembled cake (without soil) for up to 1 month. Thaw overnight in the refrigerator before serving. Garnish with edible flowers just before serving for the freshest look.
What’s the best way to hide the soil when serving?
Place the cake on a decorative plate or stand to cover the soil completely. For an extra touch, wrap the base of the pot with a ribbon or lace to create a polished look. If you’re serving outdoors, you can even place the pot on a tray lined with a pretty doily. The focus should be on the cake itself—let the surprise filling take center stage once it’s sliced!

- Braised Beef Short Ribs Recipe: Crock Pot Fall-Off-Bone Magic in 6 Hours - November 1, 2026
- Crock Pot Cocoa Recipe: Velvety Warmth With Hidden Spice Magic - November 1, 2026
- White Queso Crock Pot Recipe: Ultra-Smooth Melt Without the Grain - November 1, 2026