
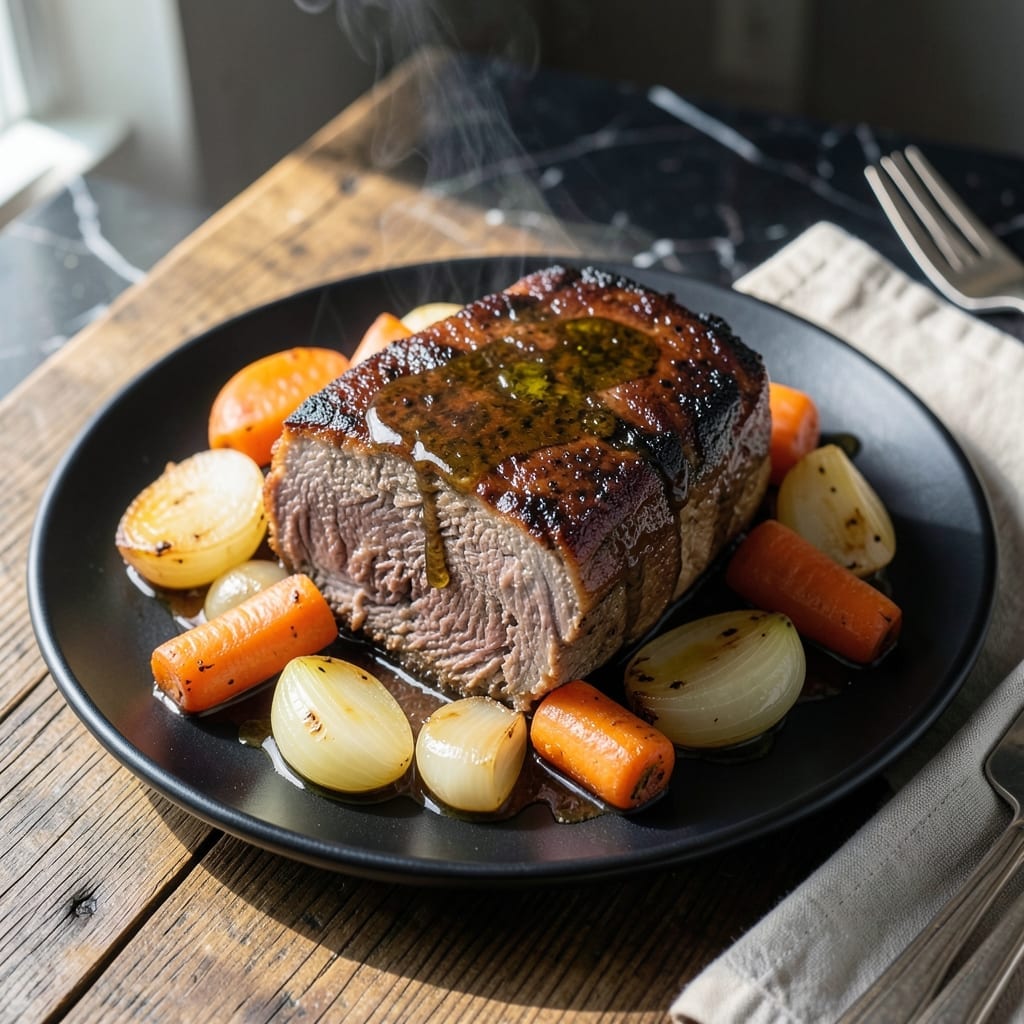
This pot roast delivers Dutch oven quality in a fraction of the time using your Foodi pressure cooker. The multi-functional appliance transforms tough cuts into tender, fall-apart meat with rich, concentrated flavors.
The secret lies in the pressure cooking process, which breaks down connective tissue quickly while locking in moisture. You’ll achieve the same deep, complex flavors as traditional braising but without the long wait.
By the time it’s done, you’ll have melt-in-your-mouth beef surrounded by vegetables that have absorbed all the savory goodness. The result is a complete meal with minimal effort and maximum flavor.
Perfect for busy weeknights when you want comfort food without the all-day commitment.
Ingredients for Foodi Pot Roast
Transform tough cuts into tender perfection with these Dutch oven-worthy ingredients for your Foodi.
| Ingredient | Amount | Notes |
|---|---|---|
| Chuck Roast 🥩 | 3 lb | Boneless, well-marbled cut preferred |
| Kosher Salt 🧂 | 2 tsp | Diamond Crystal brand recommended |
| Freshly Ground Black Pepper 🌶️ | 1 tsp | Coarse grind for texture |
| Olive Oil 🫒 | 2 tbsp | Extra-virgin for rich flavor |
| Yellow Onions 🧅 | 2 whole | Large, quartered for even cooking |
| Carrots 🥕 | 4 whole | Peeled and cut into 3-inch chunks |
| Russet Potatoes 🥔 | 4 whole | Medium-sized, halved or quartered |
| Garlic Cloves 🧄 | 6 cloves | Minced for robust flavor |
| Beef Broth 💧 | 2 cups | Low-sodium preferred for control |
| Red Wine 🍷 | 1 cup | Dry, like Cabernet Sauvignon |
| Tomato Paste 🍅 | 2 tbsp | For depth of flavor |
| Worcestershire Sauce 🍶 | 1 tbsp | Adds umami complexity |
| Fresh Thyme Sprigs 🌿 | 3 pieces | Tied together for easy removal |
| Fresh Rosemary Sprigs 🌿 | 2 pieces | Optional but recommended |
| Bay Leaves 🍃 | 2 pieces | Dried, whole leaves |
The chuck roast is non-negotiable here—look for good marbling at Costco or Whole Foods. Well-marbled chuck breaks down beautifully under pressure, giving you that melt-in-your-mouth texture. Avoid lean cuts like round or sirloin; they’ll dry out. I always grab Certified Angus Beef when it’s on sale (the extra fat is your friend). For the wine, any bold dry red works—don’t waste a fancy bottle, but don’t use cooking wine either (it’s salty junk).
No red wine? Beef broth plus a splash of balsamic gets you 90% there. Fresh herbs are ideal, but dried at one-third the amount works in a pinch. If you’re out of tomato paste, those squeeze tubes from Trader Joe’s are a lifesaver. The potatoes can be Yukon Golds if you prefer a waxier texture. Worried about sodium? Use homemade beef stock or no-salt-added broth.
This reheats like a dream—actually tastes better the next day. Keeps 4-5 days in the fridge, freezes for 3 months. I portion leftovers into meal-sized containers so dinner’s sorted for the week. Pro tip: skim the fat after chilling for a cleaner reheat.
Why You’ll Love This Recipe
- One Pot Wonder: Honestly, I just sear the chuck roast, toss in onions, and let the oven do the rest.
- Falling-Apart Tender: That slow-cooked chuck roast with kosher salt and pepper? Ridiculously good—melts in your mouth.
- Sunday Dinner, Tuesday Leftovers: I serve it fresh with mashed potatoes, then pile the extras into sandwiches the next day.
- Budget-Friendly Feast: A big cut of chuck roast feeds my family for days without breaking the bank.
Step-by-Step Instructions for Dutch Oven Style Pot Roast
This method delivers fall-apart tender beef with rich, deeply flavored vegetables in record time.
Step 1: Sear and Season the Chuck Roast
Pat the 3 lb Chuck Roast completely dry with paper towels—this ensures a proper sear. Season generously with the 2 tsp Kosher Salt and 1 tsp Freshly Ground Black Pepper, pressing the seasoning into all sides so it adheres well.
Heat the 2 tbsp Olive Oil in your pressure cooker or Dutch oven over medium-high heat. When the oil shimmers, add the chuck roast and sear for 3-4 minutes per side until deeply browned. You’re building a flavor foundation here, so don’t rush this step. Transfer the roast to a plate and set aside.
Step 2: Sauté Aromatics and Deglaze
In the same pot, add the 2 whole Yellow Onions (quartered), 4 whole Carrots (peeled and cut into chunks), and 4 whole Russet Potatoes (halved or quartered). Sauté for 5 minutes, stirring occasionally, until the onions begin to soften and develop a light golden color.
Add the 6 cloves Garlic Cloves (minced) and cook for 30 seconds until fragrant. Stir in the 2 tbsp Tomato Paste and cook for 1 minute, allowing it to deepen in color. Pour in the 1 cup Red Wine and scrape the bottom of the pot to release all the browned bits. This deglazing step is crucial for building rich, complex flavors.
Step 3: Pressure Cook to Perfection
Return the seared chuck roast to the pot. Pour in the 2 cups Beef Broth and add the 1 tbsp Worcestershire Sauce, 3 pieces Fresh Thyme Sprigs, 2 pieces Fresh Rosemary Sprigs, and 2 pieces Bay Leaves. Stir gently to combine.
Secure the lid on your pressure cooker and set it to high pressure for 60 minutes. If using a Dutch oven, bring to a simmer, cover, and transfer to a 325°F oven for 3-4 hours. For the pressure cooker, allow a natural release for 15 minutes before carefully opening the lid. The roast should be fork-tender and the vegetables soft but not mushy.
Step 4: Rest and Serve
Remove the chuck roast from the pot and transfer it to a cutting board. Let it rest for 10 minutes before shredding or slicing—this allows the juices to redistribute, ensuring every bite is moist and flavorful.
Skim any excess fat from the surface of the cooking liquid if desired, then serve the vegetables and sauce alongside the beef. The sauce should be thick and rich, coating the back of a spoon. Garnish with fresh herbs if you like, and enjoy this hearty, comforting meal with crusty bread or mashed potatoes.
Pro Tips For Making Foodi Pot Roast
- Sear the Chuck: Use high heat and about 2 tablespoons of olive oil to get a deep brown crust on the chuck roast—this builds flavor that carries through the entire dish.
- Salt Generously: I learned this the hard way: heavily salt the roast with kosher salt at least 40 minutes before cooking, or it’ll taste underseasoned no matter what you do later.
- Don’t Rush the Onions: Cook the yellow onions until they’re golden and soft, about 8-10 minutes—skipping this step leaves them raw and harsh in the final dish.
- Rest Before Slicing: After cooking, let the roast rest under foil for 15-20 minutes before slicing, or all the juices will end up on the cutting board instead of in the meat.
Dietary Considerations for These Flavors
Gluten-Free Friendly
This creation is naturally gluten-free as written, using only whole ingredients without any wheat-based components. The Worcestershire sauce is the only potential concern—check labels as some brands contain barley malt. I recommend Annie’s or Lea & Perrins gluten-free versions. 💡
Low-Carb Adaptation
To reduce carbs, simply halve the number of Russet Potatoes and Carrots, replacing them with turnips or radishes. These alternatives absorb flavors beautifully while keeping the dish hearty. The meat and sauce remain perfectly keto-friendly as is.
Dairy-Free Naturally
No modifications needed here—this dish contains no dairy products whatsoever. The richness comes from the beef itself and the slow-cooked vegetables. Perfect for anyone avoiding milk, cheese, or butter.
Sodium Considerations
For lower sodium, use low-sodium beef broth and reduce the Kosher Salt by half. The Worcestershire sauce adds significant saltiness, so you might skip it entirely. Taste before adding extra seasoning at the end.
Wine Substitution
If avoiding alcohol, replace the 1 cup Red Wine with additional beef broth plus 1 tbsp balsamic vinegar. This maintains the acidity and depth without the wine. The result is nearly identical in flavor.
Nutrition Facts
Frequently Asked Questions
Can I use a different cut of beef?
Stick with chuck roast for best results—it has the perfect fat-to-meat ratio. Brisket or short ribs work in a pinch, but avoid lean cuts like round or sirloin as they’ll turn dry.
What if I don’t have red wine?
Replace the wine with 1 cup beef broth + 1 tbsp balsamic vinegar. This keeps the acidity and depth without alcohol. The flavor difference is minimal.
Can I make this ahead?
The flavors deepen overnight in the fridge for up to 4-5 days. It also freezes well for 3 months. Reheat gently on the stovetop.

- 4C Bread Crumbs Meatballs Recipe: Crispy Crust and Juicy Centers - September 25, 2026
- 6 Oz Chocolate Chip Cookie Recipe: Perfectly Balanced Crispy Edges and Chewy Hearts - September 25, 2026
- 6-Inch Coffee Cake Recipe: Vanilla Bean Swirls and Buttery Streusel Topping - September 25, 2026