
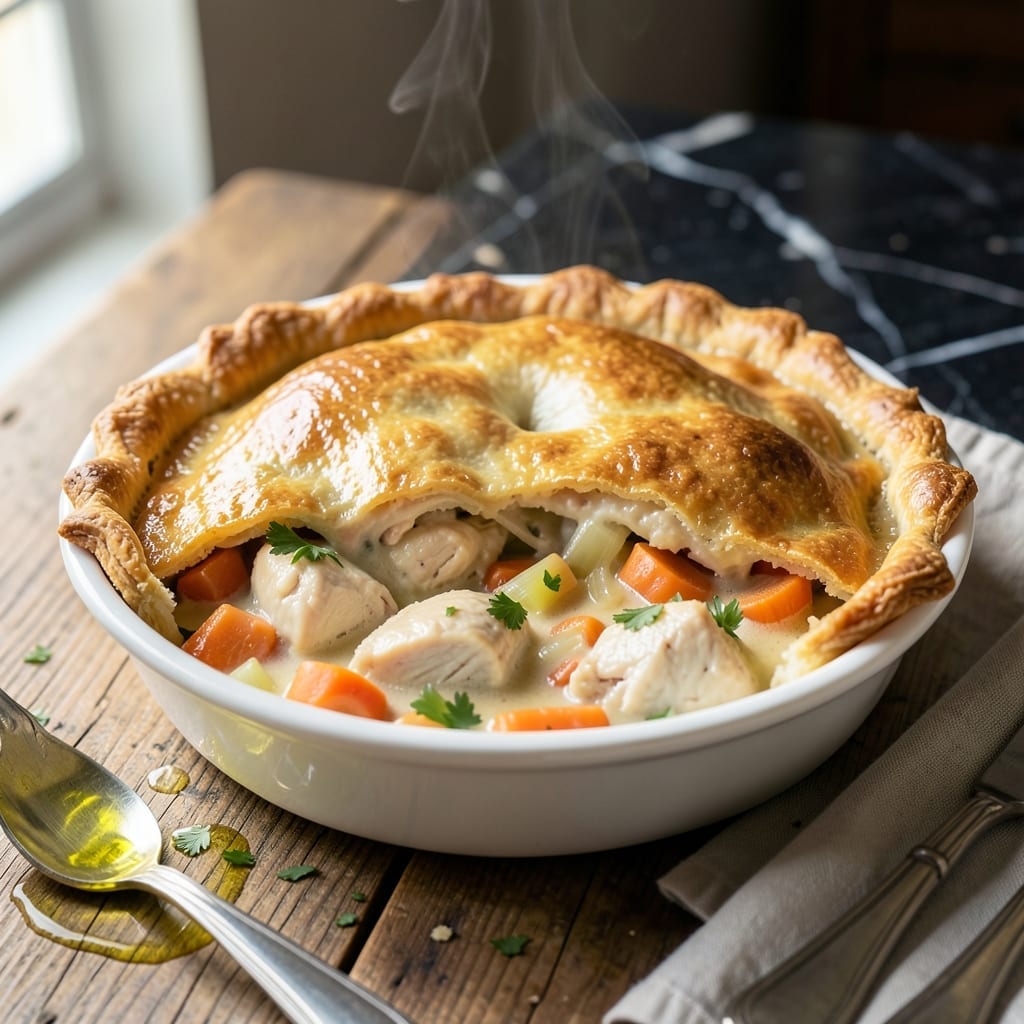
There’s something deeply comforting about a golden-crusted chicken pot pie fresh from the oven. This recipe delivers flaky layers of buttery pastry over a rich, herb-infused filling packed with tender chicken and vegetables.
I developed this version to simplify the process without sacrificing quality. The filling comes together in one pot, while the crust bakes to perfectly golden perfection. Every bite offers hearty chunks of chicken, creamy sauce, and just the right amount of seasoning.
What sets this apart is the balance—enough filling to satisfy, enough crust to indulge. The herbs add warmth, while the vegetables keep it wholesome. It’s a meal that feels like a hug on a chilly evening.
Ready in under 90 minutes, this is comfort food worth the effort.
Ingredients for Free Chicken Pot Pie
Golden crust meets herb-kissed filling with tender chicken and garden vegetables in every bite.
| Ingredient | Amount | Notes |
|---|---|---|
| Boneless Skinless Chicken Breasts 🍗 | 1 ½ lb | Cut into 1-inch chunks |
| Unsalted Butter 🧈 | ½ cup | Divided for filling and crust |
| All-Purpose Flour 🌾 | ⅓ cup | For roux thickening |
| Yellow Onion 🧅 | 1 whole | Diced medium fine |
| Carrots 🥕 | 2 whole | Peeled and sliced |
| Celery Stalks 🥬 | 2 pieces | Diced into 1/4-inch pieces |
| Frozen Green Peas 🌱 | 1 cup | No need to thaw |
| Chicken Broth 🍲 | 2 cups | Low-sodium preferred |
| Whole Milk 🥛 | ¾ cup | For creamy sauce base |
| Fresh Thyme Leaves 🌿 | 1 tbsp | Chopped finely for herb infusion |
| Fresh Rosemary 🌿 | 1 tsp | Minced for aromatic depth |
| Garlic Cloves 🧄 | 2 cloves | Minced for savory base |
| Kosher Salt 🧂 | 1 ½ tsp | Diamond Crystal preferred |
| Freshly Ground Black Pepper 🌶️ | ½ tsp | Adjust to taste preference |
| Refrigerated Pie Crusts 🥧 | 2 sheets | For top and bottom crusts |
The chicken quality elevates this dish. Boneless, skinless breasts from Whole Foods or Costco ensure tender, juicy chunks—avoid pre-cut pieces as they often lack moisture. For the crust, Pillsbury refrigerated pie dough delivers consistent flakiness without the effort. The herbs should be fresh (thyme and rosemary), as dried won’t provide the same aromatic brightness for the filling.
No fresh herbs? Dried at one-third the amount works in a pinch, though fresh is ideal. Swap chicken for rotisserie chicken to save 20 minutes. Vegetable flexibility is key—mushrooms or corn work well. For a richer sauce, heavy cream instead of milk adds decadence. The broth can be homemade or Better Than Bouillon for depth.
Assemble and refrigerate unbaked pie for up to 1 day ahead. Baked pie keeps 3-4 days refrigerated and reheats beautifully. Freeze baked slices for 2 months—perfect for quick meals. Always cool completely before storing to preserve crust flakiness.
Why You’ll Love This Recipe
- One Pan Wonder: I toss everything—chicken, carrots, onion—into a single dish and let the oven do the work.
- Buttery Comfort: The flaky crust and creamy filling with tender chicken breasts just hits different on a chilly night.
- Feeds the Crew: I make a big batch and it’s gone in one sitting, or I stretch it for two meals with sides.
- Leftovers? Yes Please: Honestly, it tastes even better the next day, and my kids fight over the last slice.
Step-by-Step Instructions for Chicken Pot Pie
This method ensures a golden crust and rich, velvety filling with every bite.
Step 1: Prepare and Cook the Chicken and Vegetables
Cut the 1.5 lb Boneless Skinless Chicken Breasts into 1-inch chunks and season with 1 tsp of the Kosher Salt and 0.5 tsp Freshly Ground Black Pepper. Heat 1 tablespoon of the 0.5 cup Unsalted Butter in a large skillet over medium-high heat until melted.
Add the chicken and cook for 5-6 minutes until the pieces are lightly golden and just cooked through. Remove the chicken to a plate and set aside. In the same skillet, add the 1 whole Yellow Onion, 2 whole Carrots, and 2 pieces Celery Stalks. Sauté for 4-5 minutes until the vegetables begin to soften.
Step 2: Create the Roux and Build the Filling
Reduce heat to medium and add the remaining 0.5 cup Unsalted Butter to the skillet. Once melted, sprinkle in the 0.33 cup All-Purpose Flour and whisk constantly for 1-2 minutes until the mixture turns a light golden brown and smells nutty. This roux will thicken the filling.
Slowly pour in the 2 cups Chicken Broth, whisking continuously to avoid lumps. Stir in the 2 cloves Garlic Cloves, 1 tbsp Fresh Thyme Leaves, and 1 tsp Fresh Rosemary. Add the 1 cup Frozen Green Peas and the cooked chicken. Simmer for 3-4 minutes until the mixture thickens slightly.
Step 3: Finish the Filling and Preheat the Oven
Stir in the 0.75 cup Whole Milk and the remaining 0.5 tsp Kosher Salt. Continue to simmer for 2-3 minutes until the filling reaches a creamy consistency that coats the back of a spoon. Taste and adjust seasoning if needed. Remove from heat and let it cool slightly.
Meanwhile, preheat your oven to 400°F and allow the 2 sheets Refrigerated Pie Crusts to sit at room temperature for 15 minutes to make them easier to handle.
Step 4: Assemble and Bake the Pot Pie
Unroll one sheet of the Refrigerated Pie Crusts and place it in a 9-inch pie dish, pressing gently to fit. Pour the filling into the crust. Unroll the second sheet and place it over the filling. Crimp the edges to seal, then cut several small slits in the top crust to allow steam to escape.
Bake for 30-35 minutes until the crust is deep golden brown and the filling is bubbling. If the edges brown too quickly, cover them with foil or a pie shield. Let the pot pie rest for 10 minutes before slicing to allow the filling to set.
Pro Tips For Making Free Chicken Pot Pie
- Poach the Chicken: Simmer the boneless chicken breasts in salted water for 12-15 minutes until just cooked through—this keeps them juicy instead of dry when baked in the pie. I learned this the hard way after too many overcooked, rubbery bites.
- Sweat the Onions: Cook the yellow onions in butter over medium-low heat for at least 8-10 minutes until soft and translucent, not browned. Rushing this step leaves them crunchy and raw-tasting in the filling.
- Thicken Slowly: After adding flour to the butter and veggies, cook the router for 2-3 minutes to remove the raw flour taste before adding liquid. Skipping this makes the filling taste pasty.
- Pre-Cook Carrots: Parboil the diced carrots for 3-4 minutes before adding to the pie—this guarantees they’ll be tender after baking. Sounds like an extra step, but it actually changes the outcome.
Essential Equipment for This Dish
Pie Dish Essentials
Use a 9-inch glass pie dish for even heat distribution and to monitor the bottom crust browning. I prefer Pyrex because it handles temperature changes well. Avoid dark metal pans as they can overbrown the crust. 💡
Rolling Pin Matters
A wooden rolling pin gives you better control for rolling out the crust to an even ⅛-inch thickness. If your crust is store-bought like Pillsbury, a tap with the pin helps seal the edges tightly before crimping.
Pastry Brush
Invest in a silicone pastry brush for an even egg wash on the top crust. This creates that beautiful golden-brown finish and helps the slits stay defined. I keep one dedicated just for baking to avoid any savory contamination.
Sharp Knife
A serrated knife cuts through the top crust cleanly without compressing the layers. This ensures steam vents properly and the pie maintains its structure. A 9-inch blade gives you the reach you need for precise slits.
Skillet Choice
For the filling, a 12-inch stainless steel skillet provides ample room for all ingredients to cook evenly. I use All-Clad for its even heat distribution, which prevents hot spots that can burn the roux.
Cooling Rack
Always cool your pot pie on a wire rack to allow air circulation underneath. This prevents the bottom crust from getting soggy. Let it rest for the full 10 minutes to set the filling completely.
Nutrition Facts
Frequently Asked Questions
Can I use pre-cooked chicken?
Yes, rotisserie chicken works great and saves 20 minutes. Just shred or chop into 1-inch chunks and add to the filling when directed.
Why did my filling turn out watery?
This usually means the roux didn’t cook long enough. Whisk the flour and butter for a full 1-2 minutes until golden. Also, simmer the filling until it coats a spoon.
Can I make this ahead of time?
Assemble the unbaked pie and refrigerate for up to 1 day. Or bake, cool, and store in the fridge for 3-4 days. Reheat in a 375°F oven.

- 4C Bread Crumbs Meatballs Recipe: Crispy Crust and Juicy Centers - September 25, 2026
- 6 Oz Chocolate Chip Cookie Recipe: Perfectly Balanced Crispy Edges and Chewy Hearts - September 25, 2026
- 6-Inch Coffee Cake Recipe: Vanilla Bean Swirls and Buttery Streusel Topping - September 25, 2026