
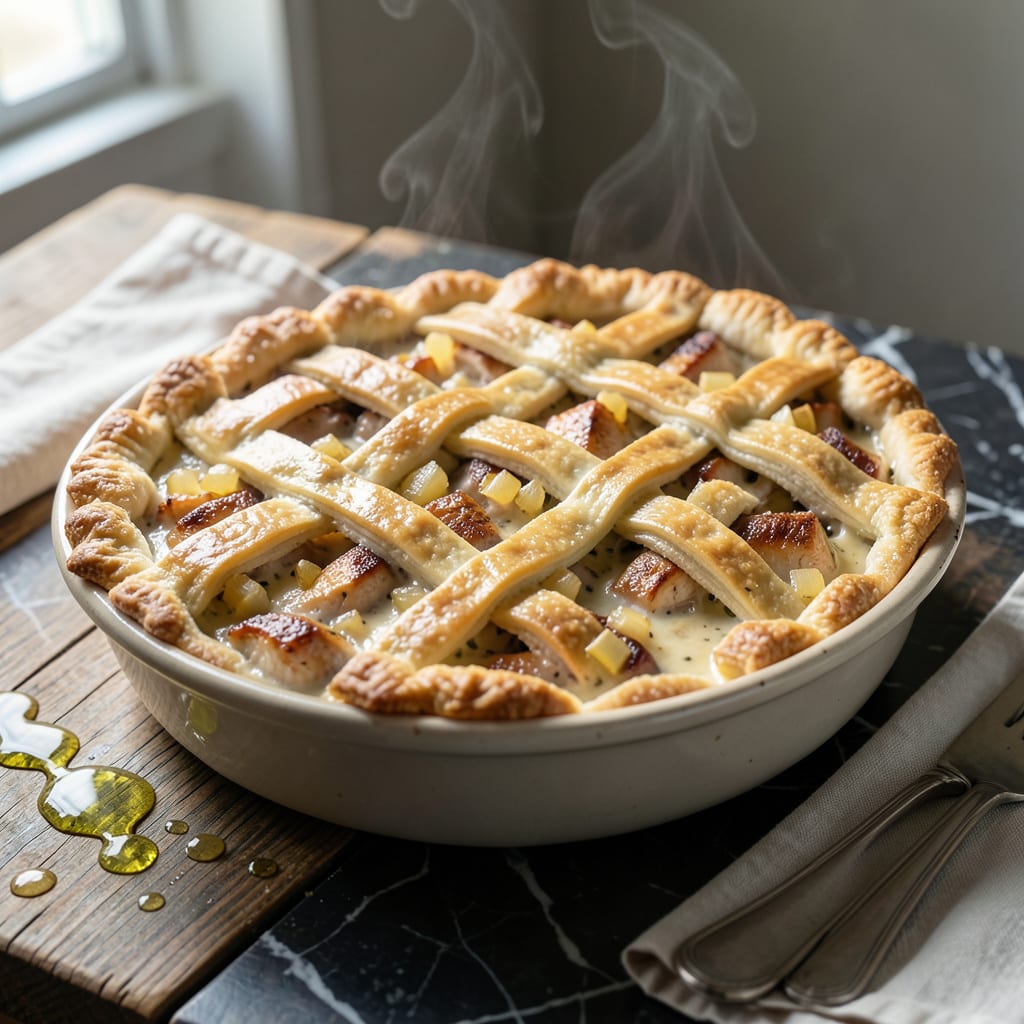
Nothing beats the comfort of a homemade pot pie, especially when you can make it ahead and freeze for later. This recipe delivers flaky pastry and hearty filling without last-minute stress.
With simple ingredients and clear steps, you’ll have a savory, satisfying meal ready to bake straight from the freezer. Perfect for busy weeks or unexpected guests.
Ingredients for Freezer Pot Pie
Flaky pastry meets hearty filling with pantry staples and fresh herbs for ultimate comfort.
| Ingredient | Amount | Notes |
|---|---|---|
| All-Purpose Flour 🌾 | 3 cups | Plus extra for dusting work surface |
| Unsalted Butter 🧈 | 1 cup | Ice cold, cubed for flakiness |
| Ice Water 💧 | ½ cup | Plus 1 tbsp as needed |
| Salt 🧂 | 1 tsp | Divided for dough and filling |
| Boneless Skinless Chicken Thighs 🍗 | 1 ¼ lb | Diced into 1-inch pieces |
| Yellow Onion 🧅 | 1 whole | Medium, finely diced |
| Carrots 🥕 | 2 whole | Medium, peeled and diced |
| Celery Stalks 🥬 | 2 whole | Diced, leaves reserved for garnish |
| Garlic Cloves 🧄 | 3 cloves | Minced for depth of flavor |
| Frozen Green Peas 🌱 | 1 cup | No need to thaw before using |
| Chicken Broth 🥣 | 1 ½ cups | Low-sodium preferred for control |
| Heavy Cream 🥛 | ½ cup | Full-fat for richness in filling |
| Fresh Thyme Leaves 🌿 | 2 tsp | Stems discarded, chopped finely |
| Fresh Rosemary 🍃 | 1 tsp | Finely chopped, stems removed |
| Black Pepper 🌶️ | ½ tsp | Freshly ground for best flavor |
The butter must be ice cold for flaky layers—Land O’Lakes or Kerrygold are reliable choices. All-purpose flour from King Arthur or Gold Medal gives consistent results. For the chicken, thighs stay juicier than breasts after freezing and baking. Look for boneless, skinless pieces at Whole Foods or your local butcher for quality control.
No fresh thyme? Dried thyme at one-third the amount works in a pinch. Swap chicken thighs for turkey thighs or rotisserie chicken to save time. The vegetables are flexible—add diced potatoes or swap peas for frozen corn. Heavy cream can be replaced with half-and-half, but the filling may be slightly less rich.
Assembled pies freeze beautifully for up to 3 months. Wrap tightly in plastic, then foil to prevent freezer burn. Bake from frozen, adding 10-15 minutes to the cooking time. The filling thickens as it cools, so let it rest before serving for the best texture.
Why You’ll Love This Recipe
- Make Ahead Magic: I can assemble these pot pies on Sunday and freeze them for those crazy weeknights when cooking feels impossible.
- Buttery Crust Love: The flaky all-purpose flour crust made with cold butter and ice water gives that perfect crunch with every bite.
- Feeds the Fam: One batch makes enough to feed my whole family, and the chicken thighs stay juicy even after freezing.
- Pennywise Comfort: Honestly, it’s cheaper than takeout and I always have the basics on hand—flour, butter, chicken—no fancy ingredients needed.
Step-by-Step Instructions for Freezer Pot Pie
This method ensures a flaky crust and rich filling that freezes beautifully for later enjoyment.
Step 1: Prepare the Pie Dough
In a food processor, pulse the 3 cups all-purpose flour with ½ tsp salt to combine. Add the 1 cup unsalted butter, cubed and ice cold, and pulse until the mixture resembles coarse crumbs with pea-sized butter pieces visible.
With the processor running, drizzle in the ½ cup ice water through the feed tube. Stop as soon as the dough begins to come together—overworking develops gluten and makes the crust tough. Turn the dough out onto a lightly floured surface, divide into two equal portions, and shape each into a disk. Wrap in plastic and refrigerate for 1 hour to relax the gluten and firm the butter.
Step 2: Make the Savory Filling
In a large skillet over medium heat, cook the diced 1.25 lb boneless skinless chicken thighs until no longer pink, about 5-7 minutes. Remove with a slotted spoon and set aside. In the same skillet, add the finely diced yellow onion, carrots, and celery stalks, cooking for 5 minutes until softened.
Stir in the minced 3 cloves garlic cloves, 2 tsp fresh thyme leaves, and 1 tsp fresh rosemary, cooking for 30 seconds until fragrant. Sprinkle with the remaining ½ tsp salt and ½ tsp black pepper. Add the 1.5 cups chicken broth and ½ cup heavy cream, simmering for 5 minutes until slightly thickened. Return the chicken to the skillet along with the 1 cup frozen green peas and cook for 2 minutes until heated through. Cool completely before assembling.
Step 3: Assemble the Pot Pies
On a lightly floured surface, roll out one dough disk to a 12-inch circle. Transfer to a 9-inch pie dish, pressing gently into the bottom and up the sides. Trim the edges, leaving a ½-inch overhang. Spoon the cooled filling into the crust, mounding slightly in the center.
Roll out the second dough disk to a 10-inch circle and place it over the filling. Trim the edges, leaving a ½-inch overhang, then fold the bottom crust over the top and crimp to seal. Cut several small slits in the top crust to allow steam to escape during baking. For freezer storage, wrap the assembled pie tightly in plastic wrap followed by aluminum foil. Freeze for up to 3 months.
Step 4: Bake to Golden Perfection
Preheat the oven to 375°F. If baking from frozen, add 15 minutes to the baking time. Place the pot pie on a baking sheet to catch any drips and bake for 45-50 minutes until the crust is deep golden brown and the filling is bubbly.
If the edges begin to brown too quickly, cover them loosely with aluminum foil. Let the pot pie rest for 10 minutes before serving to allow the filling to set. Each slice should reveal a flaky, golden crust with a creamy, hearty filling beneath.
Pro Tips For Making Freezer Pot Pie
- Chill the Dough: After mixing the flour, butter, and ice water, let the dough rest in the fridge for at least 30 minutes—this prevents shrinking when baked and makes it easier to roll out.
- Season the Thighs: Don’t just salt the crust; generously season the chicken thighs with salt before cooking, since they’ll carry the flavor through the filling.
- Avoid Soggy Bottoms: Blind-bake the bottom crust for 10 minutes before adding the filling to keep it crisp, even after freezing and reheating.
- Use Cold Butter: Cut the butter into small cubes and keep it ice-cold when mixing the crust—this creates flaky layers instead of a dense, tough pastry.
Dietary Considerations for This Dish
Gluten-Free Option
Swap the all-purpose flour for a 1:1 gluten-free baking blend like King Arthur’s Measure for Measure. The dough will be slightly more delicate, so chill it for 20 extra minutes before rolling. Use a floured surface and roll between parchment paper to prevent sticking.
Dairy-Free Adaptation
Replace the butter with cold coconut oil or dairy-free butter like Miyoko’s. For the filling, swap the heavy cream with full-fat coconut milk. The flavor will have a slight coconut note, but the texture remains rich and creamy.
Lower-Calorie Version
Use chicken breast instead of thighs to reduce fat, and swap the heavy cream for low-fat milk thickened with 1 tbsp cornstarch. This cuts calories without sacrificing the comforting texture of this dish.
Vegetarian Twist
Omit the chicken and add 1.5 cups cooked chickpeas or diced mushrooms for a hearty filling. Boost the flavor with 1 tbsp soy sauce or vegetable broth instead of chicken broth. The crust and veggies remain the same. 🌱
Nut Allergy Note
This recipe is naturally nut-free, but always check your flour and broth labels for cross-contamination warnings. If using store-bought pie crust, verify it’s produced in a nut-free facility for those with severe allergies.
Sodium Control
Use low-sodium chicken broth and reduce the added salt by ½ tsp. Fresh herbs like thyme and rosemary add flavor without extra sodium. Taste the filling before assembling to adjust seasoning as needed.
Nutrition Facts
Frequently Asked Questions
Can I use store-bought pie crust?
Yes! Use 2 store-bought pie crusts to save time. Let them thaw slightly if frozen, then roll and assemble as directed. Homemade tastes best, but store-bought works perfectly for convenience.
How do I prevent a soggy crust?
Cool the filling completely before assembling. Also, brush the bottom crust with a thin layer of beaten egg or melted butter to create a moisture barrier.
Can I bake individual pot pies?
Divide the dough and filling into 6-8 ramekins. Adjust baking time to 30-35 minutes at 375°F. Perfect for portion control or meal prep.
What’s the best way to reheat leftovers?
Cover with foil and warm in a 350°F oven for 15-20 minutes. Avoid microwaving, as it makes the crust soggy. Let it rest 5 minutes before serving.

- 4C Bread Crumbs Meatballs Recipe: Crispy Crust and Juicy Centers - September 25, 2026
- 6 Oz Chocolate Chip Cookie Recipe: Perfectly Balanced Crispy Edges and Chewy Hearts - September 25, 2026
- 6-Inch Coffee Cake Recipe: Vanilla Bean Swirls and Buttery Streusel Topping - September 25, 2026