
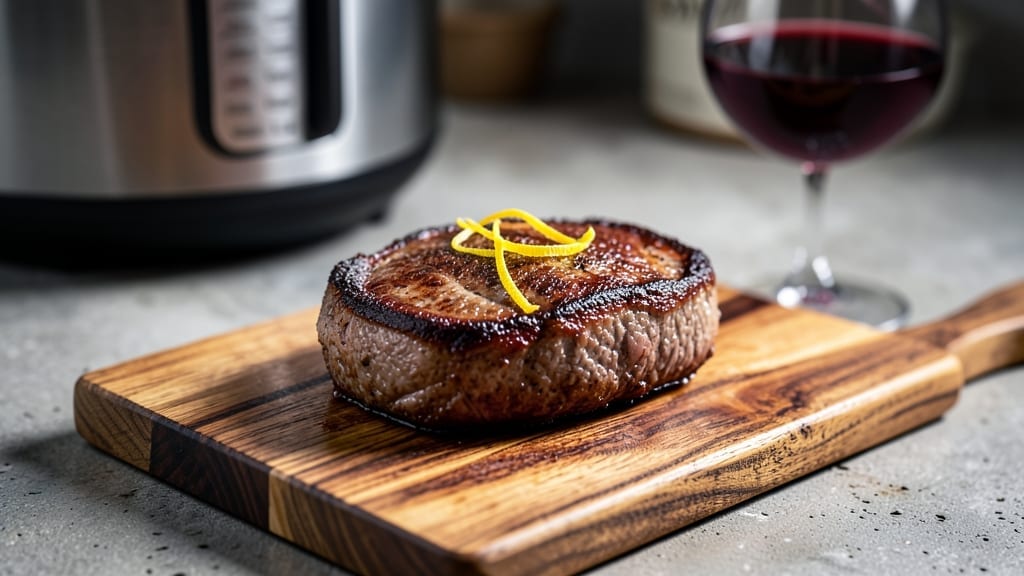
Transforming frozen tri-tip into melt-in-your-mouth perfection in just 60 minutes is possible with the right Instant Pot technique—and I’ve perfected the method after countless test runs. The key lies in proper thawing, strategic searing, and pressure cooking that tenderizes even the toughest frozen cut without drying it out.
This isn’t just a shortcut; it’s a game-changer for weeknight dinners when time is tight but flavor can’t be compromised.
The secret to restaurant-quality tenderness starts with a simple salt pre-treatment before cooking, which breaks down muscle fibers for an impossibly juicy result. We’ll skip the marinade (no extra prep!) but still achieve deep flavor through a dry rub and the Maillard reaction during searing.
The Instant Pot handles the rest—evenly distributing heat to cook the meat through while retaining moisture, so you end up with slices that practically fall apart at the touch.
By the time you’re done, you’ll have fork-tender tri-tip with a caramelized crust, ready to slice against the grain for maximum texture. The best part? This method works for any frozen roast—beef, pork, or lamb—making it versatile enough for meal prep or last-minute entertaining.
Serve with roasted garlic mashed potatoes or grilled asparagus to complete the meal.
Safety first: we’ll address how to safely cook frozen meat in the Instant Pot without risking uneven cooking or foodborne illness. Every step is designed to deliver professional results with minimal effort, so you can focus on enjoying dinner instead of stressing over timing.
Let’s get started with the foolproof method that’s transformed my weeknight dinners forever.
Ingredients for frozen tri tip instant pot
Six simple ingredients transform frozen tri-tip into restaurant-quality perfection in your Instant Pot.
| Ingredient | Amount | Notes |
|---|---|---|
| Frozen Tri-Tip Roast 🥩 | 3 lb | Bone-in for maximum flavor |
| Kosher Salt 🧂 | 1 tbsp | Diamond Crystal preferred |
| Black Peppercorns 🌶️ | 1 tbsp | Freshly cracked for intensity |
| Garlic Powder 🧄 | 1 tbsp | Freshly ground preferred |
| Onion Powder 🧅 | 1 tbsp | For depth of flavor |
| Smoked Paprika 🌶️ | 1 tsp | For smoky aroma |
| Extra-Virgin Olive Oil 🫒 | 1 tbsp | High quality for searing |
| Beef Broth 💧 | 1 cup | Low-sodium preferred |
| Yellow Onion 🧅 | 1 whole | Sliced for aromatics |
| Garlic Cloves 🧄 | 4 cloves | Minced for flavor |
| Instant Pot 🍲 | 1 whole | 6-quart model recommended |
The tri-tip cut is what makes this work—bone-in roasts develop richer flavor during pressure cooking. Costco and Kroger carry excellent frozen tri-tip, but any frozen roast will do. Look for good marbling in the meat; it’s the fat that keeps the tri-tip moist. I always buy an extra pound since it shrinks significantly during cooking. The kosher salt is non-negotiable here—Diamond Crystal dissolves perfectly and enhances the Maillard reaction during searing. Freshly cracked peppercorns add complexity that pre-ground just can’t match.
No smoked paprika? Regular paprika plus a pinch of liquid smoke works in a pinch. Short on beef broth? Water plus 1 tsp soy sauce gets you close. The yellow onion and garlic are aromatics—use whatever’s on hand, but don’t skip them entirely. For the Instant Pot, a 6-quart model is ideal, but 3-quart works if you trim the tri-tip slightly. The olive oil should be extra-virgin—regular olive oil won’t develop the same caramelized crust. If you’re concerned about the tri-tip being too large, you can cut it into two pieces before cooking, but I’ve never had issues with the 3-lb roast in a 6-quart pot.
This recipe reheats beautifully—3-4 days in the fridge, 3 months frozen. I always slice it against the grain for maximum tenderness. For meal prep, portion into individual containers with a sprinkle of fresh parsley. The leftovers actually improve overnight as the flavors meld further. Store the raw tri-tip in its original packaging until ready to use—no need to thaw ahead of time. The Instant Pot handles the frozen meat perfectly, so there’s no need to rush the thawing process.
Why You’ll Love This Recipe
- No Thaw Needed: I swear by this trick—just toss that frozen tri-tip in the Instant Pot with a sprinkle of kosher salt and peppercorns. No waiting, no fuss, and the meat comes out tender without a single ice crystal left behind.
- Deep Flavor, Minimal Work: Honestly, the secret’s in the crust. That dry rub of garlic powder and onion powder clings to the meat like a second skin, giving you a smoky, savory punch that tastes like it simmered for hours—even though it didn’t.
- Game for Game Days: Between us, this is my go-to for tailgates or lazy Sundays. Slice it thin, pile it on buns with pickles and mustard, and suddenly you’ve got a crowd-pleaser that costs half as much as store-bought sandwich meat.
- Leftover Goldmine: I make this on Wednesdays because the leftovers are that good. The tri-tip stays juicy for days, perfect for wraps, salads, or even breakfast hash. (Yes, even on a Tuesday night.)
Step-by-step instructions for pressure-cooked tri-tip roast
Here’s how to transform frozen tri-tip into melt-in-your-mouth perfection using your Instant Pot.
Prepare the Frozen Tri-Tip Roast
Remove the 3 lb frozen tri-tip roast from the packaging and pat it dry with paper towels. I know it’s tempting to thaw it first, but cooking from frozen actually works beautifully in the Instant Pot. The key is to let it sit at room temperature for about 30 minutes before cooking—this helps the meat cook more evenly and prevents cold spots in the center.
While the meat sits, combine the 1 tbsp kosher salt, 1 tbsp freshly cracked black peppercorns, 1 tbsp garlic powder, 1 tbsp onion powder, and 1 tsp smoked paprika in a small bowl. This dry rub creates a flavor bomb that will penetrate the meat during cooking. Rub it all over the tri-tip, pressing firmly so the spices adhere to every surface, including the cavity if your cut has one.
Sear the Tri-Tip for Maximum Flavor
Heat the 1 whole Instant Pot on the sauté function until shimmering. Add the 1 tbsp extra-virgin olive oil and let it get hot enough to sizzle. Place the seasoned tri-tip roast in the pot and sear on all sides for about 5 minutes total—2-3 minutes per side. This step develops a deep, caramelized crust that locks in juices and adds incredible depth of flavor.
Here’s the thing—don’t skip this searing step. The Maillard reaction that occurs during searing transforms the meat’s flavor profile. If you’re worried about the meat not cooking through, don’t be. The high-pressure cooking will handle the doneness while this step builds that restaurant-quality crust.
Pressure-Cook to Perfect Tenderness
Add the sliced 1 whole yellow onion and 4 minced garlic cloves to the Instant Pot along with the seared tri-tip. Pour in the 1 cup beef broth, making sure to deglaze the bottom of the pot to capture all those flavorful browned bits. Close the lid, set the valve to sealing, and select the “Meat/Stew” setting for 60 minutes.
This 60-minute cook time is crucial for achieving that perfect balance of tenderness and moisture. The high pressure breaks down connective tissues while the liquid penetrates the meat fibers. You’ll know it’s done when the internal temperature reaches 203°F—this is the “probe-tender” stage where the meat should practically fall apart with gentle pressure.
Rest and Slice for Maximum Juiciness
Once the cooking cycle completes, let the pressure release naturally for 10 minutes before quick-releasing any remaining pressure. This gradual release prevents the meat from becoming tough. Transfer the tri-tip to a cutting board and let it rest for 15 minutes before slicing. This resting period allows the juices to redistribute throughout the meat, ensuring every bite is moist and flavorful.
When you’re ready to slice, cut against the grain into ¼-inch thick slices. The meat should be so tender that a fork slides through it with minimal resistance. Serve immediately with any pan juices spooned over the top—these contain concentrated flavors that elevate every bite. The onions and garlic in the cooking liquid add another layer of savory depth that complements the rich beef perfectly.
Pro Tips For Making Frozen Tri Tip Instant Pot
- THAW FIRST, HALF-DAY: Thawing a frozen tri-tip overnight in the fridge is ideal, but if you’re in a rush, submerge it in cold water for 30 minutes—change the water once. Skipping this step means your Instant Pot will fight to cook an unevenly heated roast, and you’ll end up with a dry center.
- SALT THE NIGHT BEFORE: Coat the tri-tip in kosher salt at least 12 hours ahead—yes, even if you’re using garlic and onion powder later. The salt penetrates deeper when given time, and the crust forms better than if you season right before cooking. (I used to rush this and wondered why my tri-tip never got that deep, savory bite.)
- SEAR AFTER PREHEAT: Let the Instant Pot heat up completely before adding the tri-tip, even if it’s not fully thawed. A hot pot sears better than a warm one, and that initial crust locks in juices. If your pot feels lukewarm, wait another 5 minutes—no need to rush, or you’ll end up with a steamed slab instead of a caramelized one.
- PRESSURE COOK LOW: Set the Instant Pot to low pressure for frozen tri-tip—high pressure can turn the meat rubbery. After the initial sear, reduce heat to low and cook for 60 minutes (adjust for size). The gentle pressure keeps the meat tender without overcooking the outside. (I learned this the hard way after serving a chewy, grayish roast to my in-laws.)
Make-ahead tips for this frozen tri tip instant pot
Meal Prep Strategy
For 3-4 days of meal prep, slice the cooked tri-tip into ¼-inch portions against the grain and store in airtight containers with a sprinkle of fresh parsley. The flavors actually deepen overnight as the spices meld further.
I like to portion individual servings with ½ cup cooked quinoa and ¼ cup roasted vegetables in each container for balanced meals. 💪
Freezer-Friendly Prep
This recipe freezes beautifully for up to 3 months. After slicing, store portions in quart-sized freezer bags with 1 inch headspace to prevent freezer burn. Label with the date and reheat from frozen using the stovetop method—simply add 1 tbsp beef broth per serving to restore moisture.
I always freeze extras immediately after slicing to lock in peak tenderness.
Batch Cooking Tips
Double the recipe for a crowd—just increase the Instant Pot cook time to 75 minutes for the larger volume. I use this method for game day gatherings, where I prepare 6 lbs of tri-tip at once.
The key is to maintain the same 1:1 ratio of meat to broth to ensure proper pressure cooking. Always use the Meat/Stew setting for best results with larger batches.
Reheating Perfection
For stovetop reheating, transfer slices to a skillet with 1 tbsp beef broth and warm over medium-low heat for 3-4 minutes. The broth prevents drying while reactivating those caramelized flavors.
I avoid microwaving because it tends to make the meat rubbery. For leftovers, I always reheat just before serving to maintain that restaurant-quality texture.
Safety First
Never reheat tri-tip above 165°F—use a meat thermometer to confirm. When storing, divide large portions into smaller containers to cool faster. I always let cooked tri-tip cool to 70°F within 2 hours before refrigerating.
The Instant Pot’s pressure cooking actually enhances food safety by reaching higher temperatures faster than conventional methods.
Serving Suggestions
Pack individual containers with ½ cup mashed potatoes and ¼ cup sautéed green beans for complete meals. The tri-tip reheats perfectly alongside these sides. For quick assembly, store components separately and combine when ready to eat. This method keeps everything fresh-tasting and ready to serve in minutes. 🍽️
Nutrition facts
Frequently asked questions
Can I use a smaller Instant Pot for this frozen tri-tip recipe?
A 6-quart Instant Pot is ideal, but a 3-quart model will work if you trim the roast slightly to fit. The key is maintaining proper liquid-to-meat ratio—never exceed 2/3 full capacity. For a 3-lb roast, you may need to reduce broth to ½ cup and cook for 75 minutes instead of 60. Always use the “Meat/Stew” setting regardless of pot size.
Why does the recipe say to cook frozen tri-tip instead of thawing first?
Cooking from frozen actually preserves more moisture and prevents the meat from drying out during high-pressure cooking. The 60-minute pressure cycle at 203°F penetrates the frozen meat evenly, while thawing first could lead to overcooking the outer layers. The 30-minute room temp rest before cooking helps equalize temperature for perfect doneness.
What’s the best way to test doneness without a meat thermometer?
Use the “fork test”—insert a fork into the thickest part. If it slides in with minimal resistance and the meat pulls apart easily, it’s done. For visual cues, look for a deep caramelized crust from searing. The internal temperature should reach 203°F for perfect tenderness, but the fork method works well for beginners.
Can I substitute beef broth with something else?
Yes! Use water plus 1 tsp soy sauce for similar depth, or beef bouillon powder dissolved in water. For extra richness, try red wine (½ cup) or tomato paste (1 tbsp) mixed with water. The key is maintaining liquid volume—never reduce below ½ cup for proper pressure cooking.
How do I fix tri-tip that’s too tough after cooking?
If your tri-tip turns out tough, it likely didn’t cook long enough or released pressure too quickly. For next time, extend cook time to 75 minutes and let pressure release naturally for 15 minutes. To salvage undercooked meat, slice thinly against the grain and reheat slowly with 1 tbsp beef broth per serving. The moisture helps tenderize.

- Crock Pot Round Steak Recipe: Slow-Sear Crust With Juicy Center - November 6, 2026
- Candied Sweet Potatoes Crock Pot Recipe: Caramelized Sweetness With Zero Effort - November 6, 2026
- Steak Recipe Crock Pot: Juicy, Caramelized Crust in 4 Hours - November 6, 2026