
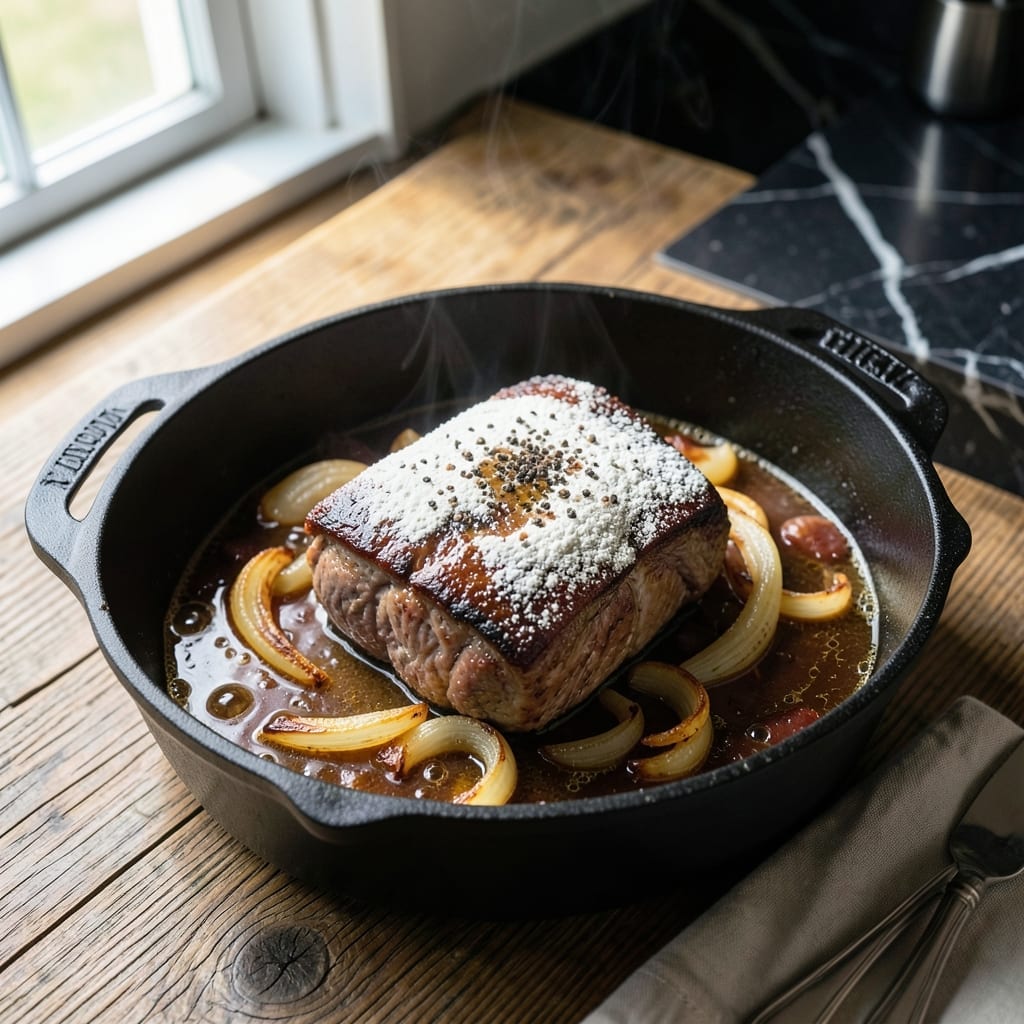
There’s a reason professional chefs swear by the red wine braising method for pot roast—it transforms tough cuts into something extraordinary. This approach delivers fall-apart tender meat with a depth of flavor that slow cooking alone can’t achieve.
The technique is simple but precise: sear the beef to build a flavorful crust, then braise it in red wine and aromatics until it reaches perfect doneness. Every step builds layers of rich, complex taste that define this dish.
You’ll end up with melt-in-your-mouth pot roast surrounded by a velvety sauce that’s perfect for soaking up with crusty bread. The wine reduces to a glossy finish, balancing the meat’s natural richness with bright acidity.
This is the kind of meal that turns a Sunday afternoon into something special. The results speak for themselves.
Ingredients for Gavin Kaysen Pot Roast
Professional-grade ingredients deliver that signature braised depth and fall-apart tenderness every time.
| Ingredient | Amount | Notes |
|---|---|---|
| Chuck Roast 🥩 | 3 lb | Well-marbled, boneless preferred |
| Kosher Salt 🧂 | 1 ½ tbsp | Diamond Crystal preferred for texture |
| Freshly Ground Black Pepper 🌶️ | 1 tsp | Coarse grind for crust depth |
| All-Purpose Flour 🌾 | ¼ cup | For dredging beef evenly |
| Neutral Oil 🫒 | 2 tbsp | High smoke point for searing |
| Yellow Onions 🧅 | 2 whole | Medium dice for even melting |
| Carrots 🥕 | 3 whole | Peeled, cut into 2-inch chunks |
| Celery Stalks 🌿 | 2 whole | Cut into 2-inch pieces |
| Garlic Cloves 🧄 | 6 cloves | Smashed for robust flavor |
| Tomato Paste 🍅 | 2 tbsp | Double-concentrated preferred |
| Dry Red Wine 🍷 | 2 cups | Bold variety like Cabernet Sauvignon |
| Beef Stock 🥣 | 2 cups | Low-sodium for controlled seasoning |
| Fresh Thyme Sprigs 🌿 | 3 whole | Tied with kitchen twine |
| Bay Leaves 🍃 | 2 whole | Dried, added whole |
| Unsalted Butter 🧈 | 2 tbsp | For finishing the sauce |
The beef selection is non-negotiable for Gavin Kaysen’s method. Chuck roast with abundant marbling ensures the connective tissue breaks down beautifully during the long braise. Source from Whole Foods or a trusted butcher—look for bright red color with white fat streaks. The wine matters just as much: a bold Cabernet Sauvignon from Trader Joe’s offers excellent value without sacrificing depth.
Short on red wine? Dry white wine plus a splash of balsamic works in a pinch, though the color will be lighter. Substitute beef stock for wine at one-to-one ratio if avoiding alcohol entirely. The tomato paste can be swapped with tomato sauce reduced by half. Fresh rosemary can replace thyme, but use half the quantity—its piney notes are more assertive.
The roast improves overnight as flavors meld. Store in its braising liquid for up to 5 days refrigerated or 3 months frozen. Reheat gently to prevent the meat from breaking apart further. Always remove the bay leaves before serving—they’re inedible and can be sharp.
Why You’ll Love This Recipe
- Set It and Forget: I sear the chuck roast, then let the oven do the work for hours while I tackle my to-do list.
- Crispy, Tender Magic: The flour crust and slow cook time turn tough chuck into fall-apart perfection with a rich, savory bite.
- Sunday Supper Star: Honestly, it’s my go-to for feeding a crowd or meal prepping lunches for the week.
- Budget-Friendly Feast: A inexpensive chuck roast transforms into a showstopper that stretches to multiple meals.
Step-by-Step Instructions for Red Wine Braised Pot Roast
Master the technique behind this refined braise with precise timing and professional execution.
Step 1: Season and Sear the Chuck Roast
Pat the 3 lb chuck roast thoroughly dry with paper towels, ensuring all moisture is removed. This guarantees a proper sear rather than steaming. Season all sides aggressively with the 1.5 tbsp kosher salt and 1 tsp freshly ground black pepper, pressing the seasoning into the meat for maximum adherence.
Dredge the roast in the 0.25 cup all-purpose flour, shaking off any excess—this creates a light crust that thickens the braising liquid later. Heat the 2 tbsp neutral oil in a Dutch oven over medium-high heat until shimmering. Sear the beef for 4-5 minutes per side until deeply browned on all surfaces. This develops a fond that forms the flavor base of your braise.
Step 2: Build the Aromatic Foundation
Remove the seared chuck roast and set aside. In the same Dutch oven, add the 2 whole yellow onions, 3 whole carrots, and 2 whole celery stalks (all cut as specified). Sauté over medium heat for 6-8 minutes until the vegetables develop golden-brown edges.
Add the 6 cloves garlic cloves and 2 tbsp tomato paste, cooking for 1-2 minutes until the tomato paste darkens slightly and coats the vegetables. This step intensifies the umami depth. Stir constantly to prevent burning—tomato paste can scorch quickly once it hits the hot pan.
Step 3: Deglaze and Begin the Braise
Pour in the 2 cups dry red wine to deglaze the pan, scraping up all browned bits with a wooden spoon. Reduce the wine by half over medium-high heat, which takes about 5-7 minutes. This concentrates the flavor before the long braise.
Return the chuck roast to the Dutch oven along with any accumulated juices. Add the 2 cups beef stock, 3 whole fresh thyme sprigs, and 2 whole bay leaves. The liquid should come about halfway up the meat. Bring to a gentle simmer.
Step 4: Slow Braise to Perfection
Cover the Dutch oven and transfer to a preheated 325°F oven. Braise for 3 to 3.5 hours, turning the chuck roast every 45 minutes to ensure even cooking. The meat is done when it yields easily to a fork and the internal temperature reaches 195-200°F.
Resist the urge to check too frequently—each time you open the oven, you lose heat and extend the cooking time. The braising liquid should be gently bubbling, not at a rolling boil, which would toughen the meat.
Step 5: Finish and Serve
Carefully remove the chuck roast to a cutting board and tent with foil. Skim excess fat from the surface of the braising liquid, then place the Dutch oven on the stovetop over medium heat. Simmer for 5-10 minutes to reduce slightly.
Whisk in the 2 tbsp unsalted butter to add a silky finish to the sauce. Taste and adjust seasoning if needed. Slice the chuck roast against the grain and serve with the reduced braising liquid spooned over the top. The sauce should coat the back of a spoon with a rich, velvety texture.
Pro Tips For Making Gavin Kaysen Pot Roast
- Sear It Hard: Use high heat and don’t touch the chuck roast for 3-4 minutes per side—this builds a deep crust that flavors the entire pot roast. I learned this the hard way after pulling it too soon and getting a pale, weak sear.
- Pat It Dry: Blot the chuck roast with paper towels before seasoning and searing. Sounds tedious, but it’s the only way to get that flour coating to stick and brown properly.
- Skip the Crowding: Sear the roast in batches if your pan isn’t big enough—overcrowding steams the meat instead of browning it. After ruining a few batches, I finally started using two pans.
- Rest Before Slicing: Let the pot roast sit 15-20 minutes after cooking, tented with foil. It stays juicier, and I was skeptical until I tried it and saw the difference.
Pro Cooking Tips for This Dish
Perfect Searing Technique
Pat the 3 lb chuck roast completely dry before seasoning—any moisture prevents proper browning. Heat your Dutch oven until the oil just starts to shimmer, then sear for 4-5 minutes per side until a deep mahogany crust forms. I use Le Creuset for even heat distribution.
Fond Development
Don’t rush the searing process—the browned bits left in the pan are flavor gold. When adding your 2 cups red wine, scrape aggressively with a wooden spoon to release every last bit. This fond is what gives your braise its incredible depth. 🔥
Temperature Control
Maintain a gentle simmer during the braise—never let it boil. I check my oven with a ThermoWorks probe to ensure it stays at 325°F. Boiling toughens the meat, while a slow simmer breaks down connective tissue perfectly.
Turning Schedule
Rotate your roast every 45 minutes during the 3-3.5 hour braise. This ensures even cooking and prevents any part from drying out. I set a timer so I don’t forget—consistency is key with this dish.
Sauce Finishing
After removing the meat, reduce the braising liquid by 25% before adding the 2 tbsp butter. This concentrates flavors and creates that velvety texture Kaysen is known for. Skim fat first for a cleaner finish.
Always taste and adjust seasoning at the end—the reduction often needs a final pinch of salt. ✨
Nutrition Facts
Frequently Asked Questions
What cut of beef works best for this braise?
Chuck roast is ideal due to its marbling and connective tissue. The 3-3.5 hour braise at 325°F transforms it into tender perfection. Avoid lean cuts like sirloin.
Can I make this in a slow cooker instead?
Yes, but sear the meat first and reduce the wine before transferring. Cook on low for 8 hours or high for 5-6 hours. The texture will differ slightly from oven braising.
How do I know when the pot roast is done?
It’s ready when it reaches 195-200°F internally and shreds easily with a fork. The meat should pull apart with minimal resistance.
What if my sauce is too thin?
Simmer uncovered after removing the meat to reduce it. Add a cornstarch slurry if needed, but reducing naturally concentrates flavors best.

- 6 Oz Chocolate Chip Cookie Recipe: Perfectly Balanced Crispy Edges and Chewy Hearts - September 25, 2026
- 6-Inch Coffee Cake Recipe: Vanilla Bean Swirls and Buttery Streusel Topping - September 25, 2026
- 1 Hour Soup Recipe: Velvety Richness Without the Wait - September 25, 2026