
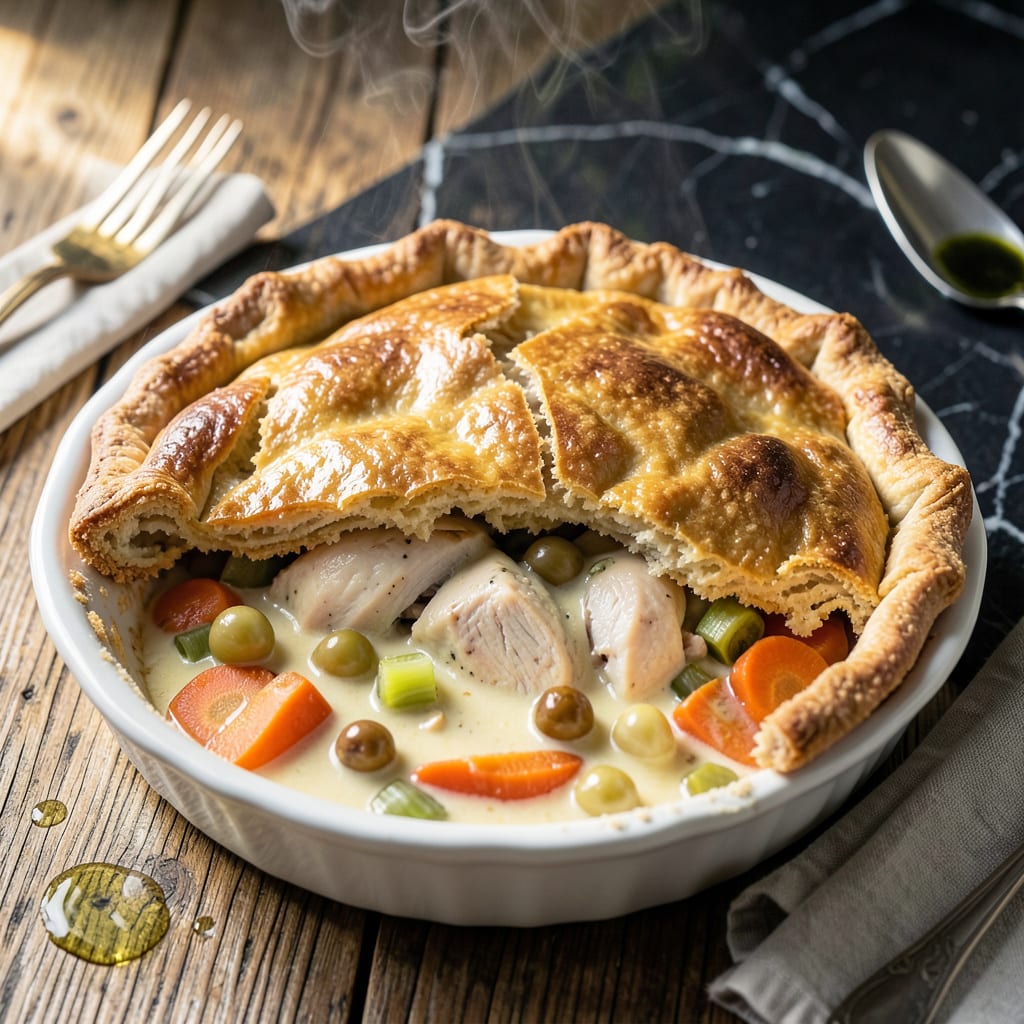
This gluten-free chicken pot pie delivers all the comfort of the classic without compromising on texture or flavor. The key is a carefully crafted crust that bakes up flaky and golden, proving that gluten-free doesn’t mean taste-free.
With tender chicken, hearty vegetables, and a creamy filling, this dish brings warmth to any table. The secret lies in the right blend of gluten-free flours and a precise baking method for that perfect crust every time.
Ingredients for Gf Chicken Pot Pie
Gluten-free flours and fresh ingredients create this comforting classic with a flaky crust.
| Ingredient | Amount | Notes |
|---|---|---|
| Chicken Breast 🍗 | 1 ½ lb | Boneless, skinless, diced |
| Gluten-Free All-Purpose Flour 🌾 | 1 ½ cups | Plus extra for dusting |
| Almond Flour 🌰 | ½ cup | Fine, blanched preferred |
| Cold Butter 🧈 | ¾ cup | Unsalted, cubed |
| Heavy Cream 🥛 | ½ cup | Or full-fat coconut milk |
| Chicken Broth 🍲 | 1 ½ cups | Low-sodium preferred |
| Carrots 🥕 | 2 whole | Peeled and diced |
| Frozen Peas 🌱 | 1 cup | No need to thaw |
| Yellow Onion 🧅 | 1 whole | Finely diced |
| Celery Stalks 🌿 | 2 pieces | Diced for texture |
| Garlic Cloves 🧄 | 3 cloves | Minced for flavor |
| Fresh Thyme 🌿 | 1 tbsp | Chopped, or 1 tsp dried |
| Salt 🧂 | 1 tsp | Kosher or sea salt |
| Black Pepper 🌶️ | ½ tsp | Freshly ground preferred |
| Xanthan Gum 💊 | ½ tsp | For crust binding |
[recipeingredientscaler]
The gluten-free flour blend is critical here. King Arthur or Bob’s Red Mill 1-to-1 are reliable brands for consistent results. For the almond flour, fine blanched ensures a smooth texture in the crust. Cold butter (right from the fridge) is non-negotiable for flakiness. The chicken should be fresh—look for bright color and no odor. Most supermarkets carry these ingredients in dedicated gluten-free sections.
No almond flour? Substitute tapioca starch at the same amount for a different texture. Fresh thyme can be swapped for dried at one-third the quantity. Heavy cream not an option? Full-fat coconut milk works well (use the canned kind). For the broth, vegetable broth can replace chicken if preferred. No xanthan gum? 1 tsp psyllium husk can work in a pinch.
The filling can be prepped 1 day ahead and stored in the fridge. The crust dough should rest for 30 minutes before rolling. Assembled pie keeps in the fridge for 24 hours before baking, or freeze for 2 months (bake from frozen, adding 10-15 minutes).
Why You’ll Love This Recipe
- I’ll be real: I double the batch and freeze one for those nights I just can’t.
- One Bowl Wonder: I mix the almond and gluten-free flour right in the same bowl I’ll bake in—no extra dishes, no fuss.
- Buttery Crust Magic: Honestly, the cold butter and heavy cream make the flakiest gluten-free crust I’ve ever had.
- Freezer Friendly: I’ll be real: I double the batch and freeze one for those nights I just can’t.
Step-by-Step Instructions for GF Chicken Pot Pie
This method ensures a golden, flaky crust and rich, creamy filling without gluten.
Step 1: Prepare the Filling Base
In a large pot over medium heat, melt 2 tablespoons of the 0.75 cup cold butter. Add the diced 1 whole yellow onion, 2 whole carrots, and 2 pieces celery stalks, cooking for 5-7 minutes until softened.
Stir in the minced 3 cloves garlic cloves and chopped 1 tbsp fresh thyme, cooking for an additional 1 minute until fragrant. This builds the aromatic foundation for your filling.
Sprinkle in 1.5 cups gluten-free all-purpose flour and 0.5 tsp xanthan gum, stirring constantly for 2 minutes to cook off the raw flour taste. The mixture should form a smooth paste that coats the vegetables.
Step 2: Build the Creamy Filling
Gradually pour in the 1.5 cups chicken broth and 0.5 cup heavy cream, whisking continuously to prevent lumps. Bring the mixture to a gentle simmer over medium heat.
Add the diced 1.5 lb chicken breast, 1 cup frozen peas, 1 tsp salt, and 0.5 tsp black pepper. Simmer for 10-12 minutes until the chicken is cooked through and the sauce thickens enough to coat the back of a spoon.
Taste and adjust seasoning if needed. The filling should be rich and velvety, with the chicken fully cooked and vegetables tender. Remove from heat and set aside to cool slightly.
Step 3: Prepare the Gluten-Free Crust
In a food processor, combine the remaining 0.5 cup cold butter (cubed), 1.5 cups gluten-free all-purpose flour, 0.5 cup almond flour, and a pinch of salt. Pulse until the mixture resembles coarse crumbs with pea-sized butter pieces visible.
With the processor running, drizzle in 3-4 tablespoons of ice water, 1 tablespoon at a time, just until the dough begins to come together. Be careful not to overmix—the dough should hold when pressed but remain slightly crumbly.
Turn the dough out onto a sheet of parchment paper and shape into a disk. Chill in the refrigerator for 20 minutes to firm up. This rest period allows the flours to hydrate fully.
Step 4: Assemble and Bake the Pot Pie
Preheat your oven to 375°F. Transfer the slightly cooled filling to a 9-inch pie dish or similar baking dish. The filling should be thick enough that it mounds slightly in the center.
On a lightly floured surface (use some of the extra gluten-free all-purpose flour), roll out the chilled dough to ¼-inch thickness. Carefully drape the dough over the filling, trimming any excess and crimping the edges to seal.
Cut several small slits in the top crust to allow steam to escape. Bake for 35-40 minutes until the crust is golden brown and the filling is bubbling beneath. Let rest for 10 minutes before serving to allow the filling to set.
Pro Tips For Making Gf Chicken Pot Pie
- Chill the Dough: Pop your gluten-free crust in the fridge for 20-30 minutes before rolling—almond flour especially needs this to hold its shape, or you’ll be patching cracks like I did my first five attempts.
- Poach the Chicken: Simmer the chicken breast in the heavy cream with a pinch of salt for 12-15 minutes instead of boiling in water. It stays juicy and adds depth to the filling—sounds weird, but it works.
- Skip the Overmixing: Stir the gluten-free flour into your roux just until combined, then stop. Overworking it makes the filling gummy, and nobody wants a pot pie with that texture.
- Vent the Crust: Cut 3-4 slits in the top crust before baking, or steam will turn your beautiful pie into a soggy mess. I learned this the hard way—after ruining two pies in one week.
Perfect Pairings for This Dish
Vegetable Sides
A simple green salad with a light vinaigrette balances this dish’s richness. I toss mixed greens with olive oil, lemon juice, and a pinch of salt for brightness. 🥗
Roasted Vegetables
Brussels sprouts or asparagus roasted at 400°F for 20 minutes add a caramelized depth. Toss with 1 tbsp olive oil and pinch of salt before roasting. The crisp texture contrasts beautifully with the creamy filling.
Wine Pairings
A crisp white wine like Sauvignon Blanc or Pinot Grigio complements the dish’s creaminess. I prefer a New Zealand Sauvignon Blanc for its citrus notes. Chilled to 45-50°F, it cuts through the richness. 🍷
Gluten-Free Bread
Serve with warm gluten-free dinner rolls to soak up the filling. Schar or Canyon Bakehouse brands are reliable. Toast lightly for extra crunch.
Herb Garnishes
Fresh parsley or chives sprinkled on top add color and freshness. Chop 2 tbsp just before serving. A squeeze of lemon zest brightens the dish.
Comfort Additions
Mashed cauliflower or sweet potatoes make hearty accompaniments. For cauliflower, steam 1 head until tender, then blend with 2 tbsp butter and ¼ cup cream. 💛
Nutrition Facts
Frequently Asked Questions
Can I make the crust ahead of time?
Yes! Prepare the dough, shape into a disk, and refrigerate for up to 2 days or freeze for 1 month. Thaw overnight in the fridge before rolling.
Why is my filling runny?
This usually means it didn’t thicken enough. Simmer the filling for an extra 3-5 minutes and ensure you’ve used the correct amount of flour. The sauce should coat the back of a spoon.
Can I use pre-cooked chicken?
Use 2 cups of shredded rotisserie chicken and add it at the end to warm through. Avoid overcooking, or it may dry out.
How do I prevent a soggy bottom crust?
Preheat your baking dish and brush the bottom crust with a thin layer of beaten egg before adding the filling. This creates a barrier. Bake on a lower oven rack for best results.

- 4C Bread Crumbs Meatballs Recipe: Crispy Crust and Juicy Centers - September 25, 2026
- 6 Oz Chocolate Chip Cookie Recipe: Perfectly Balanced Crispy Edges and Chewy Hearts - September 25, 2026
- 6-Inch Coffee Cake Recipe: Vanilla Bean Swirls and Buttery Streusel Topping - September 25, 2026