
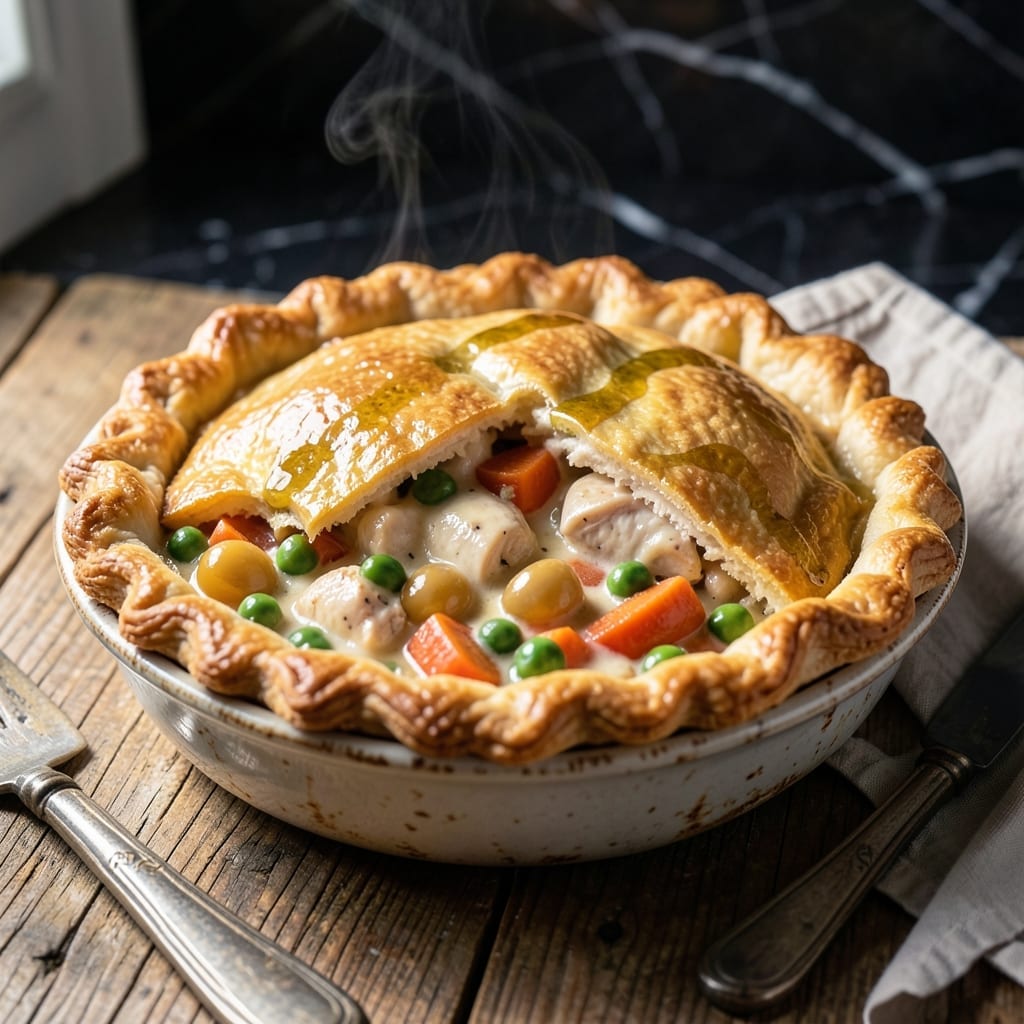
There’s something deeply comforting about a chicken pot pie with its flaky crust and rich, savory filling. This version proves gluten-free baking can deliver the same satisfying results as the classic.
I developed this recipe after years of testing gluten-free crusts, focusing on a blend that mimics traditional texture without compromise. The filling stays creamy and packed with flavor, while the crust bakes to golden perfection.
The key is a simple yet precise method that ensures the crust stays flaky and the filling thickens just right. Every bite offers tender chicken, hearty vegetables, and a buttery crust that holds its own.
Perfect for family dinners or special occasions when you want comfort food without the gluten. Here’s how to make it.
Ingredients for Gluten Free Chicken Pot Pie
Every ingredient here works together to create that flaky crust and creamy filling you love.
| Ingredient | Amount | Notes |
|---|---|---|
| Gluten-Free All-Purpose Flour 🌾 | 2 ½ cups | Plus extra for dusting |
| Xanthan Gum 🧂 | 1 tsp | Omit if flour blend contains it |
| Cold Unsalted Butter 🧈 | 1 cup | Cut into small cubes |
| Ice Water 💧 | ½ cup | Plus extra as needed |
| Salt 🧂 | 1 tsp | Divided for crust and filling |
| Boneless Skinless Chicken Breast 🍗 | 1 ½ lb | Cut into 1-inch cubes |
| Carrots 🥕 | 2 whole | Peeled and diced |
| Celery Stalks 🌿 | 2 whole | Diced fine |
| Yellow Onion 🧅 | 1 whole | Small dice |
| Frozen Peas 🌱 | 1 cup | No need to thaw |
| Chicken Broth 🍲 | 2 cups | Low-sodium preferred |
| Heavy Cream 🥛 | ½ cup | For creamy filling |
| Garlic Cloves 🧄 | 3 cloves | Minced finely |
| Dried Thyme 🍃 | 1 tsp | Or 1 tbsp fresh |
| Black Pepper 🌶️ | ½ tsp | Freshly ground |
The gluten-free flour blend is critical here. King Arthur Measure for Measure is my go-to—it already includes xanthan gum, so you can skip that step. For the butter, cold is non-negotiable; it creates those flaky layers. I pick up my flour at Whole Foods, where the staff can guide you to the right blend if you’re new to gluten-free baking. Always check the label to ensure no cross-contamination.
No gluten-free flour? Regular all-purpose works for non-gluten-free versions. Out of thyme? Poultry seasoning at half the amount does the trick. Heavy cream can be swapped for full-fat coconut milk if you need a dairy-free option. For the chicken, rotisserie chicken shreds work in a pinch (just skip the cooking step). The peas can be fresh, but frozen is easier and just as tasty.
The crust dough can be made a day ahead—just wrap it tight and refrigerate. Baked pie keeps 3-4 days in the fridge, though it’s best fresh. Reheat slices in the oven to keep the crust crisp. Freeze unbaked pies for up to 2 months (thaw before baking).
Why You’ll Love This Recipe
- I’ll be real: this is my go-to when I need comfort food fast, and it still feels like a special treat.
- One Bowl Crust: The gluten-free flour and xanthan gum mix comes together with cold butter so quickly—I don’t even dirty a second bowl.
- Flaky, Buttery Layers: That crisp, golden crust made with unsalted butter tastes just like the classic version, only better because it’s light and tender.
- Weeknight Rescue: I’ll be real: this is my go-to when I need comfort food fast, and it still feels like a special treat.
Step-by-Step Instructions for Gluten Free Chicken Pot Pie
Here’s the method that ensures a flaky crust and creamy filling every time.
Step 1: Prepare the Gluten-Free Pie Crust
In a food processor, pulse the 2.5 cups Gluten-Free All-Purpose Flour, 1 tsp Xanthan Gum, and ½ tsp Salt until combined. Add the 1 cup Cold Unsalted Butter (cut into small cubes) and pulse until the mixture resembles coarse crumbs with pea-sized butter pieces visible.
With the processor running, slowly drizzle in the ½ cup Ice Water until the dough just comes together. It should hold when pressed but not be sticky. Turn the dough out onto a lightly floured surface, divide into two equal portions, shape into discs, wrap in plastic, and refrigerate for 30 minutes.
Step 2: Cook the Filling Base
In a large skillet over medium heat, cook the 1.5 lb Boneless Skinless Chicken Breast (cut into 1-inch cubes) until no longer pink, about 6-8 minutes. Remove the chicken and set aside.
In the same skillet, add the diced 2 whole Carrots, 2 whole Celery Stalks, and 1 whole Yellow Onion. Cook for 5 minutes until the vegetables begin to soften. Add the minced 3 cloves Garlic Cloves, 1 tsp Dried Thyme, and ½ tsp Black Pepper, stirring for 1 minute until fragrant.
Step 3: Build the Creamy Filling
Sprinkle 2 tablespoons of the gluten-free flour over the vegetables and stir to coat. Slowly pour in the 2 cups Chicken Broth, stirring constantly to prevent lumps. Bring to a simmer and cook for 3-4 minutes until slightly thickened.
Return the chicken to the skillet along with the 1 cup Frozen Peas and ½ cup Heavy Cream. Stir well and simmer for 5 minutes until the mixture is creamy and thick enough to coat the back of a spoon. Taste and adjust seasoning with the remaining ½ tsp Salt if needed.
Step 4: Assemble and Bake the Pot Pie
Preheat the oven to 375°F. Roll out one disc of dough on a floured surface until ⅛-inch thick and transfer it to a 9-inch pie dish. Pour the filling into the crust. Roll out the second disc and place it over the filling, crimping the edges to seal. Cut several slits in the top crust to allow steam to escape.
Bake for 35-40 minutes until the crust is golden brown and the filling is bubbly. If the edges begin to brown too quickly, cover them with foil. Let the pot pie rest for 10 minutes before slicing to allow the filling to set.
Pro Tips For Making Gluten Free Chicken Pot Pie
- Chill the Dough: I learned this the hard way—gluten-free pie crust needs at least 30 minutes in the fridge before rolling, or it’ll crumble like dry leaves. The cold butter is what gives it that flaky texture.
- Add Xanthan Gum Last: Mix the xanthan gum into the dry ingredients just before adding the butter and water. If it sits too long, it’ll get gummy and turn your crust into a dense mess.
- Use Ice Water: Sounds obvious, but warm water melts the butter and ruins the layers. I keep a bowl of ice water next to me and add just 1 tablespoon at a time until the dough holds together.
- Blind Bake First: After burning three bottom crusts, I finally started pre-baking the shell for 10 minutes at 375°F before adding the filling. No more soggy bottoms.
Pro Cooking Tips for This Dish
Crust Perfection Tips
Keep your butter ice cold—I freeze mine for 15 minutes before cubing. Work quickly to prevent the butter from melting into the flour, which is what creates those desirable flaky layers. A food processor helps maintain the cold temperature better than hand mixing. 💡
Filling Thickness Trick
For a filling that’s creamy but not runny, cook your roux for the full 3-4 minutes until it turns a light golden color. This removes the raw flour taste and ensures proper thickening. I use a whisk to prevent lumps from forming.
Avoid Soggy Bottoms
Pre-bake your bottom crust for 8-10 minutes at 375°F before adding the filling. This creates a barrier that prevents the wet filling from making the crust soggy. I call this my “insurance policy” for perfect texture.
Venting Matters
Cut 4-5 slits in the top crust to allow steam to escape. Without proper venting, your pie might burst at the seams. I use a sharp knife to make decorative cuts that also serve this practical purpose.
Resting Time
The 10-minute rest after baking isn’t optional—it lets the filling set so it doesn’t run out when you slice. I set a timer because it’s tempting to dive in too soon. This waiting period makes all the difference in presentation. ⏰
Crust Color Control
If your crust browns too quickly, tent it with foil after 20 minutes of baking. For extra shine, brush the top crust with 1 beaten egg before baking. This gives that beautiful golden finish you see in bakery pies.
Nutrition Facts
Frequently Asked Questions
Can I make the crust ahead of time?
Yes! Prepare the dough, wrap it tightly, and refrigerate for up to 2 days.
What if my filling is too thin?
Simmer longer or mix 1 tablespoon cornstarch with 1 tablespoon cold water, then stir into the filling. Cook for 2-3 minutes until thickened.
How do I prevent the crust from burning?
Tent the pie with foil after 20 minutes of baking. This protects the edges while the filling finishes cooking.
Can I use store-bought gluten-free pie crust?
Use 2 pre-made gluten-free crusts and follow the same assembly steps. Just ensure they’re certified gluten-free.

- 6 Oz Chocolate Chip Cookie Recipe: Perfectly Balanced Crispy Edges and Chewy Hearts - September 25, 2026
- 6-Inch Coffee Cake Recipe: Vanilla Bean Swirls and Buttery Streusel Topping - September 25, 2026
- 1 Hour Soup Recipe: Velvety Richness Without the Wait - September 25, 2026