
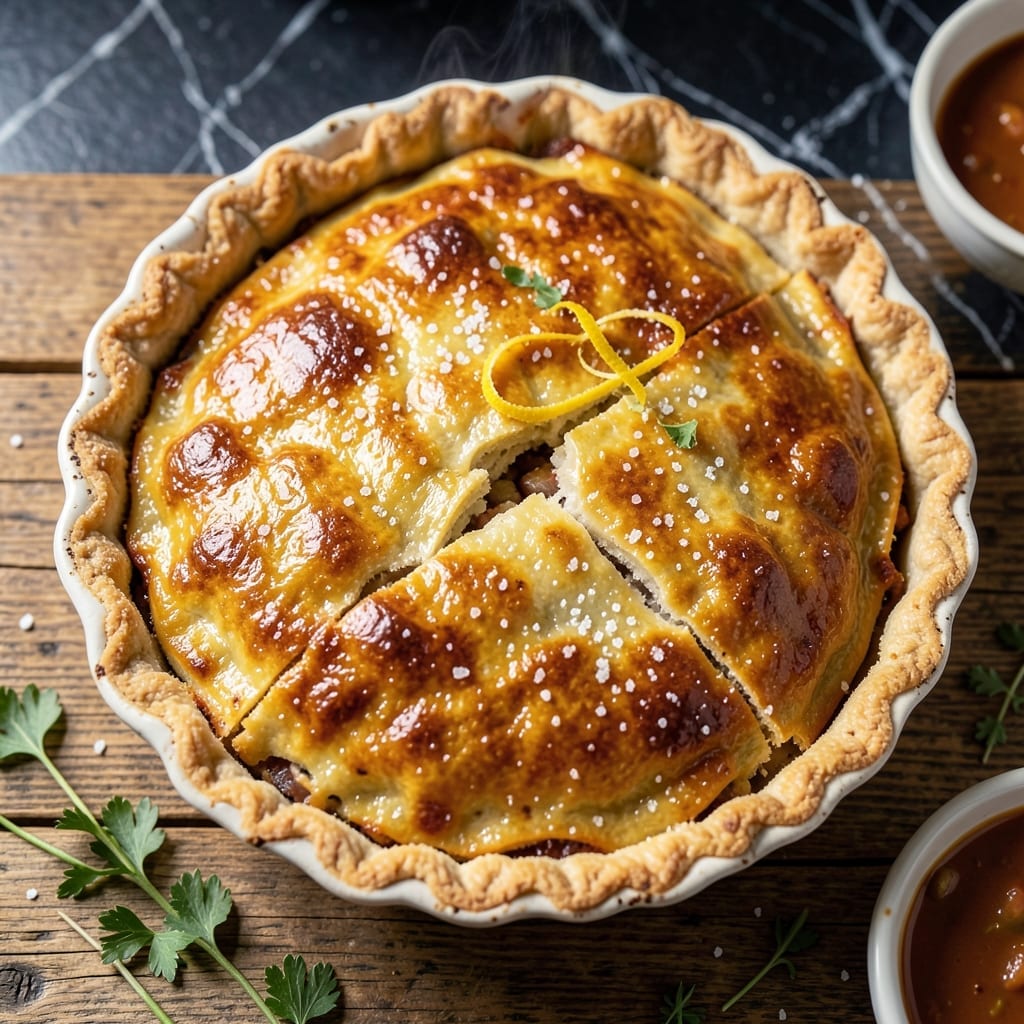
This gluten free pot pie crust delivers the flaky texture you’ve been missing without compromising on taste or structure.
After years of testing different flour blends and techniques, I developed this method that creates layers so tender they rival traditional pie crust. The key is using cold ingredients and minimal handling to prevent gluten development in the alternative flours.
The result is a golden, flaky crust that holds up beautifully to hearty fillings and bakes to perfection. It’s the solution for anyone who thought they had to give up pot pie after going gluten free.
With just a few simple ingredients and careful technique, you’ll achieve professional results that no one will believe are gluten free.
Ingredients for Gluten Free Pot Pie Crust
Cold butter and a smart flour blend create that coveted flaky texture everyone misses.
| Ingredient | Amount | Notes |
|---|---|---|
| Gluten-Free All-Purpose Flour Blend 🌾 | 2 ½ cups | Plus extra for dusting surface |
| Xanthan Gum 🧪 | 1 tsp | Omit if blend contains it |
| Cold Unsalted Butter 🧈 | 1 cup | Cut into 1/2-inch cubes |
| Ice Water 💧 | ⅓ cup | Plus 1 tbsp as needed |
| Fine Sea Salt 🧂 | 1 tsp | Divided for seasoning |
| Granulated Sugar 🍚 | 1 tsp | Optional for browning |
| Large Egg 🥚 | 1 whole | For egg wash finish |
| White Vinegar 🍶 | 1 tsp | Keeps dough tender |
| Gluten-Free Baking Powder 🧂 | ½ tsp | Ensures flaky layers |
| Tapioca Starch 🌾 | ¼ cup | Adds chewiness to crust |
The flour blend is critical here. King Arthur Measure for Measure is the gold standard for gluten-free baking—consistent results every time. Bob’s Red Mill 1-to-1 works too but may need an extra pinch of xanthan gum. Always check your blend’s label—some already include it. For the butter, European-style (higher fat content) gives superior flakiness, but any cold unsalted will do in a pinch.
No xanthan gum? Psyllium husk powder at half the amount can work, but texture may vary. Out of tapioca starch? Cornstarch or arrowroot are acceptable substitutes. The vinegar might seem odd, but don’t skip it—it tenderizes the dough beautifully. For a richer crust, replace 1/4 cup of the ice water with cold heavy cream (still vegetarian, still delicious).
This dough keeps 2-3 days wrapped tightly in the fridge, or freeze for 1 month. Let it sit at room temperature for 10 minutes before rolling. Baked crusts can be frozen for 2 months—just reheat in a 350°F oven for 10 minutes to restore crispness.
Why You’ll Love This Recipe
- One Bowl Wonder: I just dump the gluten-free flour, xanthan gum, and salt in a bowl, cut in the cold butter, and add ice water—no fancy tools, no mess.
- Buttery Crisp Layers: The cold butter creates these flaky, golden pockets that shatter with every bite, and the sea salt makes the flavor pop.
- Freezer Friendly: I roll out extra dough, freeze it, and now I’ve got pot pie crust ready for impromptu comfort food nights.
- No Waste Dough: Between us, I use every last scrap for mini hand pies or lattice tops—nothing goes to waste, and my family never complains.
Step-by-Step Instructions for Gluten Free Pot Pie Crust
Follow this method precisely and you’ll achieve a flaky, golden crust that rivals traditional versions.
Step 1: Combine Dry Ingredients for Structure
In a large mixing bowl, whisk together the 2.5 cups Gluten-Free All-Purpose Flour Blend, 1 tsp Xanthan Gum, 0.5 tsp Gluten-Free Baking Powder, 1 tsp Fine Sea Salt, and 0.25 cup Tapioca Starch until uniformly combined. The xanthan gum is critical here—it mimics gluten’s elasticity, giving your crust structure without toughness.
Add the 1 tsp Granulated Sugar and whisk again. This small amount enhances browning and adds subtle sweetness that balances savory fillings. Ensure there are no visible streaks of unmixed ingredients before proceeding to the next step.
Step 2: Cut in Cold Butter for Flaky Layers
Add the 1 cup Cold Unsalted Butter (cut into ½-inch cubes) to the dry mixture. Using a pastry cutter or your fingertips, work the butter into the flour until the mixture resembles coarse crumbs with pea-sized butter pieces visible. This uneven distribution is intentional—it creates the flaky layers that define a superior crust.
Keep the butter as cold as possible during this process. I recommend chilling the bowl and utensils beforehand. If the butter begins to soften or melt, pause and refrigerate the mixture for 10-15 minutes before continuing. The cold butter creates steam during baking, which separates the layers.
Step 3: Bind the Dough with Liquid Ingredients
Create a well in the center of the mixture. Add the 0.33 cup Ice Water, 1 tsp White Vinegar, and 1 whole Large Egg. Using a fork, gently stir from the center outward until the dough just begins to come together. The vinegar tenderizes the crust, while the egg adds richness and binding power.
Be careful not to overmix—gluten-free doughs become gummy when worked too much. The mixture should hold together when pressed but may appear slightly crumbly. If it’s too dry to form a ball, add ice water 1 tablespoon at a time until it reaches the proper consistency.
Step 4: Chill and Rest the Dough
Turn the dough onto a lightly floured surface (using additional Gluten-Free All-Purpose Flour Blend) and gently shape it into a disk. Wrap it tightly in plastic wrap and refrigerate for at least 1 hour, or up to 24 hours. This resting period allows the flour to fully hydrate and the butter to firm up.
Chilling is non-negotiable for gluten-free crusts. It prevents shrinking during baking and makes the dough easier to roll. When ready to use, let the dough sit at room temperature for 10 minutes to soften slightly before rolling between two sheets of parchment paper.
Step 5: Roll, Fit, and Pre-Bake for Perfect Results
Roll the chilled dough to a ⅛-inch thickness and transfer it to your pie dish. Press gently into the bottom and up the sides, trimming any excess with a sharp knife. For a single crust pot pie, dock the bottom with a fork to prevent air pockets during baking.
For a pre-baked shell, line the crust with parchment paper and fill with pie weights or dried beans. Bake at 375°F for 15 minutes, then remove the weights and bake for an additional 5-7 minutes until the edges are just beginning to turn light golden brown. This creates a sturdy base that won’t become soggy when filled.
Pro Tips For Making Gluten Free Pot Pie Crust
- Chill the Dough: After mixing, refrigerate the dough for at least 30 minutes—I learned this the hard way when my warm dough kept tearing during rolling.
- Use Very Cold Butter: Cut the butter into small cubes and freeze for 10 minutes before mixing; it creates flakier layers in the crust.
- Skip Overmixing: Gluten-free dough gets tough fast, so stir just until the ingredients come together—no more.
- Add Xanthan Gum: If your flour blend doesn’t include it, add ½ teaspoon per cup of flour to bind the crust and prevent crumbling.
Troubleshooting This Recipe
Crumbly Dough Fix
If your dough falls apart when rolling, it likely needs more binding. Add ice water 1 tablespoon at a time until it holds together. I also recommend chilling it for an extra 30 minutes to help the xanthan gum activate. 💡
Tough Crust Solution
Overworking the dough is the main culprit for toughness. Use a light touch when mixing and rolling. If your crust still turns out dense, try replacing ¼ cup of the flour blend with cornstarch next time for a more tender result.
Soggy Bottom Prevention
Pre-baking the crust is essential for pot pies. Blind bake at 375°F for 15 minutes with weights, then 5-7 minutes without. For extra protection, brush the pre-baked crust with a thin layer of beaten egg white before adding filling.
Cracked Top Crust
If your top crust develops cracks, it may have dried out. Cover the pie with foil during the last 15 minutes of baking if it’s browning too quickly. Also, ensure your oven isn’t too hot—gluten-free crusts bake best at 375°F, not higher. 🔥
Uneven Browning
Rotate your pie dish halfway through baking for even color. If some areas brown faster, tent those sections with small pieces of foil. For deeper color, brush the crust with egg wash mixed with 1 tsp water before baking.
Butter Melting Too Soon
If butter leaks during baking, your dough was likely too warm when rolled. Always chill the dough for 1 hour before rolling and work quickly. You can also freeze the shaped crust for 10 minutes before baking to firm up the butter.
Nutrition Facts
Frequently Asked Questions
Can I make this crust dairy-free?
Yes! Replace the butter with cold coconut oil or dairy-free butter sticks. Use the same 1 cup measurement. Chill the coconut oil first to maintain flakiness.
Why does my crust shrink when baking?
This usually means the dough wasn’t chilled long enough. Always rest it for at least 1 hour before rolling. Overworking can also cause shrinking, so handle gently.
Can I use almond flour instead of a blend?
Not recommended. Almond flour lacks the structure needed for flaky layers. Stick with a gluten-free all-purpose blend for best results.
How do I store leftover crust?
Baked crust keeps 2-3 days at room temperature in an airtight container. For longer storage, freeze for up to 2 months.

- 6 Oz Chocolate Chip Cookie Recipe: Perfectly Balanced Crispy Edges and Chewy Hearts - September 25, 2026
- 6-Inch Coffee Cake Recipe: Vanilla Bean Swirls and Buttery Streusel Topping - September 25, 2026
- 1 Hour Soup Recipe: Velvety Richness Without the Wait - September 25, 2026