
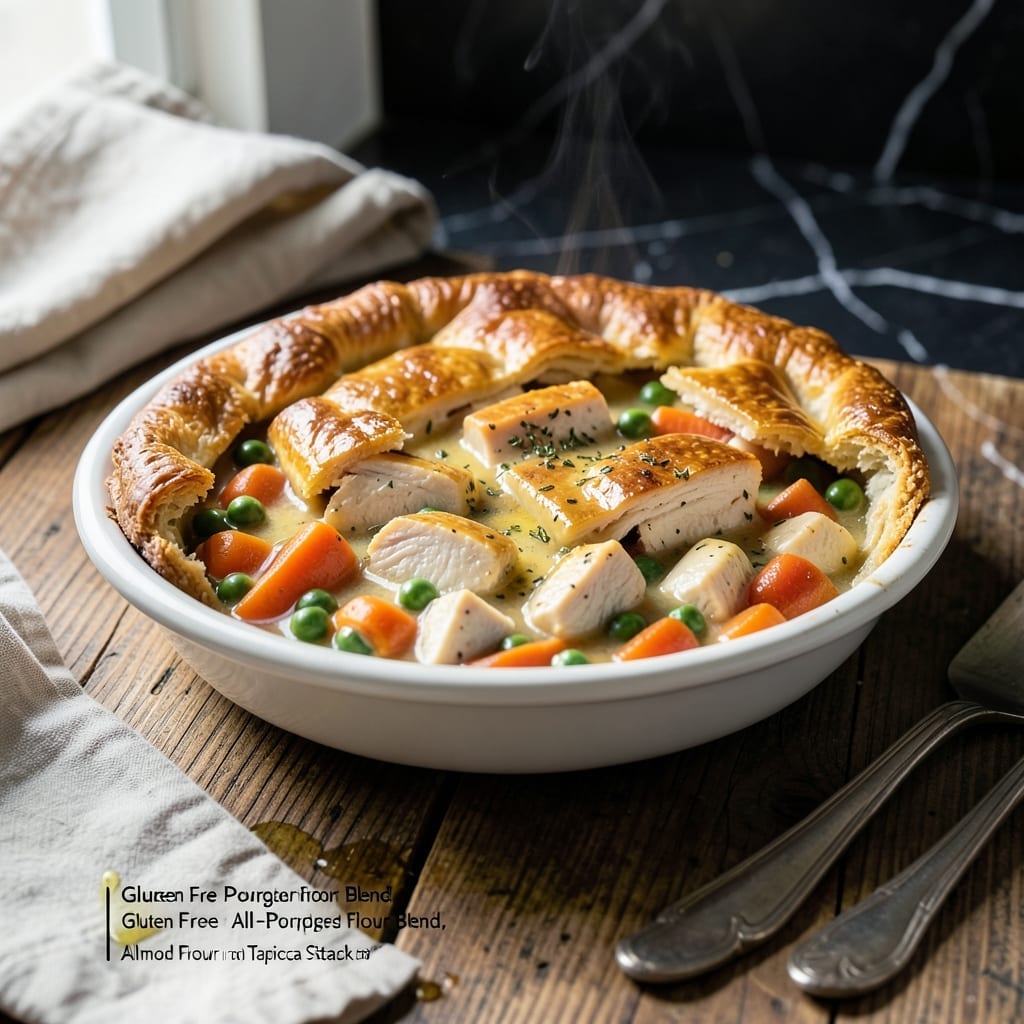
This gluten free pot pie delivers the comfort of a classic with a flaky crust that rivals traditional versions. I developed this recipe after years of testing gluten free flours to find the perfect blend that holds up to the rich filling.
The filling is a creamy mix of chicken, vegetables, and herbs in a velvety sauce that thickens beautifully as it bakes. The crust, made with a precise ratio of gluten free flours and cold butter, bakes to golden perfection without falling apart.
What you get is a savory, hearty pie with layers of flavor and a texture so satisfying, no one will guess it’s gluten free. The crust stays crisp while the filling remains creamy and packed with tender chicken and vegetables.
Serve this as a comforting main course for family dinners or special occasions. Here’s how to make it.
Ingredients for Gluten Free Pot Pie
Everything for a golden crust and creamy filling. Probably have most already.
| Ingredient | Amount | Notes |
|---|---|---|
| Gluten Free All-Purpose Flour Blend 🌾 | 2 ½ cups | Plus extra for dusting |
| Almond Flour 🌰 | ½ cup | Fine, blanched preferred |
| Tapioca Starch 🌾 | ¼ cup | For binding and crispness |
| Unsalted Butter 🧈 | 1 cup | Cold, cubed for crust |
| Ice Water 💧 | ⅓ cup | Plus 1 tbsp as needed |
| Boneless Skinless Chicken Breast 🍗 | 1 ½ lb | Diced into bite-sized pieces |
| Carrots 🥕 | 2 whole | Peeled and diced |
| Frozen Peas 🌱 | 1 cup | No need to thaw |
| Yellow Onion 🧅 | 1 whole | Finely chopped |
| Celery Stalks 🌿 | 2 whole | Diced, strings removed |
| Garlic Cloves 🧄 | 3 cloves | Minced for depth |
| Heavy Cream 🥛 | 1 cup | Full-fat for richness |
| Chicken Stock 🍲 | 1 ½ cups | Low-sodium preferred |
| Dried Thyme 🌿 | 1 tsp | Or 1 tbsp fresh |
| Dried Rosemary 🍃 | 1 tsp | Crushed between fingers |
| Salt 🧂 | 1 ½ tsp | Kosher or sea salt |
| Black Pepper 🌶️ | ½ tsp | Freshly ground |
The flour blend is key here. King Arthur or Bob’s Red Mill 1:1 work straight from the bag. For the almond flour, Costco’s Kirkland brand is a steal and the texture is perfect. Butter needs to stay ice cold—cut it into cubes, then freeze for 10 minutes before using. I always grab an extra block since you’ll use some for the filling too. The tapioca starch gives that flaky layers you miss in gluten free baking.
No chicken? Rotisserie works great—shred it and skip the dicing. Vegetarian? Swap in cremini mushrooms or chickpeas (same weight). Fresh herbs are fine if you’ve got them, but dried work just as well. The celery can be skipped in a pinch (add an extra carrot), but don’t skip the onion—it builds the flavor base. For the cream, full-fat coconut milk gets you close to the same richness.
Make the crust first and keep it chilled while you prep the filling. Baked pie keeps 3-4 days in the fridge, but honestly it’s best fresh. Freeze unbaked pies for up to 2 months—just thaw overnight before baking.
Why You’ll Love This Recipe
- One Bowl Wonder: I mix the gluten free flour blend, almond flour, and tapioca starch right in the same bowl I’ll roll out the crust—no extra dishes, no fuss.
- Buttery, Flaky Crust: The combo of cold butter and ice water makes this crust so tender it shatters, with that rich, savory taste I crave.
- Feeds a Crowd: I double the batch, bake one for tonight, and freeze the other for when I’m too tired to cook. Honestly, it’s my secret weapon.
- Leftovers for Days: The filling thickens up overnight, so the next day’s slice is even better—if it lasts that long.
Step-by-Step Instructions for Gluten Free Pot Pie
This method delivers that perfect flaky crust over a rich, creamy filling every time.
Step 1: Prepare the Gluten Free Crust
In a food processor, pulse together the 2.5 cups Gluten Free All-Purpose Flour Blend, 0.5 cup Almond Flour, and 0.25 cup Tapioca Starch until combined. Add the 1 cup Unsalted Butter (cold and cubed) and pulse just until the mixture resembles coarse crumbs with pea-sized butter pieces visible.
With the processor running, slowly pour in the 0.33 cup Ice Water through the feed tube. Add up to 1 tablespoon more if needed, but stop as soon as the dough just comes together. I’ve found that overmixing makes the crust tough, so err on the side of caution.
Turn the dough out onto a lightly floured surface and shape it into two equal discs. Wrap in plastic and refrigerate for at least 1 hour. This chilling time is crucial—it prevents the butter from melting too soon, which is what creates those beautiful flaky layers.
Step 2: Make the Savory Filling
In a large skillet, cook the diced 1.5 lb Boneless Skinless Chicken Breast over medium-high heat until no longer pink, about 6-8 minutes. Remove the chicken and set aside. In the same skillet, add the diced 2 whole Carrots, 1 whole Yellow Onion, and 2 whole Celery Stalks.
Sauté the vegetables for 5-7 minutes until they begin to soften. Add the minced 3 cloves Garlic Cloves, 1 tsp Dried Thyme, and 1 tsp Dried Rosemary, cooking for 1 minute until fragrant. This builds a solid flavor base for your filling.
Stir in the 1.5 cups Chicken Stock, 1 cup Heavy Cream, 1 cup Frozen Peas, 1.5 tsp Salt, and 0.5 tsp Black Pepper. Bring to a simmer and cook for 5 minutes until the sauce thickens slightly. Return the chicken to the skillet and stir to combine.
Step 3: Assemble and Bake the Pot Pie
On a lightly floured surface, roll out one disc of dough to fit your pie dish. Transfer it to the dish, pressing gently into the bottom and up the sides. Trim any excess dough hanging over the edge. Pour the filling into the crust-lined dish—it should be slightly heaped in the center.
Roll out the second disc of dough and place it over the filling. Crimp the edges to seal, then cut several small slits in the top crust to allow steam to escape. For extra flakiness, brush the top crust with a little melted butter.
Bake at 375°F for 40-45 minutes until the crust is golden brown and the filling is bubbling. If the edges start to brown too quickly, cover them loosely with foil. Let the pot pie rest for 10 minutes before serving to allow the filling to set.
Pro Tips For Making Gluten Free Pot Pie
- Chill the Dough: After mixing your gluten free flour blend with butter and ice water, let the dough rest in the fridge for at least 30 minutes—this keeps the crust from cracking and makes it easier to roll out.
- Pre-Cook the Filling: I learned this the hard way—gluten free crusts don’t hold up as well to long bake times, so fully cook your filling on the stovetop before adding it to the pie to avoid a soggy bottom.
- Use Cold Butter: Cut the unsalted butter into small cubes and keep it ice-cold until mixing; this creates flakier layers in the crust, which gluten free doughs often lack.
- Add Xanthan Gum: If your gluten free flour blend doesn’t include it, add ½ teaspoon of xanthan gum to the dry ingredients—it mimics gluten’s elasticity and prevents a crumbly crust.
Wine and Beer Pairings for This gluten free pot pie
White Wine Pairings
A crisp Sauvignon Blanc from New Zealand cuts through the creamy filling beautifully. Its bright acidity and citrus notes complement the chicken and herbs. I love Kim Crawford or Oyster Bay for this pairing. 🍷
Rich Whites
For a fuller-bodied option, try a buttery Chardonnay from California. The oak aging adds vanilla notes that pair well with the flaky crust. Kendall-Jackson Vintner’s Reserve is my go-to here.
Light Red Options
If you prefer red, a light Pinot Noir from Oregon works surprisingly well. The earthy notes balance the savory filling without overpowering it. Look for Belle Glos or Meiomi.
Beer Choices
A crisp lager like Samuel Adams Noble Pils cleanses your palate between bites. The light malt profile won’t compete with the rich flavors. For craft beer lovers, try a saison like Ommegang Hennepin. 🍺
Non-Alcoholic
For non-drinkers, a sparkling apple cider from Martinelli’s offers the same palate-cleansing effect. The bubbles and sweetness complement the savory pie perfectly.
Nutrition Facts
Frequently Asked Questions
Can I use store-bought gluten free pie crust?
Yes, but homemade tastes better and holds up better to the filling. Store-bought can work in a pinch—just thaw completely and pre-bake the bottom crust for 5 minutes to prevent sogginess.
How do I prevent a soggy bottom crust?
Blind-bake the bottom crust for 10 minutes before adding filling. Also, let the filling cool slightly before assembling. This creates a barrier that keeps the crust crisp.
Can I make this ahead of time?
Assemble the pie completely and refrigerate unbaked for up to 24 hours. Or freeze for up to 2 months. Bake from frozen, adding 10-15 minutes to the bake time.
What can I substitute for heavy cream?
Full-fat coconut milk works best for richness. For a lighter option, use half-and-half, but the filling may be slightly less thick. Avoid skim milk—it won’t provide enough creaminess.

- 4C Bread Crumbs Meatballs Recipe: Crispy Crust and Juicy Centers - September 25, 2026
- 6 Oz Chocolate Chip Cookie Recipe: Perfectly Balanced Crispy Edges and Chewy Hearts - September 25, 2026
- 6-Inch Coffee Cake Recipe: Vanilla Bean Swirls and Buttery Streusel Topping - September 25, 2026