
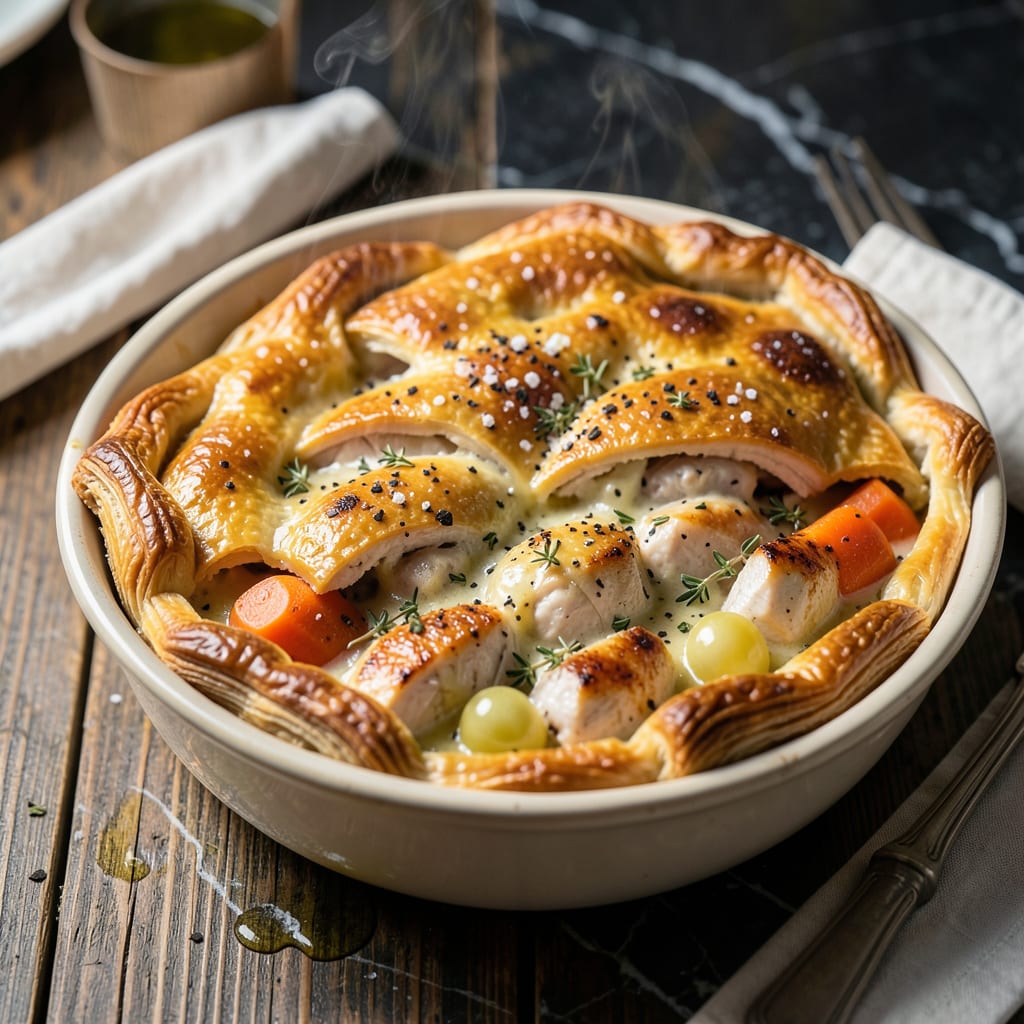
This gourmet pot pie elevates classic comfort food with a flaky, buttery crust and a rich, savory filling that’s packed with tender vegetables and premium ingredients.
The secret lies in the perfect balance of textures and flavors, with a golden crust that shatters with every bite and a creamy filling that’s hearty yet refined.
Ingredients for Gourmet Pot Pie
Flaky crust meets rich filling with these premium ingredients for a comforting yet refined dish.
| Ingredient | Amount | Notes |
|---|---|---|
| All-Purpose Flour 🌾 | 2 ½ cups | Plus extra for dusting |
| Unsalted Butter 🧈 | 1 cup | Cold, cubed for crust |
| Ice Water 💧 | ½ cup | For crust dough |
| Salt 🧂 | 1 tsp | Divided for crust and filling |
| Chicken Breast 🍗 | 1 ½ lb | Boneless, skinless, diced |
| Carrots 🥕 | 2 whole | Peeled, diced medium |
| Celery Stalks 🌿 | 2 whole | Diced, about 1 cup |
| Yellow Onion 🧅 | 1 whole | Medium, finely diced |
| Garlic Cloves 🧄 | 3 cloves | Minced for depth |
| Peas 🌱 | 1 cup | Frozen, no need to thaw |
| Heavy Cream 🥛 | 1 ½ cups | Full-fat for richness |
| Chicken Stock 🍲 | 1 ½ cups | Low-sodium preferred |
| All-Purpose Flour 🌾 | ¼ cup | For thickening filling |
| Fresh Thyme Leaves 🌿 | 1 tbsp | Or 1 tsp dried thyme |
| Black Pepper 🌶️ | ½ tsp | Freshly ground preferred |
The butter is non-negotiable here. European-style unsalted butter (like Plugrá or Kerrygold) has higher fat content, which means flakier crust. For the flour, King Arthur all-purpose is a reliable choice—consistent quality and widely available. The chicken should be fresh, not frozen, for the best texture. Look for air-chilled at Whole Foods if possible.
No thyme? Rosemary or sage at half the amount works well. Short on cream? Whole milk plus a splash of heavy cream gets you close. The peas can be swapped for frozen corn or green beans—just keep the quantity the same. For a vegetarian version, mushrooms or chickpeas replace the chicken beautifully. Always use fresh garlic; jarred lacks the necessary punch.
The assembled pie freezes beautifully—3 months wrapped tight in foil. Leftovers keep 4-5 days in the fridge, though the crust softens. Reheat in a 350°F oven to crisp it back up. Always let the filling cool completely before assembling to avoid a soggy bottom crust.
Why You’ll Love This Recipe
- One Pan Wonder: I make the whole thing in a single skillet—flaky crust, creamy filling, and all. No extra dishes, just pure comfort.
- Buttery Layers: That homemade crust with cold butter and ice water? It bakes up golden and flaky every single time.
- Feeds the Crew: I stretch one batch into two pies—perfect for Sunday dinner with leftovers for Monday lunch.
- Budget Friendly: Chicken breast and pantry staples keep costs low, but the gourmet taste makes it feel like a splurge.
Step-by-Step Instructions for Gourmet Pot Pie
Here’s the method. Straightforward, tested, works every time.
Step 1: Prepare the Buttery Crust
In a food processor, pulse 2.5 cups all-purpose flour and 1 tsp salt to combine. Add 1 cup cold unsalted butter (cubed) and pulse until the mixture resembles coarse crumbs with pea-sized butter pieces visible. This texture ensures flaky layers in your finished crust.
With the processor running, drizzle in 0.5 cup ice water just until the dough begins to come together. You’ll need about 6-8 pulses. Turn the dough onto a lightly floured surface and gently shape into two equal discs. Wrap in plastic and refrigerate for 1 hour—this chilling step prevents shrinking and ensures a tender crust.
Step 2: Cook the Savory Chicken and Vegetable Filling
In a large skillet over medium-high heat, cook diced 1.5 lb chicken breast until no longer pink, about 6-8 minutes. Remove and set aside. In the same skillet, melt 2 tbsp butter and sauté diced 2 carrots, 2 celery stalks, and 1 yellow onion for 5 minutes until softened.
Add minced 3 cloves garlic and 1 tbsp fresh thyme leaves, cooking for 30 seconds until fragrant. Sprinkle 0.25 cup all-purpose flour over the vegetables and stir to coat. Slowly pour in 1.5 cups chicken stock and 1.5 cups heavy cream, whisking constantly until smooth.
Step 3: Thicken the Filling and Add Final Ingredients
Bring the mixture to a gentle simmer and cook for 5-7 minutes until it thickens enough to coat the back of a spoon. Stir in the cooked chicken, 1 cup peas, and 0.5 tsp black pepper. Taste and adjust seasoning with additional salt if needed.
The filling should be creamy but not soupy—it will thicken slightly more as it cools. Remove from heat and let it sit while you roll out the crust. This brief rest allows the flavors to meld together beautifully.
Step 4: Assemble and Bake the Pot Pie
On a lightly floured surface, roll out one disc of dough to fit a 9-inch pie dish. Transfer the dough to the dish, pressing it gently into the bottom and up the sides. Spoon the filling into the crust, spreading it evenly.
Roll out the second disc and place it over the filling. Trim and crimp the edges to seal, then cut several small slits in the top crust to allow steam to escape. Bake at 375°F for 40-45 minutes until the crust is golden brown and the filling is bubbling.
Step 5: Rest and Serve
Let the pot pie rest for 10-15 minutes after baking. This allows the filling to set slightly, making it easier to serve neat slices. The crust should be flaky and golden, while the filling remains creamy and rich.
Serve warm, with each portion showcasing a perfect balance of tender chicken, vibrant vegetables, and a velvety sauce encased in that buttery, layered crust. This is comfort food at its finest.
Pro Tips For Making Gourmet Pot Pie
- Chill the Dough: Pop your crust dough in the fridge for at least 30 minutes before rolling—I learned this the hard way after my first three pot pies came out tough as leather.
- Dry the Chicken: Pat the chicken breast completely dry before searing, or it’ll steam instead of brown, and nobody wants a pale, soggy filling.
- Vent the Top: Cut a few small slits in the top crust before baking, or you’ll be cleaning pot pie lava off your oven ceiling like I did that one memorable Thanksgiving.
- Use Ice Water: Sounds fussy, but cold butter and ice water make the flakiest crust—warm water gives you a dense, sad pastry that’s more like a hockey puck.
Storing and Reheating This gourmet pot pie
Refrigerator Storage
Let your pot pie cool completely before storing—this prevents condensation from making the crust soggy. Transfer leftovers to an airtight container and refrigerate at 40°F or below for up to 4-5 days. I always store mine in glass containers for easy reheating. ❄️
Freezer Storage
For longer storage, wrap individual slices or the whole pie tightly in plastic wrap, then in heavy-duty aluminum foil. This double-layer protection prevents freezer burn. It’ll stay fresh for up to 3 months at 0°F or below.
Oven Reheating
Preheat your oven to 350°F for the best results. Place the pot pie on a baking sheet and heat for 15-20 minutes for slices or 25-30 minutes for a whole pie. This method keeps the crust crispy and the filling creamy. 🔥
Microwave Reheating
For a quick meal, microwave individual portions on medium power for 2-3 minutes, checking and stirring halfway. Cover with a damp paper towel to retain moisture. Note that the crust will soften but the filling stays delicious.
Make-Ahead Tips
Assemble the pie up to a day ahead and refrigerate it unbaked. When ready, bake as directed, adding an extra 5-10 minutes to the cooking time. This is perfect for busy weeknights when you want a homemade meal without the last-minute rush.
Nutrition Facts
Frequently Asked Questions
Can I use store-bought pie crust instead?
Yes, but opt for an all-butter version for best flavor. Homemade crust offers superior flakiness, but store-bought works in a pinch. Just ensure it’s thawed if frozen.
What’s the secret to a flaky top crust?
Keep your butter ice-cold and avoid overworking the dough. Bake at 375°F until golden for that perfect crisp texture.
How do I prevent a soggy bottom crust?
Pre-bake the bottom crust for 8-10 minutes before filling. Also, ensure the filling is cooled completely to avoid steam softening it.
Can I make this vegetarian?
Swap chicken for mushrooms or chickpeas. Use vegetable stock instead of chicken stock for a fully plant-based version.

- 4C Bread Crumbs Meatballs Recipe: Crispy Crust and Juicy Centers - September 25, 2026
- 6 Oz Chocolate Chip Cookie Recipe: Perfectly Balanced Crispy Edges and Chewy Hearts - September 25, 2026
- 6-Inch Coffee Cake Recipe: Vanilla Bean Swirls and Buttery Streusel Topping - September 25, 2026