
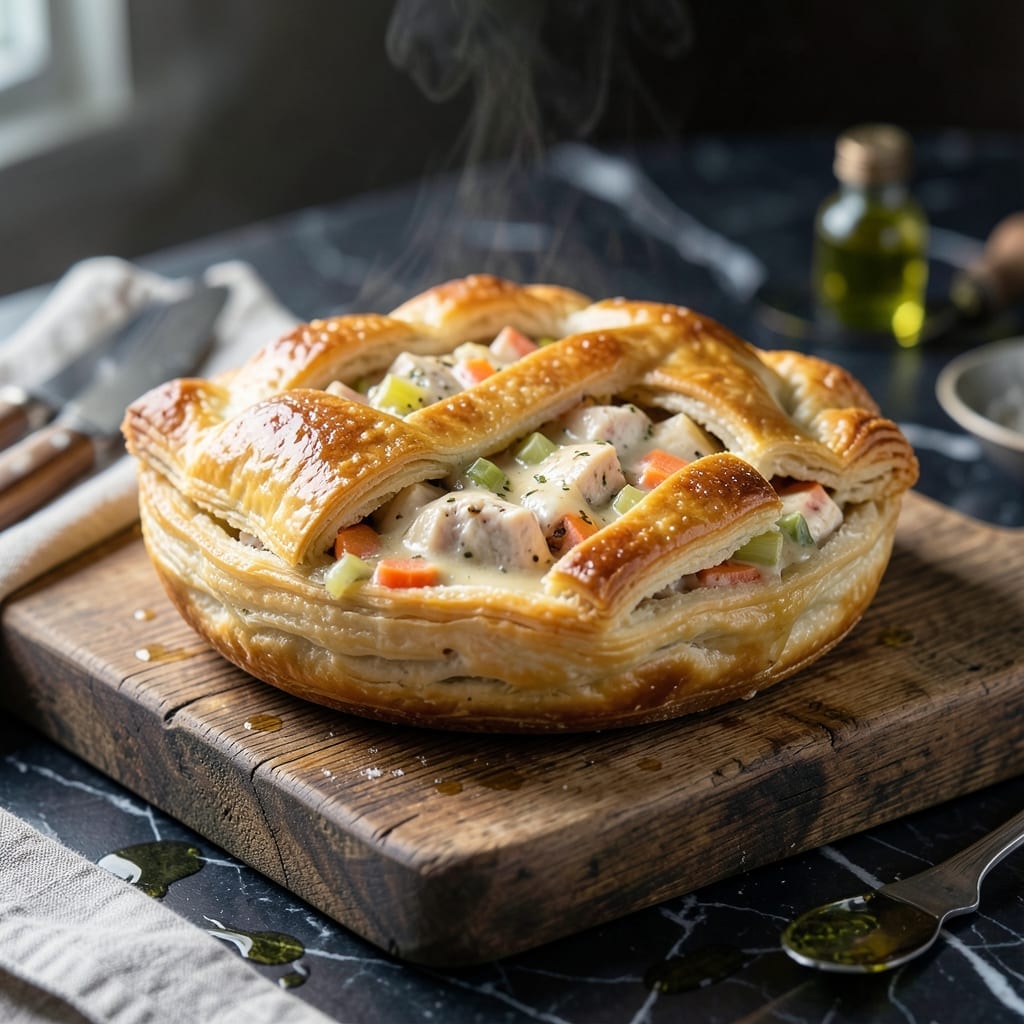
These portable savory bites redefine comfort food with their perfect balance of creamy filling and flaky pastry. I developed this recipe to capture all the warmth of classic chicken pot pie in a convenient, individual serving format.
The filling combines tender chicken, hearty vegetables, and a velvety sauce that’s rich without being heavy. The crust stays beautifully golden and flaky even when baked in handheld portions, thanks to a simple but precise technique.
Each bite delivers the complete experience: crisp pastry giving way to creamy chicken and vegetables. The portable format makes them ideal for lunches, picnics, or whenever you crave that homestyle flavor without the commitment of a full pie.
This method ensures consistent results with minimal effort, proving that great comfort food doesn’t require complicated techniques.
Ingredients for Handheld Chicken Pot Pie
Flaky crust meets creamy chicken and vegetables in these individual, portable comfort food bites.
| Ingredient | Amount | Notes |
|---|---|---|
| Boneless Skinless Chicken Breasts 🍗 | 1 ½ lb | Diced into 1/2-inch pieces |
| Unsalted Butter 🧈 | ½ cup | Divided for filling and crust |
| All-Purpose Flour 🌾 | ⅓ cup | For roux and thickening |
| Whole Milk 🥛 | 1 cup | Full-fat for creamy sauce |
| Chicken Broth 💧 | 1 ½ cups | Low-sodium preferred for control |
| Carrots 🥕 | 2 whole | Medium, diced into small cubes |
| Yellow Onion 🧅 | 1 whole | Finely diced for even distribution |
| Celery Stalks 🌿 | 2 whole | Diced, leaves reserved for garnish |
| Frozen Green Peas 🌱 | ¾ cup | No need to thaw before using |
| Fresh Thyme Leaves 🍃 | 1 tbsp | Stripped from stems, chopped |
| Garlic Cloves 🧄 | 2 cloves | Minced for depth of flavor |
| Kosher Salt 🧂 | 1 ½ tsp | Diamond Crystal preferred for consistency |
| Freshly Ground Black Pepper 🌶️ | ½ tsp | Coarse grind for texture |
| Store-Bought Pie Crust 🥧 | 2 sheets | All-butter for best flakiness |
| Large Egg 🥚 | 1 whole | For egg wash to seal and brown |
The crust is non-negotiable for that signature flaky texture. Pillsbury all-butter pie crust is my go-to—it rolls out easily and browns beautifully. For the chicken, boneless, skinless thighs can substitute for breasts; they stay juicier. Look for low-sodium chicken broth so you can control the seasoning. Fresh thyme is worth the effort, but dried works at one-third the amount if that’s all you have.
No whole milk? Half-and-half or heavy cream makes an even richer sauce. Short on time? Rotisserie chicken works perfectly—just shred about 3 cups. The vegetables are flexible: swap in diced potatoes or green beans for the peas. If you’re avoiding dairy, use olive oil instead of butter and swap the milk for unsweetened almond milk.
Assemble and bake the same day for best results, but you can prep the filling 1 day ahead. Leftovers keep in the fridge for 3-4 days—reheat in the oven to revive the crust. These freeze beautifully for up to 2 months; thaw overnight before reheating.
Why You’ll Love This Recipe
- One Bowl Wonder: I mix the flour, butter, and milk right in the same bowl I’ll use for filling—no extra dishes to wash.
- Buttery Crust Magic: The butter and milk create this flaky, golden shell that cracks just right when you bite in.
- Lunchbox Hero: My kids actually ask for these in their lunches, and they reheat beautifully.
- Stretch Your Dollar: A couple chicken breasts and pantry staples make a dozen pies—way cheaper than store-bought.
Step-by-Step Instructions for Handheld Chicken Pot Pie
This method ensures a flaky crust encasing a creamy, vegetable-packed filling in every bite.
Step 1: Prepare the Filling Base with Aromatics
Dice the boneless skinless chicken breasts into ½-inch pieces and set aside. In a large skillet over medium heat, melt ¼ cup of the unsalted butter. Add the finely diced yellow onion, diced carrots, and diced celery stalks. Cook for 5-6 minutes until the vegetables soften and the onion becomes translucent.
Add the minced garlic cloves and chopped fresh thyme leaves, stirring for 30 seconds until fragrant. This builds the flavor foundation. I always let the aromatics cook until their scent fills the kitchen—that’s how you know they’re ready.
Step 2: Create the Roux and Simmer the Filling
Sprinkle the all-purpose flour over the vegetable mixture and stir to coat. Cook for 1-2 minutes to eliminate the raw flour taste. Gradually whisk in the chicken broth, followed by the whole milk, ensuring no lumps form. Stir in the frozen green peas, kosher salt, and freshly ground black pepper.
Add the diced chicken and simmer for 8-10 minutes until the chicken is cooked through and the filling thickens to a creamy consistency. The mixture should coat the back of a spoon. Taste and adjust seasoning if needed—this is your last chance to perfect the flavor.
Step 3: Assemble the Hand Pies
Unroll the store-bought pie crust sheets on a lightly floured surface. Using a 4-inch round cutter, cut out circles from the dough. Place a generous 2 tablespoon portion of the cooled filling on half of each dough circle, leaving a ½-inch border around the edge.
Fold the dough over the filling to create a half-moon shape. Press the edges together with a fork to seal, ensuring no filling escapes during baking. This step determines whether your pies will hold together or burst open in the oven.
Step 4: Bake to Golden Perfection
Preheat the oven to 375°F. Beat the large egg with 1 tablespoon water to create an egg wash. Brush the tops of the assembled pies with the wash—this ensures a deep, golden-brown finish. Cut a small slit in the top of each pie to allow steam to escape.
Bake on a parchment-lined sheet for 20-25 minutes until the crust is golden brown and flaky. Rotate the pan halfway through for even browning. The filling should be bubbling slightly at the slits when done.
Pro Tips For Making Handheld Chicken Pot Pie
- Poach the Chicken: Simmer the boneless chicken breasts in the chicken broth for 12-15 minutes until just done—this keeps them juicy and infuses extra flavor into the filling.
- Chill the Dough: After mixing your flour and butter for the crust, let it rest in the fridge for at least 30 minutes; it’s easier to handle and less likely to shrink when baked.
- Thicken the Filling: Cook your milk and broth mixture until it coats the back of a spoon before adding the chicken—this prevents a soggy bottom crust.
- Seal the Edges: Press the top and bottom crusts together firmly with a fork to lock in the filling, or you’ll risk leaks during baking.
Troubleshooting This Recipe
Soggy Crust Fixes
If your crust turns out soft instead of flaky, the filling was likely too wet. Let it cool completely before assembling. I also brush the dough with a thin layer of melted butter before adding filling to create a moisture barrier. 💡
Filling Too Thin
A runny filling usually means the roux didn’t cook long enough. Cook it for a full 2 minutes after adding flour, and simmer the filling until it coats the back of a spoon. You can also mix 1 tsp cornstarch with cold water and stir it in at the end.
Bursting Pies
This happens when there’s too much filling or the edges aren’t sealed properly. Use exactly 2 tablespoons of filling per pie and press edges firmly with a fork. Always cut a steam vent in the top—this is non-negotiable for handheld versions.
Pale Crust
For a deeper golden color, use an egg wash with 1 yolk + 1 tbsp water instead of a whole egg. Bake on the lower oven rack for the first 15 minutes, then move to the middle rack. Rotate the pan halfway through baking.
Filling Leaks
If filling oozes out during baking, your edges weren’t sealed tightly enough. Dip your fork in flour before crimping—this helps create a better seal. Also, let the filling cool slightly before assembling to prevent excess moisture from weakening the crust.
Uneven Baking
Hot spots in your oven can cause some pies to brown faster. Always rotate your baking sheet 180 degrees halfway through. For even better results, bake one sheet at a time on the middle rack. 🔥
Nutrition Facts
Frequently Asked Questions
Can I use puff pastry instead of pie crust?
Yes, puff pastry works beautifully for extra flakiness. Just thaw it first and roll to 1/8-inch thickness. Bake at 400°F for 15-20 minutes since puff pastry browns faster.
How do I prevent the filling from leaking?
Cool the filling completely before assembling. Use exactly 2 tablespoons per pie and press edges firmly with a floured fork. Always cut a steam vent in the top.
Can I make these ahead of time?
Assemble and refrigerate up to 1 day before baking. Or freeze unbaked pies for up to 2 months. Thaw overnight in the fridge before baking.

- 6 Oz Chocolate Chip Cookie Recipe: Perfectly Balanced Crispy Edges and Chewy Hearts - September 25, 2026
- 6-Inch Coffee Cake Recipe: Vanilla Bean Swirls and Buttery Streusel Topping - September 25, 2026
- 1 Hour Soup Recipe: Velvety Richness Without the Wait - September 25, 2026