
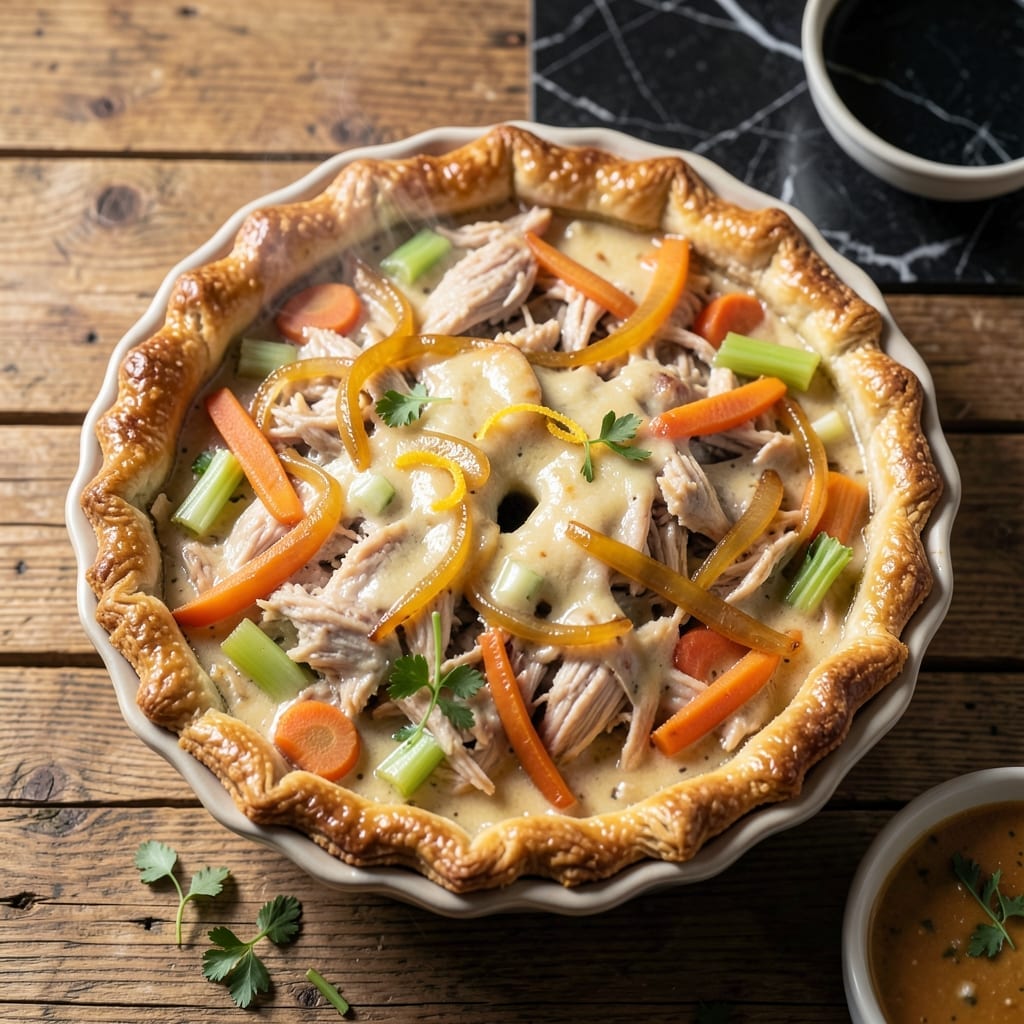
There’s something deeply satisfying about a golden, flaky crust encasing a savory chicken and vegetable filling. This dish brings comfort food to a new level with every bite.
I’ve refined this method to ensure the crust stays perfectly crisp while the filling remains rich and creamy. The key is a hot oven and a few simple techniques to lock in flavor.
The filling combines tender chicken, hearty vegetables, and a velvety sauce that’s both hearty and balanced. It’s the kind of meal that feels like a warm hug on a chilly evening.
Serve it fresh from the oven for the best texture and flavor. Here’s how to make it right.
Ingredients for Hicken Pot Pie
Flaky crust meets hearty filling with tender chicken and garden vegetables. Simple ingredients, impressive results.
| Ingredient | Amount | Notes |
|---|---|---|
| All-Purpose Flour 🌾 | 2 ½ cups | Plus extra for dusting surface |
| Unsalted Butter 🧈 | 1 cup | Cold, cubed for flaky crust |
| Chicken Breast 🍗 | 1 ½ lb | Boneless, skinless, cubed |
| Carrots 🥕 | 2 whole | Peeled and diced |
| Celery Stalks 🌿 | 2 whole | Trimmed and diced |
| Yellow Onion 🧅 | 1 whole | Finely chopped |
| Garlic Cloves 🧄 | 3 cloves | Minced for depth |
| Frozen Peas 🌱 | 1 cup | No need to thaw |
| Chicken Broth 🍲 | 2 cups | Low-sodium preferred |
| Heavy Cream 🥛 | ¾ cup | Full-fat for richness |
| All-Purpose Flour 🌾 | ¼ cup | For thickening sauce |
| Salt 🧂 | 1 tsp | Divided for seasoning layers |
| Black Pepper 🌶️ | ½ tsp | Freshly ground preferred |
| Dried Thyme 🍃 | 1 tsp | Or fresh if available |
| Large Egg 🥚 | 1 whole | For egg wash on crust |
The crust demands cold butter—Land O’Lakes or Plugrá work well. Use all-purpose flour from King Arthur if you want consistent results. For the chicken, boneless, skinless breasts stay moist if you don’t overcook them. I source mine from Whole Foods for reliable quality. The vegetables should be fresh, but frozen works in a pinch (just thaw and drain first).
Swap chicken thighs for breasts if you prefer darker meat—they’re more forgiving if left in the oven a few extra minutes. No fresh thyme? Dried works at half the amount. Out of peas? Green beans or corn add nice texture. For a richer sauce, half-and-half can replace heavy cream. The egg wash is optional, but it gives that golden finish mentioned in the title.
Assemble the pie just before baking for the crispiest crust. Leftovers keep in the fridge for 3-4 days—reheat in the oven to revive the flakiness. The filling thickens as it cools, so don’t worry if it seems loose straight from the oven.
Why You’ll Love This Recipe
- One Pan Wonder: I just dump everything into a single dish and let the oven do the work—no fancy techniques, just buttery crust and tender chicken.
- Pure Comfort: That first bite of flaky crust giving way to creamy chicken, carrots, and celery? Ridiculously good.
- Feeds a Crowd: I made this for Sunday dinner and had enough leftovers for Monday lunch. No complaints.
- Budget Friendly: Chicken breast and basic veggies stretch far, and honestly, it tastes like a million bucks for pennies.
Step-by-Step Instructions for Chicken Pot Pie
Here’s the method for achieving a flaky crust and rich filling in perfect harmony.
Step 1: Prepare the Flaky Crust
In a large bowl, combine the 2.5 cups All-Purpose Flour with 1 tsp Salt. Cut in the 1 cup Unsalted Butter (cold and cubed) using a pastry cutter or your fingers until the mixture resembles coarse crumbs with pea-sized butter pieces visible. This creates the flaky layers in your crust.
Gradually add 6-8 tablespoons of ice water, one tablespoon at a time, mixing just until the dough comes together. Don’t overwork it—stop as soon as it forms a shaggy ball. Divide the dough into two portions, flatten into discs, wrap in plastic, and refrigerate for 1 hour.
Step 2: Cook the Filling Base
In a large skillet over medium heat, cook the cubed 1.5 lb Chicken Breast until no longer pink, about 8-10 minutes. Remove and set aside. In the same pan, add the diced 2 whole Carrots, 2 whole Celery Stalks, and finely chopped 1 whole Yellow Onion. Cook for 5-7 minutes until softened.
Add the minced 3 cloves Garlic Cloves and cook for 1 minute until fragrant. Stir in the 0.25 cup All-Purpose Flour to create a roux, cooking for 1-2 minutes to remove the raw flour taste. This thickens the filling and builds flavor.
Step 3: Build the Creamy Filling
Slowly whisk in the 2 cups Chicken Broth and 0.75 cup Heavy Cream, ensuring no lumps form. Bring to a simmer and cook for 5 minutes until the mixture thickens enough to coat the back of a spoon. Season with ½ tsp Black Pepper and 1 tsp Dried Thyme.
Return the chicken to the pan along with the 1 cup Frozen Peas. Stir to combine and cook for an additional 2 minutes. The filling should be rich and creamy, with vegetables tender but still holding their shape. Remove from heat and let cool slightly while you roll out the crust.
Step 4: Assemble and Bake the Pie
On a lightly floured surface, roll out one disc of dough to fit a 9-inch pie dish. Transfer to the dish, pressing gently into the bottom and sides. Trim the edges, leaving a ½-inch overhang. Pour the cooled filling into the crust.
Roll out the second dough disc and place it over the filling. Trim and crimp the edges to seal, then brush the top with a beaten 1 whole Large Egg for a golden finish. Cut several slits in the top crust to allow steam to escape. Bake at 375°F for 40-45 minutes until the crust is golden brown and the filling is bubbling.
Pro Tips For Making Hicken Pot Pie
- Chill the Dough: Pop your pie dough in the fridge for at least 30 minutes before rolling—I learned this the hard way after my crust shrunk in the oven like a deflated balloon.
- Shred the Chicken: Poach and shred the chicken breast instead of cubing it; the smaller pieces distribute better and every bite actually has chicken in it.
- Sauté the Veggies: Cook the carrots and celery in butter for 5-7 minutes before adding liquid, or you’ll end up with crunchy, undercooked bits in the filling.
- Vent the Top: Cut a few small slits in the top crust—my grandmother swore by this, and she was right: it keeps the filling from turning into a soggy mess.
Storing and Reheating hicken pot pie
Refrigerator Storage
Let your pie cool completely before storing—this prevents soggy crust. I wrap slices in aluminum foil and refrigerate for up to 3-4 days. The filling thickens as it chills, making it easier to reheat cleanly. ❄️
Freezer Storage
For longer storage, wrap the entire pie or individual slices in plastic wrap then aluminum foil. Freeze for up to 2 months. I label with the date using masking tape to track freshness.
Thaw overnight in the fridge before reheating for best texture.
Oven Reheating
Preheat to 350°F and place slices on a baking sheet. Cover with foil and warm for 15-20 minutes. Uncover the last 5 minutes to crisp the crust. This method keeps the filling creamy. 🔥
Microwave Option
For quick reheating, microwave individual slices on 70% power for 1-2 minutes. Place a damp paper towel over the slice to retain moisture. The crust won’t be as crisp, but it’s fast.
Reviving Leftovers
If the crust loses crispness, pop slices under the broiler for 2-3 minutes—watch closely to avoid burning. I always check at 1-minute intervals for perfect results.
Nutrition Facts
Frequently Asked Questions
Can I use store-bought pie crust?
Yes, it’s a great shortcut! Use 2 pre-made pie crusts for this recipe. Just thaw them first and roll slightly to fit your dish. The texture won’t be quite as flaky as homemade, but it saves time.
How do I prevent a soggy bottom crust?
Pre-bake the bottom crust for 10 minutes before adding filling. Also, let the filling cool slightly before assembling to reduce steam that can make the crust soggy.
Can I make this ahead of time?
Assemble the pie but don’t bake it. Refrigerate for up to 24 hours or freeze for 1 month. Bake directly from cold, adding 10-15 minutes to the cooking time.
What if my filling is too thin?
Mix 1 tablespoon cornstarch with 1 tablespoon cold water and stir into the filling before baking. This will thicken it without changing the flavor.

- 4C Bread Crumbs Meatballs Recipe: Crispy Crust and Juicy Centers - September 25, 2026
- 6 Oz Chocolate Chip Cookie Recipe: Perfectly Balanced Crispy Edges and Chewy Hearts - September 25, 2026
- 6-Inch Coffee Cake Recipe: Vanilla Bean Swirls and Buttery Streusel Topping - September 25, 2026