
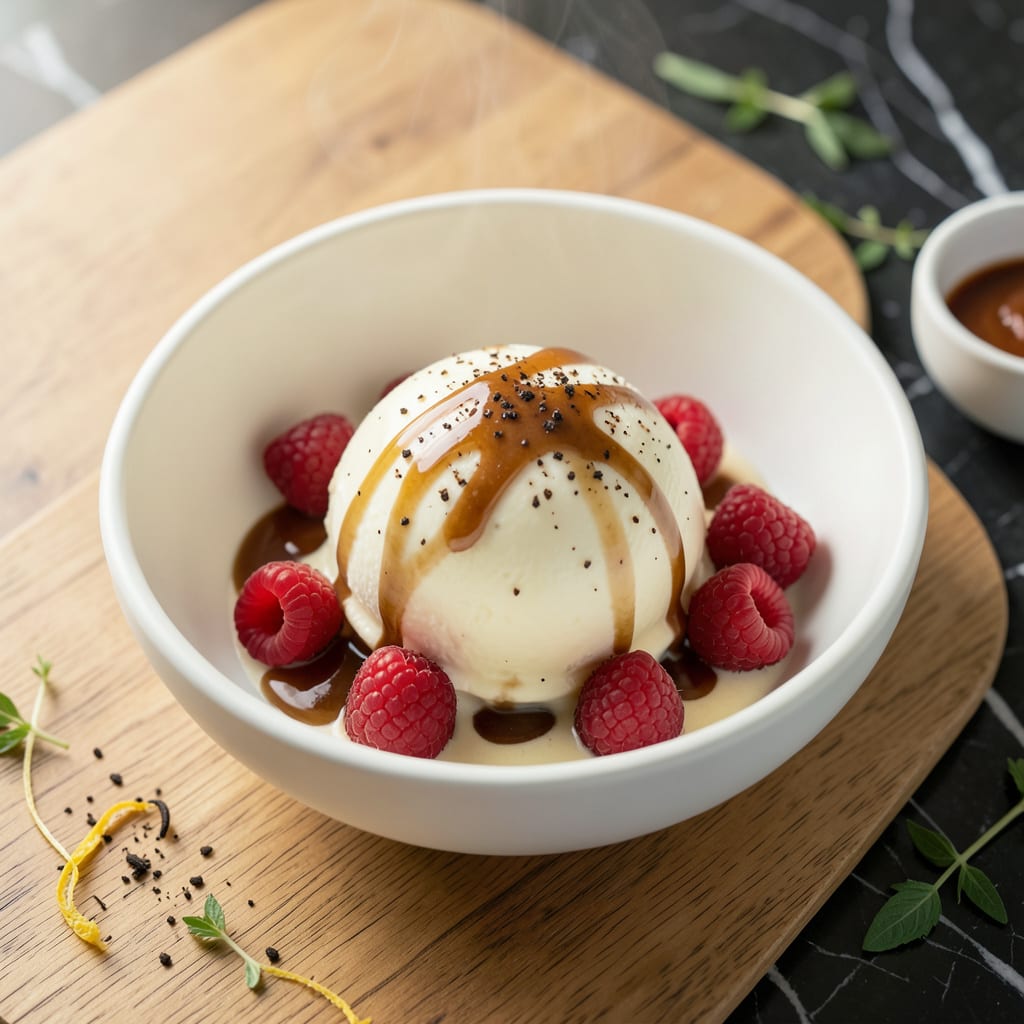
I’ve perfected this method for creating the creamiest, most luxurious ice cream you’ll ever taste. The high butterfat content transforms ordinary ingredients into an ultra-rich dessert with an impossibly smooth texture.
This recipe requires patience and precision, but the result is worth every minute. The slow churning process incorporates air while preventing ice crystals, delivering that signature velvety mouthfeel.
Ingredients for High Butter Fat Ice Cream
Rich dairy and a touch of precision create this ultra-luxurious frozen treat.
| Ingredient | Amount | Notes |
|---|---|---|
| Heavy Whipping Cream 🥛 | 2 cups | At least 36% butterfat content |
| Whole Milk 🥛 | 1 cup | Full-fat for creaminess |
| Granulated Sugar 🍚 | ¾ cup | Fine white sugar preferred |
| Egg Yolks 🥚 | 6 whole | Large eggs, room temperature |
| Unsalted Butter 🧈 | 4 tbsp | High-quality European-style preferred |
| Vanilla Bean 🌿 | 1 whole | Split and seeds scraped |
| Pure Vanilla Extract 💧 | 1 tsp | For enhanced vanilla flavor |
| Salt 🧂 | ¼ tsp | Fine sea salt preferred |
| Corn Syrup 🧈 | 2 tbsp | Light or dark variety |
| Whole Egg 🥚 | 1 whole | Optional, for stability |
The butterfat percentage is non-negotiable here. Heavy cream at 36-40% is ideal—Organic Valley or Darigold are reliable brands. Egg yolks add richness and emulsify the base; pasture-raised eggs yield a deeper color. For butter, Plugrá or Kerrygold offer superior fat content (82-86%). Avoid ultra-pasteurized cream as it can separate during churning, and always check expiration dates for freshness.
Need to adjust sweetness? Honey or maple syrup at one-to-one ratio works, but may slightly alter texture. No vanilla bean? Double the extract, though seeds add visual appeal. For a lighter version, half-and-half at 50% the volume can replace some cream, but texture will suffer. Corn syrup can be swapped for glucose syrup or agave, though the latter is sweeter—reduce by one-third.
The custard base keeps 5 days refrigerated before churning. Once churned, ice cream stores 2-3 weeks in an airtight container with parchment paper pressed to the surface. Freeze in shallow containers for easier scooping. Allow to temper at room temperature for 10 minutes before serving for optimal creaminess.
Why You’ll Love This Recipe
- One Pot Magic: I just melt, whisk, and chill—no fancy equipment, just a bowl and some patience.
- Velvety Luxury: The butter and egg yolks make it so rich, it practically melts on your tongue.
- Crowd Pleaser: Birthdays, BBQs, or a random Tuesday—everyone loses their mind over this one.
- Freezer Friendly: I always double the batch. Honestly, it keeps so well I’ve caught myself sneaking spoonfuls weeks later.
Step-by-Step Instructions for High Butter Fat Ice Cream
This professional technique ensures an ultra-rich custard base with velvety smooth texture every time.
Step 1: Infuse the Dairy with Vanilla and Butter
In a heavy-bottomed saucepan, combine the 2 cups Heavy Whipping Cream, 1 cup Whole Milk, and 4 tbsp Unsalted Butter. Heat over medium heat until the butter melts completely and the mixture just begins to simmer around the edges.
Split the 1 whole Vanilla Bean lengthwise with a sharp knife, scrape the seeds into the warm dairy mixture, then add the pod itself. Remove from heat, cover, and let steep for 15 minutes to infuse the vanilla flavor thoroughly. This patience ensures maximum flavor extraction.
Step 2: Temper the Eggs for a Silky Custard
In a separate bowl, whisk together the 6 whole Egg Yolks, 1 whole Whole Egg, 0.75 cup Granulated Sugar, 2 tbsp Corn Syrup, and 0.25 tsp Salt until pale and slightly thickened. The corn syrup adds stability and prevents ice crystals from forming.
Slowly pour about 1 cup of the warm cream mixture into the egg mixture while whisking constantly—this tempering process prevents the eggs from curdling. Once incorporated, pour the tempered egg mixture back into the saucepan with the remaining cream.
Step 3: Cook the Custard to the Perfect Thickness
Return the saucepan to medium-low heat and cook, stirring constantly with a wooden spoon or silicone spatula, until the custard thickens enough to coat the back of the spoon. This should take 8-12 minutes—look for the mixture to reach 170-175°F on an instant-read thermometer.
The custard is ready when you can run your finger through the coating on the spoon and it leaves a clean path that holds its shape. Remove from heat immediately and stir in the 1 tsp Pure Vanilla Extract. Strain the custard through a fine-mesh sieve into a clean bowl to remove the vanilla pod and any cooked bits of egg.
Step 4: Chill Thoroughly Before Churning
Press plastic wrap directly onto the surface of the custard to prevent a skin from forming. Refrigerate for at least 4 hours, or preferably overnight, until completely chilled to 40°F or below. This chilling step is critical—it ensures the custard churns properly in your ice cream maker.
Once chilled, pour the custard into your ice cream maker and churn according to the manufacturer’s instructions, typically 20-25 minutes. The ice cream is ready when it reaches the consistency of soft-serve and holds its shape when scooped.
Step 5: Freeze to Perfect Scooping Consistency
Transfer the churned ice cream to a freezer-safe container, smoothing the top with a spatula. Press plastic wrap directly against the surface to prevent ice crystals from forming. Freeze for at least 4 hours or until firm enough to scoop.
The result should be an exceptionally rich, dense ice cream with a velvety texture that melts slowly on the tongue. The high butterfat content from both the cream and butter creates a luxurious mouthfeel that sets this apart from standard ice cream recipes.
Pro Tips For Making High Butter Fat Ice Cream
- Temper the Eggs: Slowly drizzle about a cup of the hot cream mixture into the yolks while whisking constantly—I learned this the hard way after scrambling eggs in my first batch.
- Use Room Temp Dairy: Pull the heavy cream, milk, and eggs out of the fridge 30 minutes before starting; cold ingredients won’t emulsify properly and you’ll end up with icy patches.
- Skip the Boil: Heat the cream mixture just until steaming (around 170°F), not boiling, or the butterfat can separate and leave your base greasy.
- Chill Completely: Give the custard a full 4+ hours in the fridge before churning—my grandmother swore by this, and she was right: it prevents ice crystals and gives that ultra-smooth texture.
Storing and Reheating high butter fat ice cream
Freezer Storage
Press parchment paper directly against the ice cream surface before sealing with an airtight lid. This prevents ice crystals from forming on top. Store at 0°F or below for optimal texture. Your creation stays fresh for 2-3 weeks if properly sealed. ❄️
Refrigerator Storage
The custard base keeps beautifully in your fridge for up to 5 days before churning. I always use glass containers with tight lids to prevent absorbing other flavors. Make sure it’s fully chilled to 40°F before adding to your ice cream maker.
Rehardening Soft Ice Cream
If your ice cream has softened, return it to the freezer for 1-2 hours to firm up. Avoid refreezing completely melted ice cream as it can become grainy. I recommend using shallow containers for faster, more even freezing.
Scooping Tips
Let your ice cream sit at room temperature for 10-15 minutes before serving. This brief tempering makes scooping effortless while maintaining the perfect texture. A warm metal scoop dipped in hot water glides through like magic.
Portioning for Gatherings
For parties, I prep individual servings in small ramekins with lids. These can go straight from freezer to table after 5 minutes of tempering. Guests love the personal touch, and it prevents the main tub from repeated exposure to warm air.
Flavor Preservation
Store mix-ins separately and fold them in just before serving. This keeps chocolate chunks or fruit swirls from getting soggy or icy. I learned this trick after my caramel ribbons turned rock hard in the freezer. 💡
Nutrition Facts
Frequently Asked Questions
Why use butter in addition to heavy cream?
The extra butter boosts fat content to 40%+, creating an ultra-creamy texture that melts slowly. It also adds a rich, rounded flavor that cream alone can’t achieve.
Can I use a different sweetener besides sugar?
Yes, honey or maple syrup work at a 1:1 ratio, but may alter texture slightly. Reduce agave by one-third as it’s sweeter. Avoid artificial sweeteners—they won’t give the same smooth consistency.
How do I prevent ice crystals from forming?
Press plastic wrap directly on the custard surface before chilling, then do the same after churning. Store in an airtight container at 0°F or below. The corn syrup in the recipe also helps inhibit crystal formation.

- 8 Bean Soup Recipe Crock Pot: Hearty Vegetable Medley in One Pot - September 25, 2026
- 4C Bread Crumbs Meatballs Recipe: Crispy Crust and Juicy Centers - September 25, 2026
- 6 Oz Chocolate Chip Cookie Recipe: Perfectly Balanced Crispy Edges and Chewy Hearts - September 25, 2026