
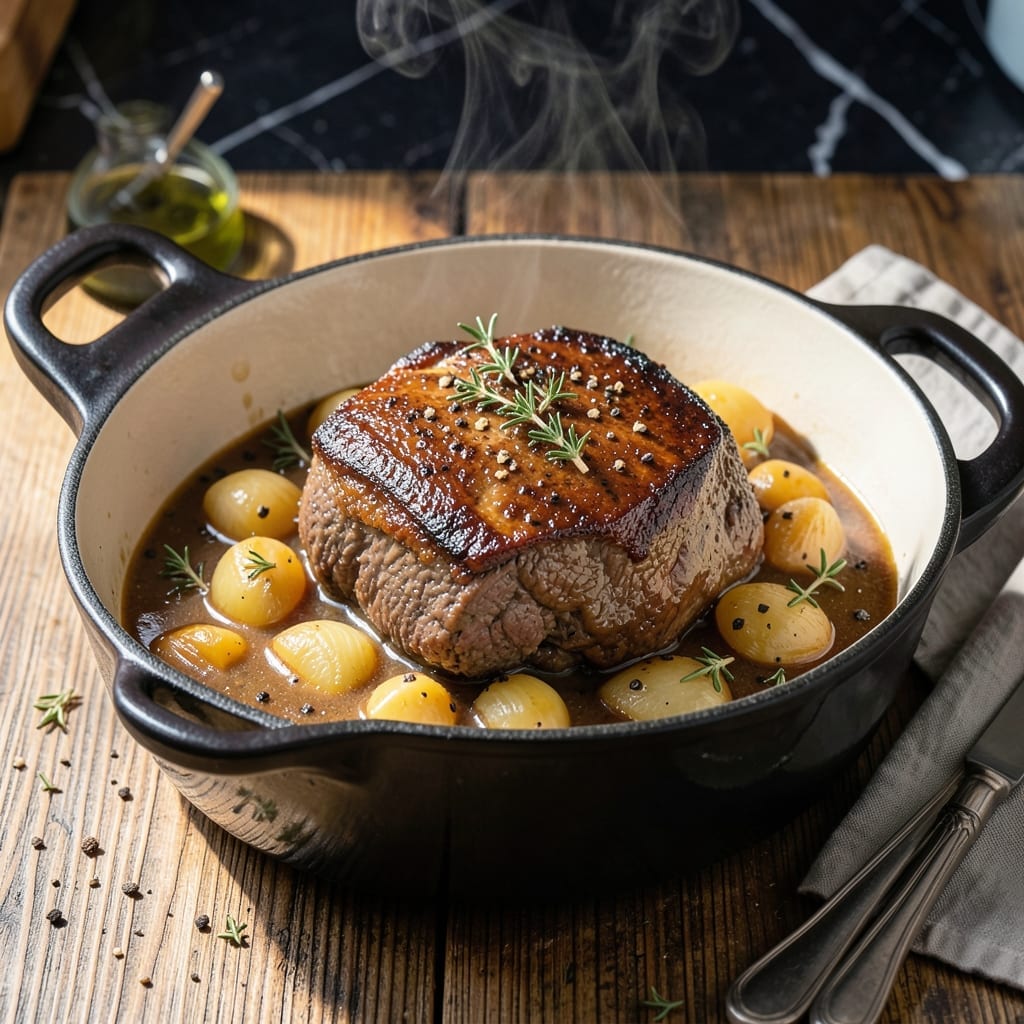
This pot roast has earned its reputation as the ultimate Sunday dinner centerpiece through years of testing and refinement.
I’ve perfected a method that transforms tough cuts into fall-apart tender meat with rich, deeply flavored gravy. The secret lies in low, slow cooking and a few key techniques that guarantee success every time.
The result is a dish that fills your home with an irresistible aroma and delivers melt-in-your-mouth tenderness. Each bite is packed with savory depth from the seared meat and caramelized vegetables.
Serve it with mashed potatoes or crusty bread to soak up every last drop of the savory sauce. This is comfort food at its finest.
Ingredients for Highest Rated Pot Roast
Sunday dinner magic starts with these quality ingredients for melt-in-your-mouth goodness.
| Ingredient | Amount | Notes |
|---|---|---|
| Chuck Roast 🥩 | 3 lb | Well-marbled, boneless preferred |
| Kosher Salt 🧂 | 2 tsp | Diamond Crystal preferred for even seasoning |
| Freshly Ground Black Pepper 🌶️ | 1 tsp | Coarse grind for texture |
| All-Purpose Flour 🌾 | ¼ cup | For dredging the meat |
| Olive Oil 🫒 | 2 tbsp | High smoke point for searing |
| Yellow Onions 🧅 | 2 whole | Large, quartered for slow cooking |
| Carrots 🥕 | 4 whole | Peeled, cut into 2-inch chunks |
| Celery Stalks 🌿 | 3 whole | Cut into 2-inch pieces |
| Garlic Cloves 🧄 | 6 cloves | Smashed for robust flavor |
| Dry Red Wine 🍷 | 1 ½ cups | Bold variety like Cabernet Sauvignon |
| Beef Stock 💧 | 2 cups | Low-sodium preferred for control |
| Tomato Paste 🍅 | 2 tbsp | Double-concentrated for depth |
| Fresh Thyme Sprigs 🌿 | 4 whole | Tied with kitchen twine |
| Bay Leaves 🍃 | 2 whole | Dried, for aromatic base |
| Unsalted Butter 🧈 | 2 tbsp | For finishing the gravy |
The chuck roast is non-negotiable here. Look for heavy marbling—it melts into the meat as it cooks, creating that signature tenderness. Whole Foods or a good butcher will have the best selection, but most supermarkets carry it too. Avoid cuts labeled ’round’ or ‘bottom round’—they stay tough. The wine should be something you’d actually drink (Cabernet Sauvignon or Merlot work perfectly). Don’t waste expensive stuff, but don’t use cooking wine either.
No red wine? Substitute with 1.5 cups beef broth plus 1 tbsp balsamic vinegar. Fresh thyme can be swapped for 1 tsp dried thyme. If you’re out of tomato paste, 2 tbsp ketchup in a pinch (but the paste gives better depth). The flour for dredging can be cornstarch or arrowroot for gluten-free. For extra richness, add 1 tbsp Worcestershire sauce to the braising liquid.
This tastes even better the next day (4-5 days in the fridge). Freeze portions for up to 3 months—just thaw in the fridge overnight. The gravy might separate when cold; reheat gently while whisking to bring it back together. Leftovers make incredible sandwiches on crusty bread.
Why You’ll Love This Recipe
- Set It and Forget: I toss the chuck roast with flour, salt, and pepper, sear it, then let the oven do the rest—hands-off cooking at its finest.
- Fall-Apart Tender: The slow roast turns the meat so tender it practically melts on the tongue, with a rich crust from the olive oil sear.
- Feeds a Crowd: One pot, one roast, and suddenly I’ve got a hearty meal that satisfies a family dinner or Sunday supper with ease.
- Leftovers for Days: Honestly, the flavors deepen overnight—shredded for sandwiches or tucked into tacos, it’s a gift that keeps giving.
Step-by-Step Instructions for Pot Roast
This Sunday dinner classic comes together with patience and a few key techniques.
Step 1: Season and Sear the Chuck Roast
Pat the 3 lb chuck roast completely dry with paper towels—this is non-negotiable for a proper sear. Season all sides aggressively with the 2 tsp kosher salt and 1 tsp freshly ground black pepper, pressing the seasoning into the meat so it adheres well.
Dredge the roast in the 0.25 cup all-purpose flour, shaking off any excess. This creates a light crust that thickens the sauce later. Heat the 2 tbsp olive oil in a Dutch oven over medium-high heat until shimmering. Sear the roast for 4-5 minutes per side until deeply browned—this builds the foundation of flavor for your pot roast.
Don’t rush this step. You want a rich, dark crust that tells you the Maillard reaction is working its magic. Transfer the seared roast to a plate and set aside momentarily.
Step 2: Build the Aromatic Base
In the same Dutch oven (no need to clean it—those browned bits are pure flavor), add the 2 whole yellow onions, 4 whole carrots, and 3 whole celery stalks. Cook over medium heat for 6-8 minutes, stirring occasionally, until the vegetables begin to soften and develop some color.
Add the 6 cloves garlic cloves and 2 tbsp tomato paste, stirring constantly for 1-2 minutes until the tomato paste darkens slightly. This step intensifies its sweetness and removes any raw flavor. The kitchen should smell incredible at this point—rich, deep, and savory.
Pour in the 1.5 cups dry red wine to deglaze the pan, scraping up all those beautiful browned bits with a wooden spoon. Let it simmer for 3-4 minutes until reduced by about half. The alcohol smell should cook off, leaving behind a concentrated, aromatic base.
Step 3: Braise Low and Slow
Return the seared chuck roast to the Dutch oven along with any accumulated juices. Pour in the 2 cups beef stock, then add the 4 whole fresh thyme sprigs and 2 whole bay leaves. The liquid should come about halfway up the roast—add a splash more beef stock if needed.
Bring the mixture to a gentle simmer, then reduce the heat to low, cover, and let it braise for 3 to 3.5 hours. This low-and-slow method transforms the tough cut into something melt-in-your-mouth tender. You’ll know it’s ready when the meat shreds easily with a fork.
Step 4: Finish and Rest
Once the chuck roast is fork-tender, carefully transfer it to a serving platter. Skim any excess fat from the surface of the braising liquid, then stir in the 2 tbsp unsalted butter to add a silky finish to the gravy. Taste and adjust seasoning if needed—though the initial salting should have you covered.
Let the roast rest for 15-20 minutes before slicing or shredding. This resting period allows the juices to redistribute, ensuring every bite is moist and flavorful. Serve the pot roast with the vegetables and gravy spooned over the top for a Sunday dinner that’s as hearty as it is impressive.
Pro Tips For Making Highest Rated Pot Roast
- Sear Hard, Don’t Rush: Get your olive oil smoking hot before adding the floured chuck roast—this is where the deep, caramelized crust forms. I learned this the hard way after too many pale, sad-looking roasts.
- Pat It Dry: Blot the chuck roast with paper towels before seasoning; even a little moisture prevents the flour from sticking properly and ruins the sear.
- Skip the Cold Meat: Let the roast sit at room temperature for 30-45 minutes before searing, or the center stays cold while the outside overcooks.
- Use Enough Oil: Don’t skimp—use about 3 tablespoons of olive oil in a heavy pot to fully coat the bottom, or the flour will burn instead of browning.
Common Mistakes When Making Perfect Results
Skipping the Sear
I can’t stress this enough—skipping the sear is the fastest way to bland pot roast. That 4-5 minutes per side over medium-high heat creates the Maillard reaction, which builds deep, complex flavors. Without it, your dish will taste flat and one-dimensional.
Overcrowding the Pan
When searing, resist the urge to add all the vegetables at once. Too many ingredients lower the pan temperature, causing the meat to steam instead of brown. I sear the roast first, then cook the vegetables in batches if needed. 🔥
Using the Wrong Cut
Chuck roast is non-negotiable here. Leaner cuts like round or sirloin won’t break down properly during the long braise. Look for heavy marbling—this fat renders into the meat, creating that signature tenderness we all love.
Insufficient Liquid
Your braising liquid should come about halfway up the roast. If using a 3 lb chuck roast, 2 cups beef stock plus 1.5 cups wine is perfect. Too little liquid means the meat will dry out before it becomes tender.
Peeking Too Often
Every time you lift the lid during braising, you release heat and moisture, extending the cooking time. I check only once after 2 hours to ensure the liquid hasn’t reduced too much. Trust the process—low and slow wins the race.
Skipping the Rest
Resting for 15-20 minutes lets the juices redistribute. Slice too soon, and all that beautiful moisture will end up on your cutting board instead of in the meat. Patience here makes the difference between good and exceptional. 💛
Nutrition Facts
Frequently Asked Questions
What’s the best cut for this dish?
Chuck roast is ideal due to its marbling and connective tissue. It breaks down beautifully during the 3-3.5 hour braise, creating tender, flavorful meat. Avoid leaner cuts like round or sirloin.
Can I make this in a slow cooker?
Yes! Sear the meat first, then transfer everything to the slow cooker. Cook on low for 8-10 hours or high for 5-6 hours. The texture will be slightly different but still delicious.
How do I thicken the gravy?
If your gravy is thin, simmer it uncovered for 10-15 minutes after removing the meat. For a quicker fix, mix 1 tbsp cornstarch with 1 tbsp water and stir into the gravy.

- 4C Bread Crumbs Meatballs Recipe: Crispy Crust and Juicy Centers - September 25, 2026
- 6 Oz Chocolate Chip Cookie Recipe: Perfectly Balanced Crispy Edges and Chewy Hearts - September 25, 2026
- 6-Inch Coffee Cake Recipe: Vanilla Bean Swirls and Buttery Streusel Topping - September 25, 2026