
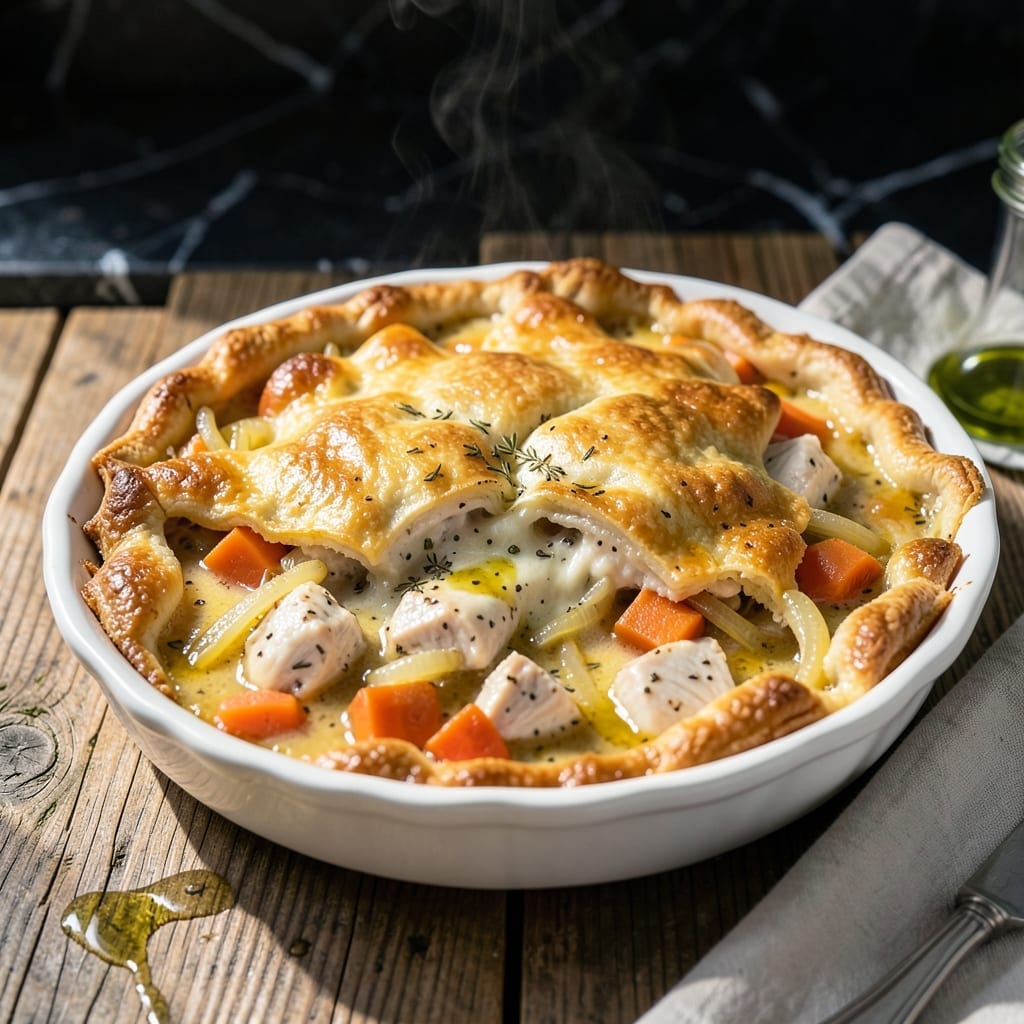
There’s nothing like a warm chicken pot pie straight from the oven, especially when it features a flaky, buttery Bisquick topping over a rich, creamy filling. This homemade version delivers comfort in every bite without the fuss of traditional pastry.
The beauty of using Bisquick lies in its simplicity—just a few ingredients transform into a golden, tender crust that bakes up perfectly over the savory chicken and vegetable mixture. It’s a shortcut that doesn’t compromise on flavor or texture.
Inside, you’ll find chunks of tender chicken, hearty vegetables, and a velvety sauce that comes together in under an hour. The filling is thick, satisfying, and packed with the kind of warmth that makes this dish a family favorite.
Ready in 45 minutes, this recipe proves that homemade can be both quick and deeply rewarding.
Ingredients for Homemade Chicken Pot Pie Recipe with Bisquick
Flaky buttery Bisquick topping meets creamy chicken filling. Hearty comfort in every bite.
| Ingredient | Amount | Notes |
|---|---|---|
| Bisquick Baking Mix 🥣 | 2 cups | Original or buttermilk variety |
| Whole Milk 🥛 | ⅔ cup | Cold, for biscuit topping |
| Unsalted Butter 🧈 | 4 tbsp | Melted, divided for topping and filling |
| Boneless Skinless Chicken Breasts 🍗 | 1 ½ lb | Cut into 1-inch chunks |
| Yellow Onion 🧅 | 1 whole | Medium, finely diced |
| Carrots 🥕 | 2 whole | Medium, peeled and diced |
| Celery Stalks 🌿 | 2 pieces | Diced for filling |
| Frozen Green Peas 🌱 | 1 cup | No need to thaw |
| All-Purpose Flour 🌾 | ⅓ cup | For thickening sauce |
| Chicken Broth 💧 | 1 ½ cups | Low-sodium preferred |
| Whole Milk 🥛 | ½ cup | For creamy filling |
| Salt 🧂 | 1 tsp | Kosher or sea salt, divided |
| Black Pepper 🌶️ | ½ tsp | Freshly ground preferred |
| Dried Thyme 🍃 | ½ tsp | For savory depth |
| Garlic Powder 🧄 | ½ tsp | Enhances flavor profile |
The Bisquick topping is the star here. General Mills Bisquick is the gold standard, but any baking mix works (just check for added sugar). For the chicken, boneless, skinless thighs stay juicier than breasts—grab them from the butcher counter if you want uniform pieces. The vegetables should be fresh, not canned, for the best texture. Look for carrots and celery with vibrant color and no soft spots.
No Bisquick? Homemade biscuit mix (2 cups flour + 1 tbsp baking powder + 1 tsp salt + 6 tbsp cold butter) is an easy swap. Chicken thighs can replace breasts one-for-one. Short on fresh veggies? Frozen mixed vegetables work in a pinch—just thaw and drain first. The milk can be any percentage, but whole milk gives the creamiest sauce. For extra richness, swap half the broth for heavy cream.
Leftovers keep 3-4 days in the fridge, though the crust softens. Freeze unbaked pies for up to 2 months—bake from frozen, adding 10 minutes. The filling thickens as it cools, so thin with a splash of broth when reheating. Always store covered to prevent the topping from drying out.
Why You’ll Love This Recipe
- I’ll be real: it tastes even better the next day, and the portions are generous enough for two meals.
- One Bowl Wonder: I just dump the Bisquick, milk, and butter together—no mixing bowls piling up in the sink.
- Buttery Flaky Crust: That golden Bisquick topping with the creamy chicken filling underneath? Ridiculously good.
- Weeknight Hero: Between us, I’ve served this for Sunday dinner and last-minute Tuesday meals—always a hit.
Step-by-Step Instructions for Chicken Pot Pie With Bisquick
This streamlined method delivers homemade comfort with minimal effort and maximum flavor.
Step 1: Prepare the Creamy Chicken Filling
In a large skillet over medium-high heat, melt 2 tbsp Unsalted Butter. Add 1.5 lb Boneless Skinless Chicken Breasts cut into 1-inch chunks and cook for 5-6 minutes until no longer pink. Season with ½ tsp Salt, ½ tsp Black Pepper, ½ tsp Dried Thyme, and ½ tsp Garlic Powder.
Remove the chicken and set aside. In the same skillet, add 1 whole Yellow Onion (finely diced), 2 whole Carrots (peeled and diced), and 2 pieces Celery Stalks (diced). Sauté for 4-5 minutes until vegetables soften.
Sprinkle 0.33 cup All-Purpose Flour over the vegetables and stir for 1 minute to cook off the raw flour taste. Gradually whisk in 1.5 cups Chicken Broth and 0.5 cup Whole Milk, then stir in 1 cup Frozen Green Peas. Return the chicken to the skillet and simmer for 3-4 minutes until the filling thickens.
Step 2: Adjust Seasoning and Preheat Oven
Taste the filling and adjust seasoning with the remaining ½ tsp Salt if needed. The mixture should be creamy but not soupy—it will thicken further during baking. Transfer the chicken and vegetable mixture to a 9×13-inch baking dish or four individual ramekins.
Preheat your oven to 400°F. This high heat ensures the biscuit topping will rise quickly and develop a golden-brown crust while the filling bubbles beneath. While the oven heats, prepare the Bisquick topping.
Step 3: Mix and Top With Bisquick Biscuit Dough
In a bowl, combine 2 cups Bisquick Baking Mix with 0.66 cup Whole Milk. Stir just until the dough comes together—it will be slightly sticky. Melt the remaining 2 tbsp Unsalted Butter and set aside.
Drop spoonfuls of the Bisquick dough evenly over the hot chicken filling, leaving small gaps for steam to escape. Brush the tops with the melted butter. This layer will spread as it bakes, creating a buttery, flaky crust that perfectly complements the creamy filling.
Step 4: Bake Until Golden and Bubbly
Bake for 20-25 minutes until the biscuit topping is deep golden brown and the filling is bubbling around the edges. If the topping browns too quickly, tent loosely with foil for the remaining time.
Let the pot pie rest for 5 minutes before serving. This brief pause allows the filling to set slightly, making it easier to serve. The finished dish should have a crisp, buttery topping over a rich, creamy interior packed with tender chicken and vegetables.
Pro Tips For Making Homemade Chicken Pot Pie Recipe With Bisquick
- Precook the Chicken: Poach or sauté the chicken breasts first—raw chunks in the filling will dry out during baking, and nobody wants chewy chicken in their pie.
- Chill the Dough: Let the Bisquick topping rest in the fridge for 10 minutes before baking. I learned this the hard way after watching my first few pies spread into a sad, flat layer.
- Use Cold Butter: Cut the unsalted butter into small cubes and keep it cold until mixing—this guarantees a flakier, taller biscuit topping instead of a dense one.
- Thicken the Filling: After cooking the onions, stir in a tablespoon of the Bisquick mix to the filling to soak up excess liquid—skipping this leaves you with a soggy bottom crust.
Health Benefits of These Flavors
Protein Powerhouse
The chicken in this dish provides high-quality protein—about 26 grams per 3-ounce serving—essential for muscle repair and growth. It’s a complete protein containing all nine amino acids your body needs. I love that this meal keeps me full and energized for hours. 💪
Vegetable Nutrition Boost
Carrots bring beta-carotene, which your body converts to vitamin A, while celery adds fiber and antioxidants. The peas contribute vitamin K and folate. Together, they create a nutrient-dense filling that supports overall health. 🥕
Comfort with Balance
The milk in both the filling and topping provides calcium and vitamin D, crucial for bone health. While this is a rich dish, the vegetables add fiber, which helps balance the meal and supports digestion.
Energy-Sustaining Carbs
The Bisquick topping offers quick energy from carbohydrates, while the flour in the filling helps thicken the sauce. These carbs fuel your body, making this dish perfect for active days when you need lasting energy.
Micronutrient Richness
Onions and garlic powder provide quercetin and allicin, compounds known for their immune-boosting properties. The thyme adds iron and manganese, rounding out the nutritional profile of this hearty meal.
Nutrition Facts
Frequently Asked Questions
Can I use chicken thighs instead of breasts?
Thighs stay juicier and add richer flavor. Use the same 1.5 lb amount and cook for 6-7 minutes until 165°F.
What if my topping isn’t golden after baking?
Broil for 1-2 minutes at the end, watching closely. Alternatively, brush with extra melted butter before baking for a deeper color.
Can I make this ahead of time?
Assemble the dish but don’t bake. Refrigerate for up to 12 hours, then bake as directed, adding 5-10 minutes if cold.
How do I prevent a soggy bottom crust?
Ensure filling is bubbling hot before adding topping. Avoid overmixing the Bisquick dough—stir just until combined.

- 6 Oz Chocolate Chip Cookie Recipe: Perfectly Balanced Crispy Edges and Chewy Hearts - September 25, 2026
- 6-Inch Coffee Cake Recipe: Vanilla Bean Swirls and Buttery Streusel Topping - September 25, 2026
- 1 Hour Soup Recipe: Velvety Richness Without the Wait - September 25, 2026