
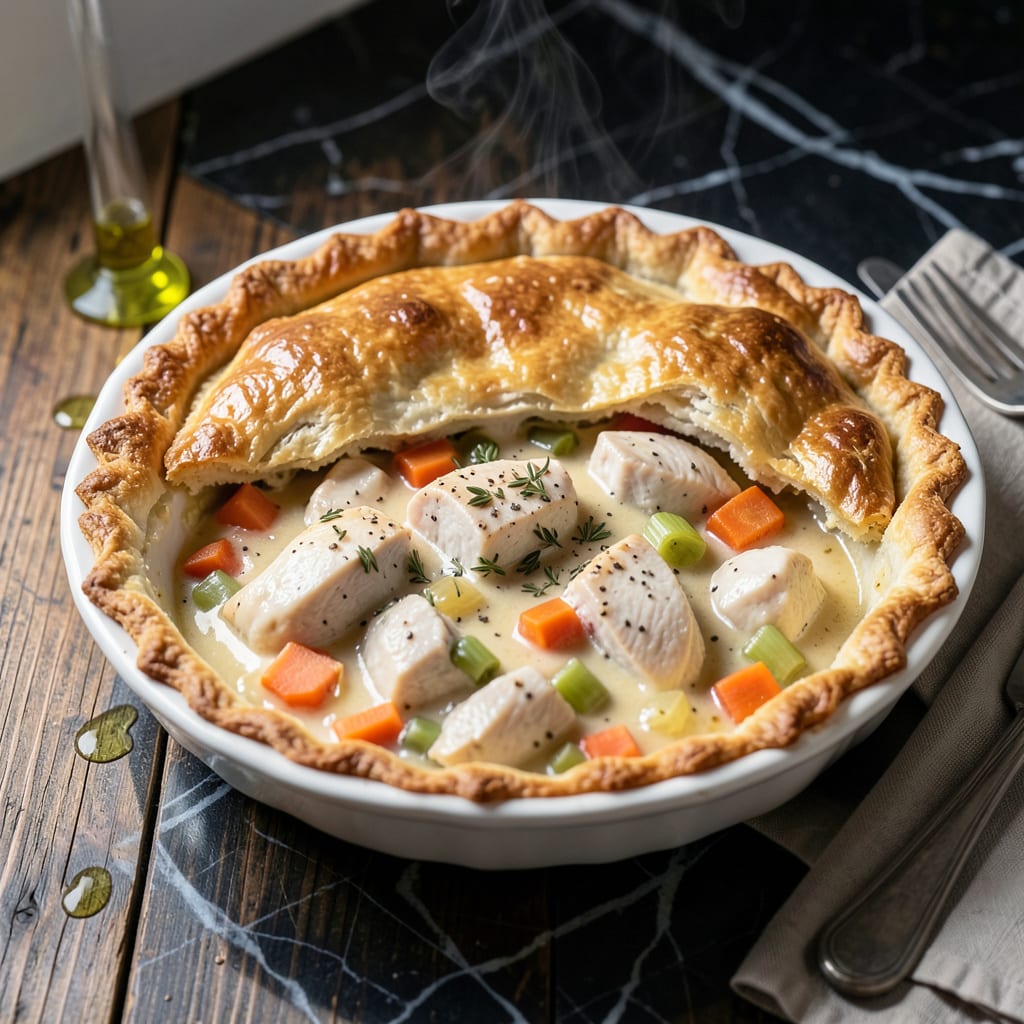
There’s nothing quite like a homemade chicken pot pie with its golden crust and rich, creamy filling. This classic comfort food brings warmth and satisfaction to any meal.
I’ve perfected this recipe to ensure a flaky, buttery lattice topping over a hearty, velvety filling packed with tender chicken and vegetables. It’s the ultimate dish for cozy dinners.
Ingredients for Homemade Chicken Pot Pie
Golden lattice meets creamy filling with these thoughtful ingredients for ultimate comfort.
| Ingredient | Amount | Notes |
|---|---|---|
| Chicken Breast 🍗 | 1 ½ lb | Boneless, skinless, diced |
| Unsalted Butter 🧈 | 1 cup | Cold, cubed for lattice |
| All-Purpose Flour 🌾 | 2 ½ cups | Plus extra for dusting |
| Whole Milk 🥛 | 1 ½ cups | Full-fat for creaminess |
| Chicken Stock 🍲 | 2 cups | Low-sodium preferred |
| Carrots 🥕 | 2 whole | Peeled, diced uniformly |
| Celery Stalks 🌿 | 2 whole | Diced, leafy tops removed |
| Yellow Onion 🧅 | 1 whole | Medium, finely diced |
| Frozen Peas 🌱 | 1 cup | No need to thaw |
| Garlic Cloves 🧄 | 3 cloves | Minced finely |
| Fresh Thyme Leaves 🌿 | 2 tsp | Stems discarded |
| Salt 🧂 | 1 ½ tsp | Diamond Crystal kosher |
| Black Pepper 🌶️ | ½ tsp | Freshly ground |
| Large Egg 🥚 | 1 whole | For egg wash |
The crust demands precision. Plugra European-style butter delivers unmatched flakiness—Land O’Lakes works if unavailable. For the filling, free-range chicken breast stays tender through baking. Source flour from King Arthur or Bob’s Red Mill for consistent results. The milk should be whole—2% will split when heated with acid.
No thyme? Dried thyme at one-third the amount suffices. Substitute leeks for onions if preferred. Vegetable stock works if avoiding meat, but adjust seasoning. Frozen mixed vegetables can replace peas and carrots—add them frozen to prevent mushiness. For richer filling, swap milk for half-and-half (the good stuff, not the pre-shredded kind).
Assemble pie just before baking—1 hour max at room temperature. Baked pie keeps 3-4 days refrigerated, though crust softens. Freeze unbaked pie for 2 months; thaw overnight before baking. Reheat portions in toaster oven to revive crust crispness.
Why You’ll Love This Recipe
- One Pan Magic: I love that I only dirty one baking dish—just mix the butter, flour, and milk for the filling, then top with crust and bake.
- Rich Comfort: The chicken stock and whole milk create a velvety sauce that soaks into every bite.
- Weeknight Hero: Honestly, it’s my go-to for busy evenings since I can prep it ahead and bake later.
- Leftovers Gold: Between us, the flavors taste even better the next day, and it reheats beautifully.
Step-by-Step Instructions for Chicken Pot Pie
Master the technique for a golden lattice crust over rich, velvety chicken filling.
Step 1: Prepare the Filling Base
In a large pot, melt 2 tablespoons of the unsalted butter over medium heat. Add the yellow onion, carrots, and celery stalks, cooking for 8-10 minutes until the vegetables soften and the onion turns translucent.
Stir in the garlic cloves and fresh thyme leaves, cooking for an additional 1 minute until fragrant. This aromatic foundation builds depth of flavor that defines the filling. Watch for the onions to turn from white to pale gold—this visual cue indicates they’re properly cooked.
Step 2: Create the Creamy Sauce
Sprinkle ¼ cup of the all-purpose flour over the vegetable mixture, stirring constantly for 2 minutes to cook out the raw flour taste. This creates a roux that will thicken your sauce beautifully.
Gradually whisk in the chicken stock and whole milk, ensuring no lumps form. Bring to a gentle simmer and cook for 5-7 minutes until the mixture thickens enough to coat the back of a spoon. The sauce should have the consistency of heavy cream when properly reduced.
Step 3: Assemble the Filling
Add the diced chicken breast, frozen peas, 1.5 tsp salt, and 0.5 tsp black pepper to the sauce. Simmer for 8-10 minutes until the chicken is cooked through and the peas are heated.
You’ll know the chicken is done when it reaches 165°F internally and no longer appears pink. The peas will turn bright green when properly heated. Remove from heat and let the filling cool slightly while you prepare the crust.
Step 4: Create and Apply the Lattice Crust
For the lattice, cut the remaining all-purpose flour with the remaining unsalted butter until it resembles coarse crumbs. Add 3-4 tablespoons of ice water, mixing until the dough just comes together. Roll out on a floured surface to ⅛-inch thickness.
Cut the dough into 1-inch strips and arrange in a lattice pattern over your filling in a pie dish. Press the edges to seal. Brush the lattice with the large egg beaten with 1 tablespoon water for a golden finish.
Step 5: Bake to Perfection
Bake at 375°F for 35-40 minutes until the lattice is golden brown and the filling bubbles through the crust. The crust should be deep amber in color and the filling should be visibly bubbling at the edges.
Let rest for 10 minutes before serving. This allows the filling to set slightly, making it easier to slice neat portions. The lattice should be crisp and flaky, while the filling remains creamy and rich.
Pro Tips For Making Homemade Chicken Pot Pie
- Pre-Cook the Chicken: Poach the chicken breast in the chicken stock before shredding—it keeps the meat juicy and infuses extra flavor into the filling.
- Chill the Dough: Let your pie crust rest in the fridge for at least 30 minutes before rolling it out; it prevents shrinking and makes it easier to handle.
- Avoid Soggy Bottom: Brush the bottom crust with a thin layer of beaten egg before adding the filling to create a moisture barrier.
- Thicken the Filling: Cook the flour and butter together for a full 2 minutes to remove the raw flour taste before slowly adding the milk and stock.
Serving Suggestions for Leftovers
Plating Presentation
Serve individual portions on warm plates to keep the filling hot. I like to use shallow pasta bowls for this dish—they showcase the beautiful lattice pattern while making it easier to scoop up every last bite of that creamy filling. 💛
Garnish Ideas
A sprinkle of fresh thyme leaves across the lattice adds a pop of color and reinforces the herb flavor. For extra flair, add a few fresh pea shoots or microgreens on top. These delicate garnishes elevate the presentation without overpowering the dish.
Side Pairings
A simple green salad with a light vinaigrette cuts through the richness beautifully. I toss baby arugula with 2 tbsp olive oil and 1 tbsp lemon juice. The peppery bite balances the creamy filling perfectly.
Beverage Match
Pair with a crisp Chardonnay or a light-bodied Pinot Noir. For non-alcoholic options, sparkling apple cider complements the buttery crust. The acidity in these drinks cleanses your palate between bites. 🍷
Family-Style Service
For gatherings, serve straight from the baking dish with a large serving spoon. The lattice will crack beautifully as you scoop, revealing that steaming filling. I always keep extra crust strips baked separately to add to plates for crunch.
Leftovers Tip
Reheat single portions in a toaster oven at 350°F for 8-10 minutes to revive the crust’s crispness. The microwave works in a pinch, but cover with a damp paper towel to prevent drying out.
Nutrition Facts
Frequently Asked Questions
Can I use rotisserie chicken instead?
Yes! Use 3 cups of shredded rotisserie chicken to save time. Skip the simmering step and just warm it through in the sauce for 3-4 minutes.
Why did my filling turn out runny?
This usually means the roux didn’t cook long enough. Cook the flour-butter mixture for a full 2 minutes and simmer the sauce until it coats a spoon. Let it rest 10 minutes before slicing.
Can I make this ahead of time?
Assemble the pie up to 1 day ahead and refrigerate. Add 5-10 minutes to baking time if chilled. Avoid freezing after assembly.

- 4C Bread Crumbs Meatballs Recipe: Crispy Crust and Juicy Centers - September 25, 2026
- 6 Oz Chocolate Chip Cookie Recipe: Perfectly Balanced Crispy Edges and Chewy Hearts - September 25, 2026
- 6-Inch Coffee Cake Recipe: Vanilla Bean Swirls and Buttery Streusel Topping - September 25, 2026