
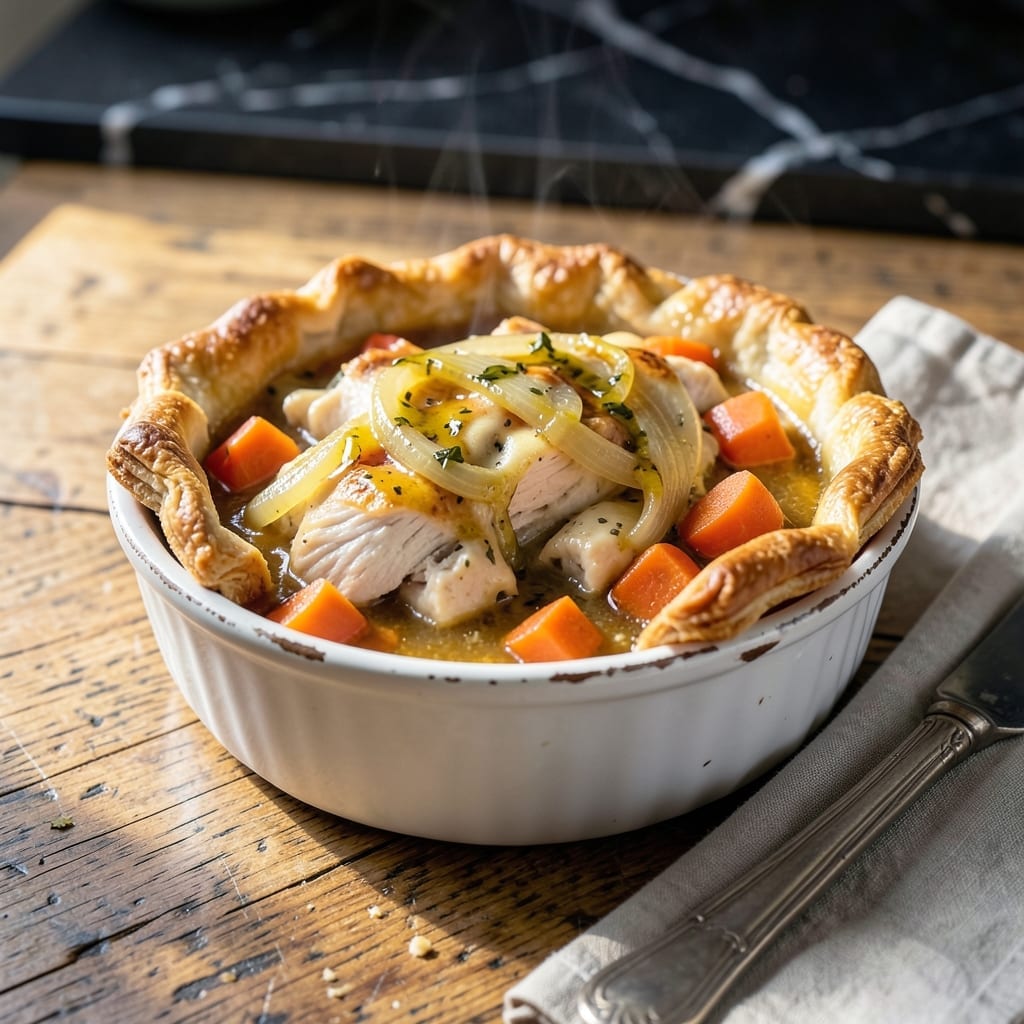
There’s nothing quite like the satisfaction of pulling a golden homemade chicken pot pie from the oven, especially when it’s perfectly portioned for one. This recipe delivers a flaky, buttery crust that encases a rich, herb-infused filling with tender chicken and vegetables in every bite.
The secret lies in the balance of textures and flavors—creamy filling meets crisp pastry without being overly heavy. I’ve refined this method to ensure each individual pie bakes evenly, with a crust that stays intact from oven to plate.
What you’ll get is comfort food at its best: a homemade meal that looks impressive but comes together with straightforward techniques. The filling is hearty yet light, and the crust achieves that coveted golden-brown finish every time.
Serve straight from the oven for the ultimate warm, satisfying experience. Here’s how to make it right.
Ingredients for Homemade Individual Chicken Pot Pie
Every element here builds that signature flaky crust and creamy herb-infused filling in perfect harmony.
| Ingredient | Amount | Notes |
|---|---|---|
| All-Purpose Flour 🌾 | 2 ½ cups | Plus extra for dusting work surface |
| Unsalted Butter 🧈 | 1 cup | Cold, cubed for flaky crust |
| Ice Water 💧 | ⅓ cup | Plus 1 tbsp as needed |
| Salt 🧂 | 1 tsp | Divided for crust and filling |
| Boneless Skinless Chicken Breast 🍗 | 1 ½ lb | Diced into 1/2-inch pieces |
| Yellow Onion 🧅 | 1 whole | Finely diced for filling |
| Carrots 🥕 | 2 whole | Peeled and diced small |
| Celery Stalks 🌿 | 2 whole | Finely diced for texture |
| Frozen Green Peas 🌱 | ¾ cup | No need to thaw |
| Garlic Cloves 🧄 | 3 cloves | Minced for aromatic base |
| Fresh Thyme Leaves 🌿 | 1 tbsp | Chopped, or 1 tsp dried |
| Fresh Rosemary 🌿 | 1 tbsp | Finely chopped for depth |
| All-Purpose Flour 🌾 | ⅓ cup | For thickening the filling |
| Chicken Stock 🍲 | 1 ½ cups | Low-sodium preferred for control |
| Heavy Cream 🥛 | ½ cup | Full-fat for creamy texture |
| Unsalted Butter 🧈 | 2 tbsp | For sautéing vegetables |
| Black Pepper 🌶️ | ½ tsp | Freshly ground for best flavor |
| Large Egg 🥚 | 1 whole | For egg wash on crust |
The crust demands cold, high-quality butter—Plugrá or Kerrygold give superior flakiness. For the chicken, boneless, skinless thighs (while slightly fattier) yield more tender results than breasts. Source fresh herbs from Whole Foods or your local farmers market; their vibrant color and aroma indicate peak freshness. The stock should be low-sodium to control seasoning precisely.
Short on time? Rotisserie chicken works beautifully—shred about 3 cups. For the herbs, dried at one-third the amount substitutes acceptably, though fresh provides brighter flavor. No heavy cream? Whole milk plus 1 tbsp cornstarch mimics the richness. The vegetables can be swapped: try mushrooms or parsnips for variation without disrupting the texture.
Assembled pies freeze beautifully for up to 3 months—bake from frozen, adding 10-15 minutes to the time. The crust dough can be made 2 days ahead and refrigerated. Baked pies keep 3-4 days in the fridge, though they’re best served fresh from the oven.
Why You’ll Love This Recipe
- One Bowl Wonder: I mix the flour, butter, and ice water right in the same bowl I use for the filling—no extra dishes piling up.
- Buttery Crust Magic: That flaky crust from scratch with just butter and flour? It’s the kind of crispy golden bite that makes every forkful worth it.
- Portion Control Win: Individual pies mean I can bake a few now and freeze the rest for those “no time to cook” nights.
- Stretches Further: One chicken breast makes four generous servings, so it’s filling without breaking the bank.
Step-by-Step Instructions for Homemade Individual Chicken Pot Pie
Master the technique, layer the flavors, and achieve restaurant-quality results at home.
Step 1: Prepare and Chill the Pie Crust
In a food processor, pulse the 2.5 cups All-Purpose Flour and 1 tsp Salt to combine. Add the 1 cup Unsalted Butter (cold and cubed) and pulse until the mixture resembles coarse crumbs with pea-sized butter pieces visible. This texture ensures flaky layers in your crust.
With the processor running, drizzle in the 0.33 cup Ice Water through the feed tube until the dough just begins to come together. Turn it out onto a lightly floured surface and divide into 4 equal portions. Shape each into a disk, wrap in plastic, and refrigerate for 30 minutes to relax the gluten and prevent shrinking.
Step 2: Cook the Filling Base
In a large skillet over medium heat, melt the 2 tbsp Unsalted Butter. Add the diced 1 whole Yellow Onion, 2 whole Carrots, and 2 whole Celery Stalks. Sauté for 5-6 minutes until the vegetables soften slightly but retain a slight bite.
Stir in the minced 3 cloves Garlic Cloves, chopped 1 tbsp Fresh Thyme Leaves, and 1 tbsp Fresh Rosemary, cooking for 1 minute until fragrant. Sprinkle the 0.33 cup All-Purpose Flour over the mixture and stir constantly for 2 minutes to cook out the raw flour taste—this creates a smooth roux for thickening.
Step 3: Build the Rich Filling
Gradually pour in the 1.5 cups Chicken Stock, whisking continuously to prevent lumps. Bring to a gentle simmer and cook for 3-4 minutes until the mixture thickens enough to coat the back of a spoon. This is your base—it should have the consistency of heavy cream.
Add the diced 1.5 lb Boneless Skinless Chicken Breast, 0.75 cup Frozen Green Peas, 0.5 cup Heavy Cream, and 0.5 tsp Black Pepper. Simmer for 5-7 minutes until the chicken is cooked through and the filling is thick and bubbly. Taste and adjust seasoning if needed, then remove from heat to cool slightly.
Step 4: Assemble and Bake the Individual Pies
On a floured surface, roll each dough disk into a 6-inch round. Press each round into a standard muffin tin or individual ramekins, allowing the edges to overhang slightly. Divide the filling evenly among the crusts, mounding it slightly in the center.
Fold the overhanging dough over the filling, crimping the edges to seal. Brush the tops with a beaten 1 whole Large Egg for a golden finish. Cut a few small slits in the top of each pie to allow steam to escape. Bake at 375°F for 30-35 minutes until the crust is golden brown and the filling is bubbling.
Pro Tips For Making Homemade Individual Chicken Pot Pie
- Chill the Dough: Pop your pie dough in the fridge for at least 30 minutes before rolling—I learned this the hard way after my first three attempts shrunk like woolen sweaters in the oven.
- Dice Chicken Small: Cut the boneless skinless chicken breast into 1/2-inch cubes so they cook through quickly without drying out while the crust bakes.
- Vent Each Pie: Poke a few small slits in the top crust of each individual pie to let steam escape, or you’ll end up with soggy bottoms and a messy oven.
- Use Ice-Cold Water: Keep that water icy when mixing your crust—about 4-5 tablespoons for this recipe—or the butter will melt and you’ll lose that flaky texture everyone loves.
Storing and Reheating homemade individual chicken pot pie
Refrigerator Storage
Let your pies cool completely before storing to prevent condensation. Place each in an airtight container—I use Glasslock for visibility. They’ll keep in the fridge for 3-4 days, though the crust is best fresh. ❄️
Freezer Storage
For longer storage, freeze unbaked pies on a baking sheet first. Once solid, wrap each tightly in plastic wrap then aluminum foil. These will stay perfect for 3 months. I always label with the date to track freshness.
Oven Reheating
Preheat to 350°F and place pies on a baking sheet. Cover loosely with foil and warm for 15-20 minutes. Remove foil for the last 5 minutes to crisp the crust. This method preserves texture best. 🔥
Microwave Method
For a quick option, microwave individual portions on 50% power for 1-2 minutes. Place a damp paper towel over the pie to retain moisture. Let rest 1 minute before serving as the filling will be very hot.
From Frozen
Bake directly from frozen at 375°F for 40-45 minutes. Add 10-15 minutes to the original baking time. There’s no need to thaw first—this works beautifully for meal prep.
Nutrition Facts
Frequently Asked Questions
Can I use store-bought pie crust instead?
Yes, but the texture won’t be as flaky. Use 1 sheet per 2 pies, cutting into rounds. Chill before baking to prevent shrinking.
How do I prevent a soggy bottom crust?
Bake on a preheated baking sheet at 375°F. Brush the crust with egg wash before adding filling to create a moisture barrier.
What’s the best way to check doneness?
The crust should be golden brown and filling bubbling. Insert a knife through a steam vent—it should come out hot to the touch.
Can I make these ahead of time?
Assemble unbaked pies, cover, and refrigerate for 24 hours or freeze for 3 months. Bake from cold, adding 5-10 minutes as needed.

- 6 Oz Chocolate Chip Cookie Recipe: Perfectly Balanced Crispy Edges and Chewy Hearts - September 25, 2026
- 6-Inch Coffee Cake Recipe: Vanilla Bean Swirls and Buttery Streusel Topping - September 25, 2026
- 1 Hour Soup Recipe: Velvety Richness Without the Wait - September 25, 2026