
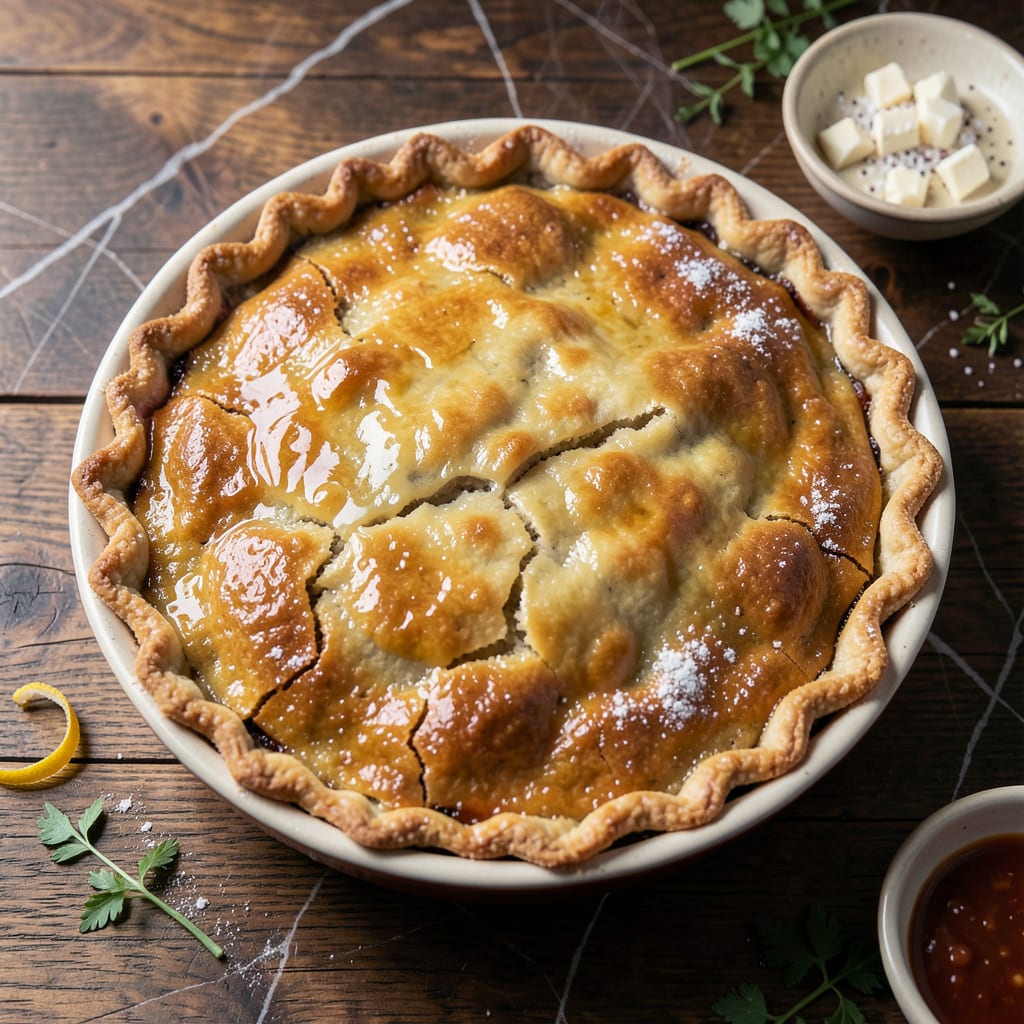
A homemade pot pie crust transforms any filling into a showstopper with its flaky, golden layers. This recipe delivers buttery, tender results every time with simple ingredients and precise technique.
The secret lies in cold butter and minimal handling, creating that coveted layered texture. With just a few steps, you’ll achieve a crust that’s sturdy enough to hold hearty fillings while remaining light and delicate.
Ingredients for Homemade Pot Pie Crust
Cold butter and flour create flaky layers for this showstopping crust. Eight ingredients, endless possibilities.
| Ingredient | Amount | Notes |
|---|---|---|
| All-Purpose Flour 🌾 | 2 ½ cups | Plus extra for dusting |
| Unsalted Butter 🧈 | 1 cup | Cold, cubed into 1/2-inch pieces |
| Ice Water 💧 | ½ cup | Plus 1-2 tbsp as needed |
| Kosher Salt 🧂 | 1 tsp | Diamond Crystal preferred |
| Granulated Sugar 🍚 | 1 tsp | Optional, for color |
| Large Egg 🥚 | 1 whole | For egg wash finish |
| Heavy Cream 🥛 | 1 tbsp | Optional for richer wash |
| White Vinegar 🍶 | 1 tsp | Helps tenderize gluten |
| Unsalted Butter 🧈 | 1 tbsp | Melted for egg wash |
[recipeingredientscaler]
The butter quality is non-negotiable here. European-style butter (like Plugrá or Kerrygold) has higher fat content, yielding superior flakiness. Ensure it stays ice-cold throughout—if your kitchen is warm, chill the mixing bowl too. For flour, King Arthur all-purpose is the gold standard, but any unbleached brand works. The vinegar tenderizes without affecting flavor. Skip the sugar if you prefer a purely savory crust.
No food processor? Pastry cutter or two forks work fine—just keep the butter pea-sized. Out of vinegar? Lemon juice at the same amount substitutes perfectly. Need a dairy-free version? Coconut oil or vegan butter (like Miyoko’s) can replace butter 1:1. The egg wash is optional but gives that professional golden sheen. For extra richness, add the cream to your wash.
Dough can be refrigerated for up to 2 days or frozen for 1 month. Wrap tightly in plastic to prevent drying. Baked crusts are best used immediately but will keep at room temperature for 24 hours. Always chill dough 30 minutes before rolling for easiest handling.
Why You’ll Love This Recipe
- 5-Minute Mix: I can have this crust ready before the oven preheats—just flour, cold butter, and a splash of ice water.
- Buttery Heaven: That flaky, golden crust with pockets of melted butter? It’s the reason I make pot pie from scratch every time.
- Freezer Friendly: Honestly, I double the batch and stash the extra dough in the freezer for next week’s dinner.
- Pantry Staples: All-purpose flour, butter, salt—no special ingredients, just what I already have on hand.
Step-by-Step Instructions for Buttery Flaky Pot Pie Crust
Master the technique for creating a tender, multi-layered crust that elevates any savory filling.
Step 1: Combine Dry Ingredients and Cold Butter
In a large mixing bowl, whisk together the 2.5 cups all-purpose flour, 1 tsp kosher salt, and 1 tsp granulated sugar until evenly distributed. The sugar is optional but adds subtle browning and flavor depth to the finished crust.
Add the 1 cup unsalted butter, cubed into ½-inch pieces, to the flour mixture. Using your fingertips or a pastry cutter, work the butter into the flour until the mixture resembles coarse crumbs with pea-sized butter pieces visible. This uneven distribution creates the flaky layers as the butter melts during baking.
Step 2: Incorporate Ice Water and Vinegar
Make a well in the center of the flour-butter mixture. Add the ½ cup ice water and 1 tsp white vinegar all at once. The vinegar tenderizes the gluten, preventing a tough crust. Using a fork, gently mix until the dough just begins to come together.
The dough will look shaggy with visible butter chunks—this is correct. Avoid overworking, as excess handling develops gluten and reduces flakiness. If the mixture seems too dry, add 1-2 tbsp additional ice water as needed, but don’t exceed this amount.
Step 3: Chill and Rest the Dough
Turn the dough onto a lightly floured surface and gently shape it into a flat disc about 1 inch thick. Wrap tightly in plastic wrap and refrigerate for at least 1 hour, or up to 24 hours. Chilling firms the butter and allows the gluten to relax, making the dough easier to roll out.
This resting period is non-negotiable. Cold dough rolls out smoothly without shrinking during baking, and the butter stays in distinct layers that create that prized flaky texture when baked.
Step 4: Roll and Prepare for Filling
On a well-floured surface, roll out the chilled dough to a 12-inch circle about ⅛-inch thick. Transfer to a 9-inch pie dish, pressing gently into the bottom and up the sides. Trim excess dough, leaving a ½-inch overhang for crimping.
For a double-crust pot pie, divide the dough in half before chilling and roll each portion separately. Use one for the bottom crust and the other for the top, ensuring both are evenly thin for consistent baking.
Step 5: Add Egg Wash and Bake
In a small bowl, whisk together the 1 whole large egg, 1 tbsp heavy cream, and 1 tbsp melted unsalted butter for the egg wash. Brush this mixture evenly over the crust just before baking. The cream and butter in the wash enhance browning and add extra richness.
Bake according to your pot pie recipe instructions. The crust is done when it’s deep golden brown and pulls slightly away from the edges of the dish. The egg wash creates a glossy, professional finish that’s as beautiful as it is delicious.
Pro Tips For Making Homemade Pot Pie Crust
- Chill the Butter: Cut the butter into small cubes and freeze for 15 minutes before mixing—I learned this the hard way after ending up with a tough crust from warm butter.
- Use Ice-Cold Water: Measure your water, add ice cubes, then use just the water (no ice) for mixing. After burning three batches, I finally figured out warm water makes the dough sticky.
- Don’t Overwork Dough: Mix just until the dough comes together, even if it looks shaggy. My grandmother swore by this, and she was right: overmixing makes the crust dense.
- Rest Before Rolling: Give the dough a solid 30 minutes in the fridge before rolling—it relaxes the gluten and prevents shrinking. I skip this when I’m lazy, but the crust is noticeably better when I don’t.
Storing and Reheating homemade pot pie crust
Refrigerator Storage
Once cooled completely, wrap your unbaked dough disc tightly in plastic wrap and store in the fridge for up to 2 days. The cold environment keeps the butter firm, preserving those flaky layers we worked so hard to create.
Freezer Storage
For longer storage, wrap the dough in plastic, then place it in a ziplock freezer bag to prevent freezer burn. It’ll keep beautifully for up to 3 months. Thaw overnight in the fridge before rolling. ❄️
Pre-Baked Crusts
If you’ve blind-baked the crust for a pot pie base, let it cool completely, then wrap it in aluminum foil. It can sit at room temperature for 24 hours or in the fridge for 3 days.
Reheating Tips
To revive a pre-baked crust, warm it in a 350°F oven for 5-10 minutes until crisp. This works for both filled and empty crusts, restoring that fresh-baked texture. 🔥
Filling and Freezing
Assemble your pot pie with filling, then freeze it unbaked for up to 2 months. Bake straight from frozen, adding 10-15 minutes to the cooking time for best results.
Avoiding Soggy Crusts
If storing a fully baked pot pie, keep it uncovered in the fridge for 1-2 days max. The crust stays crispier when not sealed in a container, as moisture is the enemy of flakiness.
Nutrition Facts
Frequently Asked Questions
Why is cold butter so important?
Cold butter creates steam when baking, which makes those flaky layers. If it warms up, the layers won’t form properly, and you’ll get a dense crust instead.
Can I use a food processor for the dough?
Yes! Pulse the butter and flour until pea-sized crumbs form, then add the liquid. Be careful not to overwork it—just until the dough comes together.
How do I prevent a soggy bottom crust?
Blind-bake the bottom crust for 10-12 minutes before adding filling. Also, brush it with a thin layer of egg wash to create a moisture barrier.
Can I make this dough ahead of time?
Prepare and refrigerate the dough for up to 2 days or freeze it for 3 months. Thaw overnight in the fridge before using.

- 4C Bread Crumbs Meatballs Recipe: Crispy Crust and Juicy Centers - September 25, 2026
- 6 Oz Chocolate Chip Cookie Recipe: Perfectly Balanced Crispy Edges and Chewy Hearts - September 25, 2026
- 6-Inch Coffee Cake Recipe: Vanilla Bean Swirls and Buttery Streusel Topping - September 25, 2026