
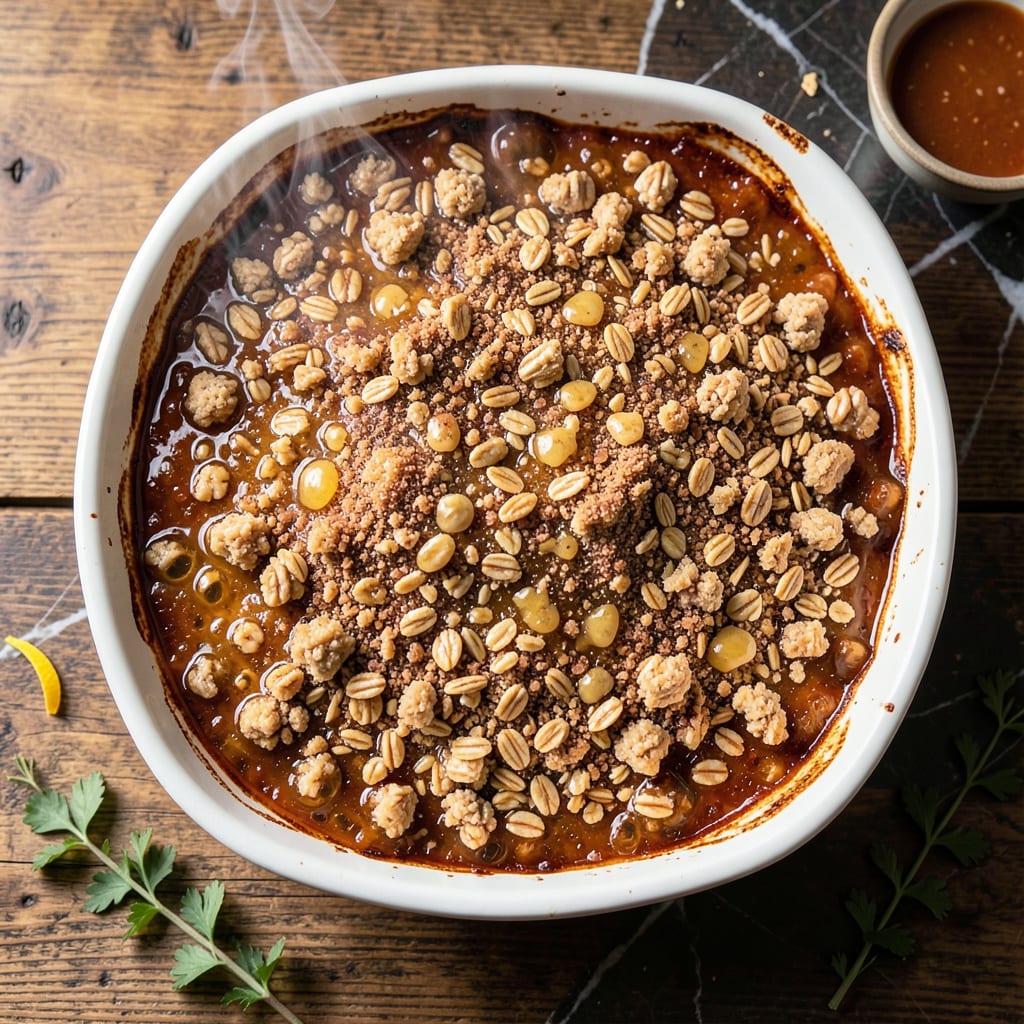
This dessert delivers a perfect balance of gooey honey center and crunchy topping that will satisfy any sweet tooth. The contrast of textures makes every bite unforgettable.
I developed this recipe to capture that ideal combination of rich sweetness and satisfying crunch. It’s simple to prepare yet feels special enough for any occasion.
Ingredients for Honey Pot
These ingredients create a dessert with gooey honey center and crunchy topping in perfect harmony.
| Ingredient | Amount | Notes |
|---|---|---|
| Honey 🍯 | 1 cup | Raw or pure for best flavor |
| Old-Fashioned Rolled Oats 🌾 | 1 ½ cups | For crunchy topping texture |
| All-Purpose Flour 🌾 | 1 cup | Unbleached preferred for structure |
| Granulated Sugar 🍚 | ½ cup | Fine grain for even distribution |
| Unsalted Butter 🧈 | ½ cup | Melted for binding topping |
| Light Brown Sugar 🍚 | ½ cup | Packed for moisture and depth |
| Baking Powder 🧂 | 1 tsp | For slight lift in topping |
| Ground Cinnamon 🌿 | 1 tsp | Freshly ground for warmth |
| Vanilla Extract 💧 | 1 tsp | Pure extract for depth |
| Salt 🧂 | ¼ tsp | Fine sea salt preferred |
| Chopped Pecans 🌰 | ½ cup | Toasted for extra crunch |
| Large Egg 🥚 | 1 whole | For binding the topping |
The honey is critical here—local raw honey from farmers markets offers the most complex flavor, but any pure honey will work. For the oats, old-fashioned rolled oats (not quick or steel-cut) provide the ideal texture. Look for unbleached all-purpose flour for better structure. The butter should be high-quality, like Plugrá or Kerrygold, as it significantly impacts the topping’s richness.
Need to swap the pecans? Walnuts or almonds work beautifully—just toast them first for maximum crunch. No brown sugar? Coconut sugar at a 1:1 ratio adds a nice depth. If avoiding eggs, 1 flax egg (1 tbsp ground flax + 3 tbsp water) can substitute, though the texture may differ slightly. The cinnamon can be omitted, but it adds a subtle warmth that complements the honey perfectly.
Store the honey in a cool, dark place where it will keep indefinitely. The topping mixture can be prepped a day ahead and refrigerated. Once assembled, this dessert is best served warm, the same day. Leftovers (if any) keep for 2-3 days at room temperature in an airtight container.
Why You’ll Love This Recipe
- I’ll be real: I double the batch because they keep perfectly in an airtight container for a full week.
- One Bowl Wonder: I love that I can mix the oats, flour, sugar, and butter in a single bowl—no fancy tools, just a wooden spoon and 10 minutes of my time.
- Buttery Honey Bliss: The combo of melted butter and honey gives these a rich, caramel-like depth that’s honestly hard to stop sneaking from the pan.
- Breakfast or Snack: They’re my go-to for quick breakfasts, but also the first thing I grab when friends drop by for coffee.
Step-by-Step Instructions for Honey Pot
This method ensures a perfectly balanced dessert with a gooey center and crisp topping every time.
Step 1: Prepare the Honey Base
Begin by spreading the 1 cup Honey evenly across the bottom of a greased 8×8-inch baking dish. I use a silicone spatula to ensure complete coverage without air pockets. The honey will bubble and caramelize slightly during baking, creating that signature gooey texture.
Place the dish in a 350°F oven for exactly 5 minutes to warm the honey. This step prevents the cold honey from seizing up when the topping is added. Watch for tiny bubbles forming at the edges—that’s your visual cue it’s ready for the next layer.
Step 2: Create the Crumb Topping
In a mixing bowl, combine the 1.5 cups Old-Fashioned Rolled Oats, 1 cup All-Purpose Flour, 0.5 cup Granulated Sugar, 0.5 cup Light Brown Sugar, 1 tsp Baking Powder, 1 tsp Ground Cinnamon, and 0.25 tsp Salt. Whisk these dry ingredients until no streaks of cinnamon remain visible.
Make a well in the center and add the 0.5 cup Unsalted Butter (melted and slightly cooled), 1 whole Large Egg, and 1 tsp Vanilla Extract. Stir with a wooden spoon until the mixture resembles coarse crumbs with some pea-sized clumps. The texture should hold together when pressed between your fingers.
Step 3: Incorporate the Pecans and Assemble
Fold the 0.5 cup Chopped Pecans into the crumb mixture. I recommend toasting the pecans first for enhanced flavor, but the recipe works well with untoasted nuts too. The pecans add both texture and visual appeal to the finished dish.
Sprinkle the topping evenly over the warmed honey in the baking dish. Use your fingers to gently press the crumbs into an even layer, ensuring full coverage right to the edges. This pressure helps the topping bind together during baking.
Step 4: Bake to Golden Perfection
Return the dish to the 350°F oven and bake for 25-30 minutes. You’re looking for the topping to turn a deep golden brown with crisp edges. The center should appear set but still have a slight jiggle when gently shaken.
Halfway through baking, rotate the dish 180 degrees to ensure even browning. The honey will be bubbling vigorously at this point—that’s normal. Resist the urge to open the oven door unnecessarily, as temperature fluctuations can cause uneven baking.
Step 5: Cool and Serve
Remove from the oven and let cool on a wire rack for exactly 15 minutes. This allows the honey to thicken slightly while the topping firms up enough to hold its shape when served. The internal temperature will continue to rise during this rest period.
Cut into squares while still warm for clean portions. The contrast between the sticky honey layer and crisp topping is most pronounced when served warm. Use a sharp knife dipped in hot water for easier slicing, and wipe the blade between cuts for neat presentation.
Pro Tips For Making Honey Pot
- Toast the Oats: Spread the rolled oats on a baking sheet and toast at 350°F for 8-10 minutes until golden. I learned this the hard way—raw oats can make the texture gummy instead of crisp.
- Warm the Honey: Microwave the honey for 15-20 seconds before mixing. Cold honey is thick and hard to incorporate evenly into the butter and dry ingredients.
- Chill the Dough: After mixing, refrigerate the dough for at least 30 minutes. Sounds tedious, but it prevents the butter from melting too fast in the oven, which flattens the texture.
- Use Room Temp Butter: Let the unsalted butter sit out for 1-2 hours before starting. After burning a batch with cold butter, I realized it doesn’t cream properly with the sugar and honey.
Troubleshooting This Dish
Honey Too Runny
If your honey layer seems too thin after baking, it likely didn’t caramelize enough. Next time, warm the 1 cup Honey for the full 5 minutes before adding the topping. Also, ensure your oven is fully preheated to 350°F before starting. 💡
Topping Won’t Crisp
For a crispier topping, spread the mixture more thinly over the honey. Press it down firmly with your fingers to create better contact. If using old-fashioned rolled oats, make sure they’re fresh—not stale oats absorb moisture differently.
Uneven Browning
Rotate your 8×8-inch baking dish 180 degrees halfway through baking as directed. If one side still browns faster, check your oven for hot spots. I position my rack in the center for most even heat distribution.
Sticky Mess When Cutting
Let the dessert cool for the full 15 minutes before slicing. Use a sharp knife dipped in hot water between cuts. If it’s still too sticky, chill for 10 minutes in the fridge to firm up the honey layer.
Topping Too Dense
If your crumb layer seems heavy, don’t overmix the dry ingredients. The 1.5 cups oats and 1 cup flour should just come together with the wet ingredients. Also, ensure your 1 tsp baking powder is fresh for proper lift.
I once used expired baking powder and wondered why my topping was so compact!
Nutrition Facts
Frequently Asked Questions
Can I use a different pan size?
A 9×9-inch pan works but may yield a slightly thinner topping. Avoid glass dishes as they can cause uneven browning. Stick to metal for best results.
How do I store leftovers?
Keep in an airtight container at room temperature for up to 2-3 days. Rewarm in the oven at 300°F for 5-10 minutes to restore crispness.
Can I make this ahead of time?
Prepare the topping mixture a day in advance and refrigerate. Assemble and bake just before serving for optimal texture.
Why did my topping stay soft?
This usually happens if the oats were stale or the mixture was packed too tightly. Spread evenly and press lightly for a crisp finish.

- 4C Bread Crumbs Meatballs Recipe: Crispy Crust and Juicy Centers - September 25, 2026
- 6 Oz Chocolate Chip Cookie Recipe: Perfectly Balanced Crispy Edges and Chewy Hearts - September 25, 2026
- 6-Inch Coffee Cake Recipe: Vanilla Bean Swirls and Buttery Streusel Topping - September 25, 2026