
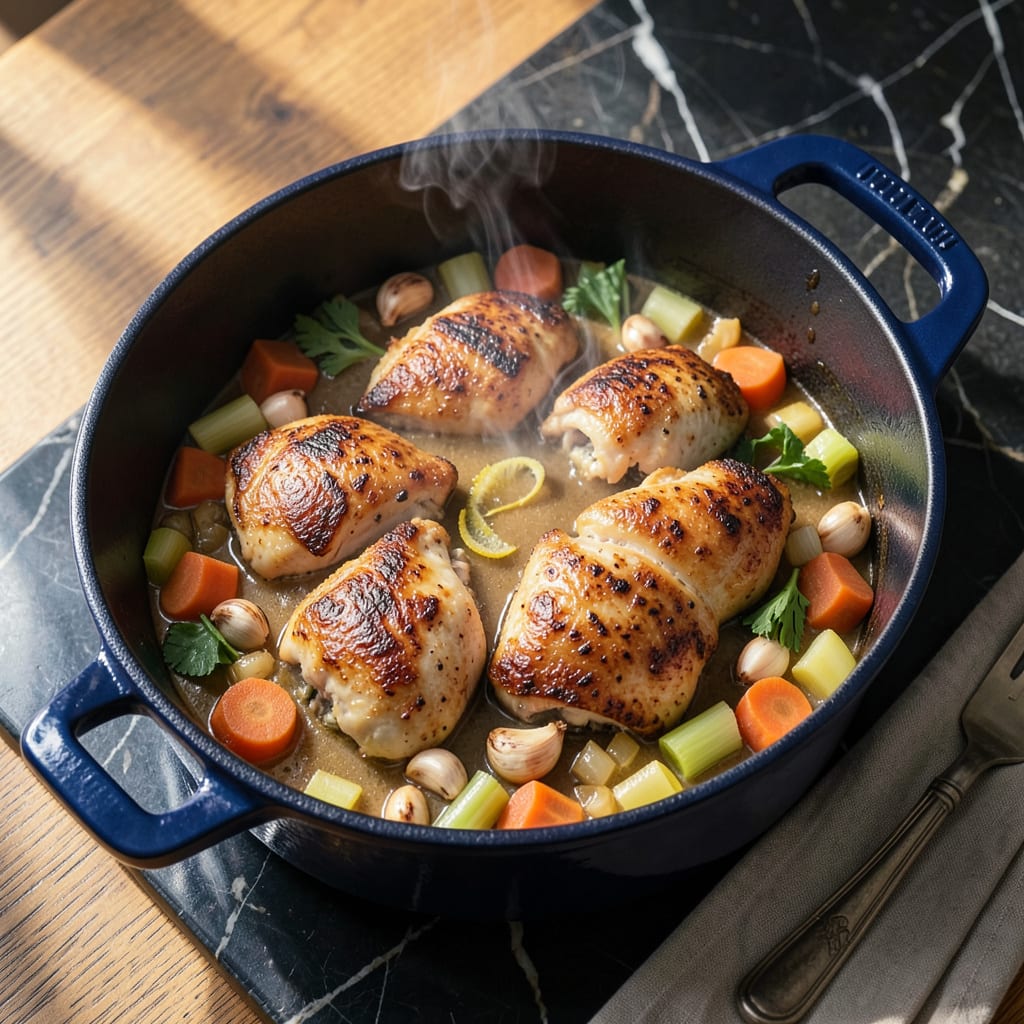
Converting Instant Pot recipes to stovetop cooking requires precise adjustments to liquid ratios and cooking times. This foolproof method maintains the same rich flavors and textures you expect, without the pressure cooking. Whether you’re adapting soups, stews, or braised meats, understanding these key conversions ensures consistent results every time.
The process focuses on two critical factors: increasing liquid by 25-50% to prevent burning, and extending cooking times by 2-3 times the original Instant Pot duration. These adjustments account for evaporation and slower heat transfer, delivering perfectly cooked dishes without specialized equipment. Let’s break down the exact steps for seamless adaptation.
Ingredients for How to Convert Instant Pot Recipe to Stovetop
Everything you need to adapt that Instant Pot favorite—just grab your Dutch oven and these pantry staples.
| Ingredient | Amount | Notes |
|---|---|---|
| Boneless Chicken Thighs 🍗 | 1 ½ lb | Skin-on for richer flavor |
| Yellow Onion 🧅 | 1 whole | Medium, finely diced |
| Carrots 🥕 | 2 whole | Peeled, cut into 1/2-inch pieces |
| Celery Stalks 🌿 | 2 whole | Diced, leaves included |
| Garlic Cloves 🧄 | 4 cloves | Minced for even distribution |
| Low-Sodium Chicken Broth 🍲 | 4 cups | Increased by 50% for stovetop |
| Diced Tomatoes 🍅 | 1 can | 14.5 oz, with juices |
| Tomato Paste 🍅 | 2 tbsp | For depth of flavor |
| Dried Thyme 🌿 | 1 tsp | Or 1 tbsp fresh |
| Dried Rosemary 🌿 | 1 tsp | Crushed between fingers |
| Bay Leaves 🍃 | 2 whole | Removed before serving |
| Kosher Salt 🧂 | 1 ½ tsp | Diamond Crystal preferred |
| Freshly Ground Black Pepper 🌶️ | ½ tsp | Coarse grind ideal |
| Olive Oil 🫒 | 2 tbsp | Divided for browning |
| All-Purpose Flour 🌾 | 2 tbsp | For thickening slurry |
The broth quantity is key here. Low-sodium chicken broth gives you control over seasoning—Better Than Bouillon is my go-to for rich flavor without the salt overload. Chicken thighs stay juicier than breasts during the longer stovetop cooking, and skin-on adds depth (render that fat first). For the tomatoes, San Marzano cans are worth the splurge, but any good-quality diced tomatoes work. The extra liquid accounts for evaporation—don’t skimp or you’ll risk burning.
No chicken broth? Vegetable broth plus a splash of soy sauce mimics the umami. Swap thighs for bone-in chicken breasts (add 10 minutes to cook time) or chickpeas for vegetarian. Fresh herbs can replace dried—use three times the amount. The flour slurry is your insurance against thin stew; cornstarch works too (mix with cold water first). If you’re out of tomato paste, ketchup in a pinch (reduce sugar elsewhere).
Leftovers taste even better the next day—store in airtight containers for 4-5 days. Freeze portions for up to 3 months (thaw overnight in the fridge). The flavors meld beautifully, so make extra. Reheat gently on the stove with a splash of broth to loosen. Pro tip: Skimming fat after chilling makes reheated leftovers cleaner (but I never bother).
Why You’ll Love This Recipe
- I’ll be real: the stovetop version skips the Instant Pot’s finicky sealing and venting—just brown the chicken thighs first, then let everything simmer in one pot. No waiting for pressure to build or release, and you still get fall-off-the-bone tenderness.
- No Pressure Needed: I’ll be real: the stovetop version skips the Instant Pot’s finicky sealing and venting—just brown the chicken thighs first, then let everything simmer in one pot. No waiting for pressure to build or release, and you still get fall-off-the-bone tenderness.
- Sweeter, Deeper Flavor: Here’s what sold me—the carrots and onions caramelize right in the pan, and the garlic gets this mellow, buttery richness that the Instant Pot just can’t replicate. That extra 10 minutes of simmering makes the broth taste like it cooked all day.
- Weeknight Meal Prep Hero: Between us, this is my Sunday ritual: double the batch, shred half for tacos Tuesday, and keep the rest whole for Wednesday’s rice bowls. The chicken stays juicy for days, and the veggies soften just enough to blend into whatever you’re craving.
Step-by-Step Instructions for Converting Instant Pot Recipes to Stovetop
Here’s how to adapt your pressure cooker favorite for the stovetop without losing flavor or texture.
Step 1: Brown the Chicken and Build the Flavor Base
Heat 1 tablespoon olive oil in a large Dutch oven or heavy pot over medium-high heat. Pat the 1.5 lb boneless chicken thighs dry and season with 1 tsp kosher salt and 0.5 tsp black pepper. Working in batches, sear the chicken for 4-5 minutes per side until deeply browned. This step develops the Maillard reaction flavors that pressure cooking skips.
Remove the chicken and set aside. In the same pot, add the remaining 1 tablespoon olive oil and sauté the diced yellow onion, carrots, and celery for 6-8 minutes until softened and beginning to caramelize. Add the minced garlic and cook for 30 seconds until fragrant but not browned. This aromatic base will provide depth that pressure cooking achieves through intense heat.
Step 2: Adjust Liquid Ratios and Create the Cooking Environment
Stir in the 2 tbsp tomato paste and cook for 1-2 minutes to develop its sweetness. Add the 2 tbsp all-purpose flour and cook for another 1 minute to eliminate the raw flour taste. This creates a roux that will help thicken your final sauce.
Pour in the 4 cups low-sodium chicken broth (note this is 50% more than typical Instant Pot recipes require) and scrape up any browned bits from the bottom of the pot. Add the diced tomatoes with juices, dried thyme, dried rosemary, and bay leaves. The increased liquid accounts for evaporation during the longer stovetop cooking process. Return the chicken to the pot along with any accumulated juices.
Step 3: Simmer with Proper Time Adjustments
Bring the mixture to a gentle boil, then reduce heat to low to maintain a steady simmer. Cover the pot with the lid slightly ajar to allow some steam to escape. Simmer for 45-60 minutes, checking occasionally to ensure the liquid maintains a gentle bubble. This extended cooking time replaces the pressure cooker’s intense heat, allowing flavors to develop gradually.
You’ll know it’s ready when the chicken is fork-tender and the liquid has reduced by about one-third. The vegetables should be completely soft, and the broth should have a rich, concentrated flavor. If the liquid reduces too quickly, add 1/2 cup water at a time to maintain the proper consistency.
Step 4: Finish and Adjust the Final Dish
Remove the bay leaves and discard. Taste the broth and adjust seasoning with additional kosher salt if needed. The flavors should be balanced but not overpowering. If the sauce is too thin, remove the chicken and simmer the liquid uncovered for 5-10 minutes to reduce further. For a thicker consistency, you can create a slurry with 1 tbsp flour and 2 tbsp broth, then stir it into the simmering liquid.
Return the chicken to the pot and let it warm through for 2-3 minutes. The final dish should have tender chicken that falls apart easily, vegetables that melt into the sauce, and a rich broth that coats the back of a spoon. Serve immediately while hot, as the flavors will continue to meld as it sits.
Troubleshooting This Recipe
Burnt Base Rescue
If you notice a burnt smell or see dark residue forming on the bottom, immediately remove the pot from heat. Transfer the contents to a clean pot, leaving the burnt bits behind. Add 1/2 cup fresh broth to the new pot and continue cooking at a lower temperature. I always keep extra broth on hand for this exact reason—it happens to the best of us! 🔥
Undercooked Ingredients
When your dish isn’t tender after the recommended time, don’t panic. For tough meats, extend cooking by 15-20 minutes at a gentle simmer. For hard vegetables, add 1/2 cup water and cook uncovered for 10 minutes. Check every 5 minutes to avoid overcooking other components.
Too Much Liquid
If your dish ends up soupy, remove the lid and simmer uncovered on medium heat for 10-15 minutes. Stir occasionally to prevent sticking. For faster results, create a slurry with 1 tbsp cornstarch and 2 tbsp cold water, then stir it in and simmer for 2 minutes.
Flavor Too Mild
Stovetop cooking sometimes needs a flavor boost. Add 1 tsp salt and 1/2 tsp acid (lemon juice or vinegar) first. If still bland, stir in 1 tbsp soy sauce or 1 tsp fish sauce for umami depth. I find this works better than just adding more salt.
Overly Thick Sauce
When your sauce reduces too much, thin it with 1/4 cup broth or water at a time. Stir well and simmer for 2-3 minutes between additions. For cream-based sauces, use warm milk instead. The key is gradual adjustment to maintain flavor balance.
Uneven Cooking
If some ingredients are perfect while others are underdone, remove the cooked items and continue simmering the rest. For meats, you can shred the tender pieces and return them later. With vegetables, scoop out the soft ones and let the firmer ones cook longer. This technique saves many meals in my kitchen! ✨
Nutrition Facts
Frequently Asked Questions
Why do I need more liquid for stovetop cooking?
Stovetop cooking exposes food to air, causing 25-50% more evaporation than a sealed Instant Pot. The extra liquid prevents burning and compensates for what’s lost during the longer cooking time. Think of it as insurance for perfect texture.
How do I adjust cooking times for different meats?
Multiply Instant Pot times by 2-3x for stovetop. Chicken thighs need 45-60 minutes, beef stew meat 2-3 hours, and pork shoulder 2.5-3 hours. Always check doneness with a meat thermometer for safety.
Can I use the same “sauté” step on stovetop?
but watch the heat! Use medium-high for browning meats and medium for vegetables. Stovetop heat is less controlled than Instant Pot’s sauté function, so stir frequently to prevent burning. A heavy Dutch oven works best.
What if my converted recipe tastes bland?
Longer cooking times can dilute flavors. Boost with 1 tsp salt and 1/2 tsp acid (vinegar/lemon) first. For depth, add 1 tbsp soy sauce or a parmesan rind while simmering. Taste and adjust in layers.
How do I prevent burning with dairy or tomatoes?
Stir in dairy (cream, milk) during the last 30 minutes only. For tomato-based recipes, add a splash of water if the pot looks dry and keep heat at low-medium. These ingredients scorch easily without pressure.

- 8 Bean Soup Recipe Crock Pot: Hearty Vegetable Medley in One Pot - September 25, 2026
- 4C Bread Crumbs Meatballs Recipe: Crispy Crust and Juicy Centers - September 25, 2026
- 6 Oz Chocolate Chip Cookie Recipe: Perfectly Balanced Crispy Edges and Chewy Hearts - September 25, 2026