
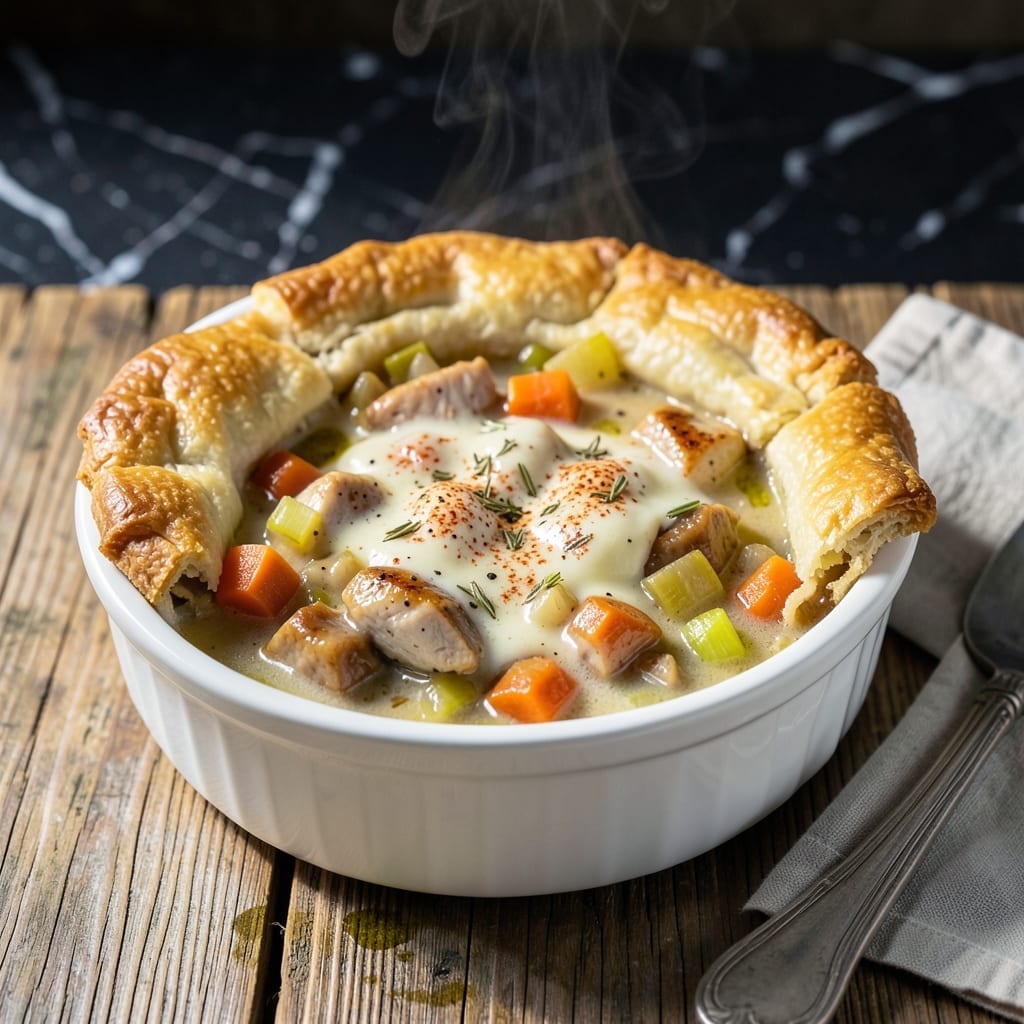
Comfort food reaches new heights with this single-serving take on a classic. I’ve streamlined the process to deliver flaky, golden topping without sacrificing the rich, creamy filling you expect from chicken pot pie.
Using Bisquick simplifies the crust, while the filling comes together in one pan. This method ensures each portion bakes evenly with a quick prep time and minimal cleanup. The result is warm, satisfying, and perfectly sized for individual enjoyment.
The filling is packed with tender chicken, hearty vegetables, and a velvety sauce that bubbles up through the crust. Every bite delivers the familiar comfort of a homemade pot pie, now in a convenient personal serving.
Ideal for busy weeknights or cozy solo dinners. Here’s how to make it.
Ingredients for Individual Chicken Pot Pie Recipe with Bisquick
Pantry staples and a few fresh veggies make this cozy classic come alive.
| Ingredient | Amount | Notes |
|---|---|---|
| Bisquick Baking Mix 🥧 | 2 cups | For flaky topping crust |
| Boneless Chicken Breast 🍗 | 1 lb | Cut into bite-sized pieces |
| Butter 🧈 | ½ cup | Unsalted preferred |
| All-Purpose Flour 🌾 | ¼ cup | For thickening sauce |
| Chicken Broth 🥣 | 1 ¼ cups | Low-sodium recommended |
| Whole Milk 🥛 | ½ cup | For creamy sauce |
| Carrots 🥕 | 2 whole | Peeled and diced |
| Celery Stalks 🌿 | 2 whole | Finely chopped |
| Frozen Peas 🌱 | ½ cup | No need to thaw |
| Yellow Onion 🧅 | 1 whole | Small dice |
| Garlic Cloves 🧄 | 2 cloves | Minced for depth |
| Salt 🧂 | ½ tsp | Season to taste |
| Black Pepper 🌶️ | ¼ tsp | Freshly ground best |
| Dried Thyme 🍃 | ½ tsp | Or use fresh thyme |
| Bay Leaf 🌿 | 1 whole | Remove before serving |
The Bisquick is non-negotiable here—any variety works, but the original is my go-to. Grab it from the baking aisle at any grocery store. For the chicken, thighs stay juicier than breasts if you want to swap, but breasts are fine for that classic pot pie texture. Look for boneless, skinless to save time on prep. The veggies? Fresh is ideal, but frozen mixed works too (just thaw and drain first).
No Bisquick? Self-rising flour plus a little baking powder gets close, but honestly just grab the real deal—it’s cheap and lasts forever. Short on time? Pre-diced mirepoix from Trader Joe’s saves chopping. Want more richness? Swap whole milk for half-and-half. The thyme can be fresh at double the amount. No peas? Corn or green beans work just as well.
The filling actually tastes better the next day—3-4 days in the fridge, or freeze unbaked pies for up to 3 months. Reheat in the oven to keep that crust crisp. Pro tip: make extra filling and freeze it for next time (worth the extra minute).
Why You’ll Love This Recipe
- One-Bowl Magic: I mix the Bisquick topping right in the same bowl I use for the filling—no extra dishes, just smart cooking.
- That Golden Crust: The buttery Bisquick lid bakes up flaky and golden, soaking up the creamy chicken broth like it was made for it.
- Freezer to Table: I assemble these on Sunday, freeze, and bake straight from the freezer on crazy weeknights—no thawing, no stress.
- Stretches a Roast: One chicken breast, a handful of pantry staples, and I’ve got four generous servings. Honestly, it’s my budget’s best friend.
Step-by-Step Instructions for Individual Chicken Pot Pie With Bisquick
Here’s the method. Straightforward, tested, works every time.
Step 1: Cook the Chicken and Vegetables
In a large skillet, melt 0.5 cup Butter over medium heat. Add the diced Yellow Onion, Carrots, and Celery Stalks. Sauté for 5-7 minutes until the onions are translucent and the vegetables begin to soften.
Stir in the minced Garlic Cloves and cook for 30 seconds until fragrant. Add the 1 lb Boneless Chicken Breast pieces and cook for 8-10 minutes until the chicken is no longer pink and the juices run clear. This builds a solid flavor base for your filling.
Step 2: Make the Creamy Filling
Sprinkle the 0.25 cup All-Purpose Flour over the chicken and vegetable mixture, stirring to coat everything evenly. Cook for 1-2 minutes to remove the raw flour taste.
Slowly pour in the 1.25 cups Chicken Broth and 0.5 cup Whole Milk, stirring constantly to prevent lumps. Add the 0.5 tsp Salt, 0.25 tsp Black Pepper, 0.5 tsp Dried Thyme, and 1 whole Bay Leaf. Simmer for 5 minutes until the mixture thickens and the flavors meld together.
Finally, stir in the 0.5 cup Frozen Peas. Remove from heat and discard the Bay Leaf before dividing the filling evenly among four oven-safe ramekins.
Step 3: Prepare and Bake the Bisquick Topping
In a bowl, combine the 2 cups Bisquick Baking Mix with just enough Whole Milk (about ⅔ cup) to form a soft, slightly sticky dough. The dough should hold together but not be too dry.
Divide the dough into four equal portions and flatten each into a round slightly larger than your ramekins. Place a dough round on top of each filled ramekin, pressing the edges gently to seal. Cut a few small slits in the top of each to allow steam to escape.
Bake at 375°F for 20-25 minutes until the topping is golden brown and the filling is bubbly. Let cool for 5 minutes before serving—this gives the filling time to set slightly so it doesn’t run out when you dig in.
Pro Tips For Making Individual Chicken Pot Pie Recipe With Bisquick
- Precook the Chicken: Poach the chicken breasts in the broth first—15 minutes in simmering liquid keeps them juicy and infuses extra flavor into the filling.
- Chill the Bisquick Mix: After cutting in the butter, let the Bisquick topping sit in the fridge for 10 minutes before baking; it prevents spreading and gives a flakier crust.
- Thicken the Filling First: Cook your flour-butter roux with the broth for at least 3-4 minutes to eliminate the raw flour taste—I learned this the hard way after my first pot pies had a pasty aftertaste.
- Use Cold Butter: Cut the butter into the Bisquick while it’s still ice cold, and work quickly; this creates layers that puff up nicely in the oven instead of turning dense.
Storing and Reheating This Recipe
Refrigerator Storage
Once cooled, transfer each pot pie to an airtight container. I use glass containers with snap-lids for easy reheating. Store in the fridge for up to 3-4 days—the flavors actually deepen as the filling rests. ❄️
Freezer Storage
For longer storage, wrap cooled pies tightly in plastic wrap and then aluminum foil. Freeze for up to 3 months without quality loss. Thaw overnight in the fridge before reheating for best texture.
Oven Reheating
Preheat to 350°F and place pies on a baking sheet. Cover with foil and bake for 15-20 minutes, then uncover to crisp the topping for 5 minutes. This method keeps the crust flaky and filling bubbly. 🔥
Microwave Reheating
For a quick meal, microwave uncovered on 70% power for 2-3 minutes. If the topping softens, broil for 1-2 minutes to restore crispness. Stir filling halfway through for even heating.
Make-Ahead Tip
Assemble unbaked pies, cover tightly, and refrigerate for up to 24 hours before baking. Add 5 minutes to the bake time if cooking straight from the fridge. Perfect for busy weeknights!
Nutrition Facts
Frequently Asked Questions
Can I use chicken thighs instead of breasts?
Thighs stay juicier and add more flavor. Use 1 lb boneless, skinless thighs and cook for the same 8-10 minutes. They’ll be extra tender in the creamy filling.
How do I prevent a soggy topping?
Don’t skip the slits in the dough—they let steam escape. Also, bake at 375°F until golden and bubbly, then cool for 5 minutes before serving. This keeps it crisp.
Can I make these ahead and freeze them?
Yes! Assemble unbaked pies, wrap tightly, and freeze for up to 3 months. Thaw overnight in the fridge, then bake as directed. Add 5 minutes if baking from frozen.
What size ramekins work best?
Use 8-10 oz ramekins for perfect portions. They’ll be about 3/4 full with filling, leaving room for the topping to rise and brown beautifully.

- 6 Oz Chocolate Chip Cookie Recipe: Perfectly Balanced Crispy Edges and Chewy Hearts - September 25, 2026
- 6-Inch Coffee Cake Recipe: Vanilla Bean Swirls and Buttery Streusel Topping - September 25, 2026
- 1 Hour Soup Recipe: Velvety Richness Without the Wait - September 25, 2026