
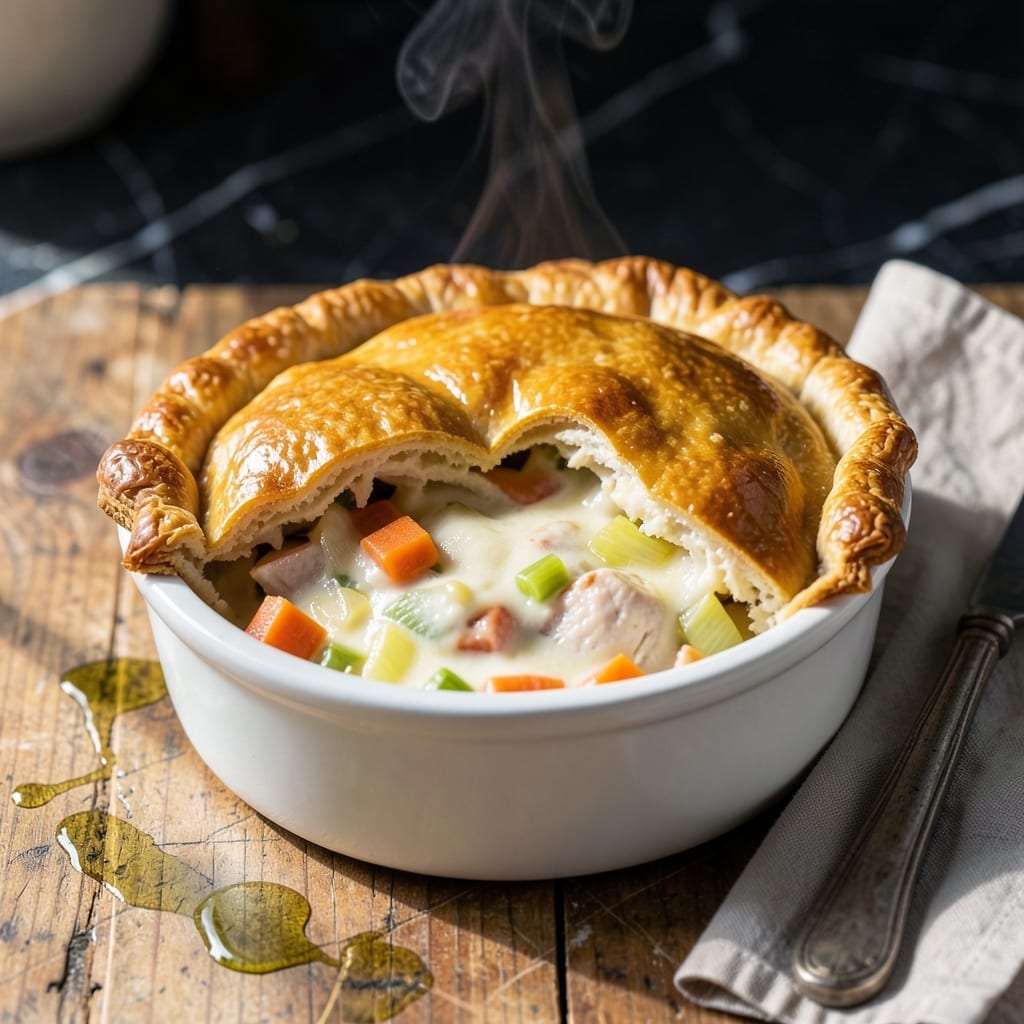
There’s something deeply satisfying about a buttery biscuit topping on individual chicken pot pies, transforming a classic into personal portions. This method ensures each serving gets its own golden, flaky crust without the fuss of traditional pastry.
I developed this recipe to simplify the process while maintaining that comforting, homemade taste. The filling comes together quickly with tender chicken, vegetables, and a creamy sauce, all baked under that perfect biscuit layer in 25 minutes.
The result is a self-contained meal with a crisp top and rich, savory filling beneath. Each bite delivers the familiar flavors of chicken pot pie, now in a convenient, individual format.
Perfect for weeknight dinners or cozy weekend meals. Here’s how to make them.
Ingredients for Individual Chicken Pot Pie
Buttery biscuit topping meets tender chicken and creamy vegetables in these personal pot pies.
| Ingredient | Amount | Notes |
|---|---|---|
| Boneless Skinless Chicken Breasts 🍗 | 1 ½ lb | Diced into 1/2-inch pieces |
| Unsalted Butter 🧈 | 6 tbsp | Divided for filling and biscuits |
| All-Purpose Flour 🌾 | 1 ½ cups | Divided for roux and biscuits |
| Yellow Onion 🧅 | 1 whole | Finely diced |
| Carrots 🥕 | 2 whole | Peeled and diced |
| Celery Stalks 🌿 | 2 whole | Finely diced |
| Garlic Cloves 🧄 | 3 cloves | Minced |
| Chicken Broth 🍲 | 1 ½ cups | Low-sodium preferred |
| Whole Milk 🥛 | ¾ cup | For creamy sauce |
| Frozen Peas 🌱 | 1 cup | No need to thaw |
| Dried Thyme 🍃 | 1 tsp | Or fresh thyme leaves |
| Dried Rosemary 🌿 | 1 tsp | Crushed between fingers |
| Salt 🧂 | 1 ½ tsp | Divided to taste |
| Black Pepper 🌶️ | ½ tsp | Freshly ground |
| Baking Powder 🧂 | 2 tsp | For flaky biscuit topping |
The chicken needs to stay juicy, so boneless, skinless breasts are ideal—avoid overcooking. Whole Milk gives the sauce richness, but half-and-half works if that’s what you have. For the broth, low-sodium lets you control the seasoning. Fresh thyme and rosemary elevate the flavor, but dried works perfectly (just use half the amount). Most grocery stores carry all of these without a special trip.
No thyme? Poultry seasoning at half the amount gets you close. Swap the carrots for parsnips if you want a sweeter note. The biscuit topping can be made with all-purpose flour or half whole wheat for a nuttier flavor. If you’re out of baking powder, self-rising flour works in a pinch—just omit the salt and baking powder from the biscuit portion.
The filling can be prepped a day ahead—store it in the fridge until ready to bake. Biscuit topping is best made fresh, but leftovers reheat beautifully. These keep in the fridge for 3-4 days or freeze for up to 3 months. Reheat in the oven to revive the crust.
Why You’ll Love This Recipe
- One Pan Wonder: I love that I can brown the chicken, sauté the onions and carrots, and bake the pies all in the same skillet.
- That Buttery Crust: The flaky top layer made with butter and flour gives way to the tender chicken and veggies inside.
- Portion Control: These individual servings are perfect for meal prepping lunches or a cozy dinner for two.
- Budget Stretcher: Boneless chicken breasts and basic pantry staples keep costs low while still feeling like a special treat. Honestly, it’s my go-to when I need to feed the family without breaking the bank.
Step-by-Step Instructions for Individual Chicken Pot Pie
Master the technique for a golden biscuit topping over a creamy, vegetable-packed filling.
Step 1: Prepare the Filling Base with Aromatics
Heat 2 tablespoons of the unsalted butter in a large skillet over medium heat until melted and foaming. Add the diced yellow onion, carrots, and celery stalks. Sauté for 6-8 minutes until the vegetables soften and the onion becomes translucent.
Add the minced garlic cloves, dried thyme, and dried rosemary, cooking for an additional 1 minute until fragrant. This builds a flavorful foundation for the filling. Season with ½ teaspoon of the salt and ¼ teaspoon of the black pepper to enhance the vegetables’ natural sweetness.
Step 2: Cook Chicken and Create Creamy Sauce
Increase heat to medium-high and add the diced boneless skinless chicken breasts to the skillet. Cook for 5-6 minutes until the chicken is no longer pink and is lightly browned. The chicken will finish cooking in the sauce, so don’t overcook at this stage.
Sprinkle 3 tablespoons of the all-purpose flour over the chicken and vegetables, stirring to coat evenly. Pour in the chicken broth and whole milk, then add the frozen peas. Bring to a gentle simmer and cook for 3-4 minutes until the sauce thickens enough to coat the back of a spoon.
Season with the remaining 1 teaspoon of salt and ¼ teaspoon of black pepper. Taste and adjust seasoning if needed—the sauce should be rich and savory with a velvety texture.
Step 3: Prepare the Biscuit Topping
In a mixing bowl, combine the remaining 1 ¼ cups of all-purpose flour with the baking powder and a pinch of salt. Cut in the remaining 4 tablespoons of cold unsalted butter using a pastry cutter or fork until the mixture resembles coarse crumbs with pea-sized butter pieces visible.
Gradually add the whole milk, 1 tablespoon at a time, mixing just until the dough comes together. Avoid overworking the dough to ensure flaky, tender biscuits. The dough will be slightly sticky but should hold together when pressed.
Step 4: Assemble and Bake to Golden Perfection
Preheat the oven to 375°F. Divide the creamy chicken filling evenly among four oven-safe ramekins or small baking dishes. The filling should come nearly to the top of each dish.
Roll or pat the biscuit dough into a ½-inch thickness and cut into rounds slightly larger than the ramekins. Place one biscuit round on top of each filled dish, pressing gently to adhere. Cut a small slit in the center of each biscuit to allow steam to escape during baking.
Bake for 20-25 minutes until the biscuit topping is golden brown and the filling is bubbling at the edges. The biscuits should rise slightly and develop a crisp, buttery crust.
Let the individual pot pies cool for 5 minutes before serving. The filling will thicken further as it rests, making each spoonful rich and satisfying.
Pro Tips For Making Individual Chicken Pot Pie
- Poach the Chicken: Simmer the chicken breasts in broth for 12-15 minutes until just cooked through—this keeps them juicy and infuses extra flavor into the filling.
- Sweat the Veggies: Cook the onion and carrots in butter for at least 5 minutes until soft, or they’ll stay crunchy and undercooked under the crust.
- Thicken the Filling: After adding flour to the veggie-butter mix, let it cook for 1-2 minutes to remove the raw taste before adding liquid.
- Vent the Pies: Cut a small slit in the top crust of each pot pie to let steam escape, or you’ll risk soggy bottoms and burst seams.
Pro Cooking Tips for individual chicken pot pie
Perfect Biscuit Texture
Keep your butter ice-cold when cutting it into the flour—this creates flaky layers. I freeze my butter for 15 minutes before starting and use a pastry cutter for even distribution. The key is pea-sized crumbs, not a smooth dough.
Filling Consistency
Your sauce should coat the back of a spoon before baking. If it’s too thin, simmer for 1-2 extra minutes. Too thick? Add ¼ cup more broth. The filling will thicken slightly as it bakes under the biscuit.
Even Baking
For uniform browning, place ramekins on the center rack with 2 inches between them. Rotate the pan halfway through baking. I check at 18 minutes and adjust if one side is browning faster.
Steam Vent Trick
Cut a small X in the center of each biscuit top instead of a single slit. This allows steam to escape more evenly, preventing soggy spots. Press the edges of the biscuit to the ramekin rim to seal in moisture. 💡
Avoiding Soggy Bottoms
Preheat your ramekins in the oven for 5 minutes before adding the filling. This creates a barrier against excess moisture. Also, don’t overfill—leave ¼ inch at the top for the biscuit to expand.
Resting Time
Those 5 minutes of resting are crucial. The filling sets and the biscuit firms up slightly, making it easier to serve. I set a timer so I don’t rush this step. The aromas while waiting are pure comfort. 💛
Nutrition Facts
Frequently Asked Questions
Can I use store-bought biscuits instead?
Yes, you can substitute 1 can of refrigerated biscuits for the topping. Place one biscuit on each ramekin and follow the baking instructions. The texture won’t be quite as flaky, but it’s a great time-saver.
How do I prevent the topping from getting soggy?
Ensure your filling is thick before adding the biscuit. Preheat the ramekins and don’t overfill them. The biscuit should sit slightly above the filling to create a proper seal.
Can I make these ahead of time?
Prepare the filling up to a day in advance and store it in the fridge. Assemble and bake just before serving for the best texture. Baked pies keep in the fridge for 3-4 days or freeze for up to 3 months.
What can I substitute for the milk?
Use half-and-half for extra richness, or a dairy-free milk like oat or almond. The sauce will be slightly less creamy with non-dairy options, but still delicious.

- 11×15 Sheet Cake Recipe: Triple-Layered Vanilla Bean Bliss - September 25, 2026
- 1 Kg Plum Cake Recipe: Buttery Layers and Spiced Fruit Filling - September 25, 2026
- 5-Star Pork Loin Recipe: Pan-Seared Crust With Juicy Pink Heart - September 25, 2026