
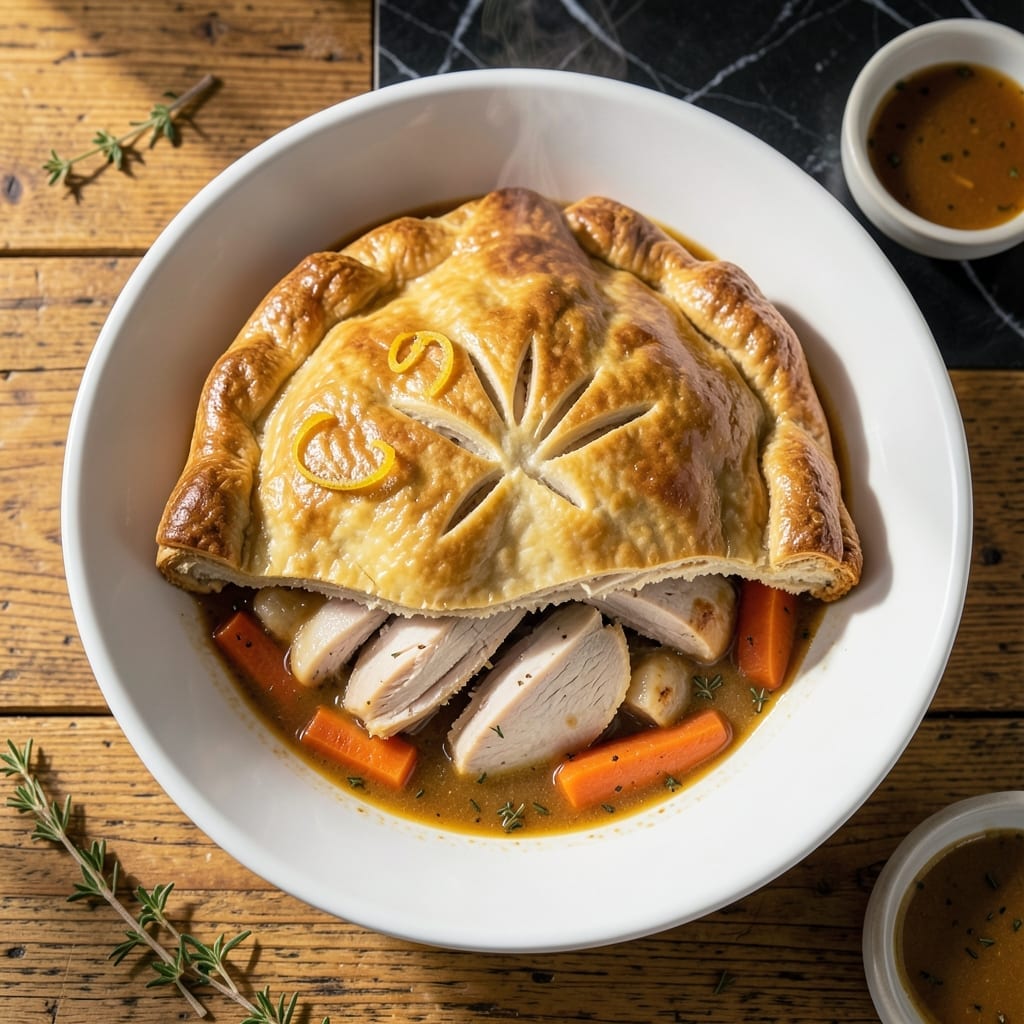
There’s nothing quite like the satisfaction of pulling a golden flaky pot pie from the oven, knowing every layer was made by hand. This recipe transforms simple ingredients into pure comfort, with a rich, creamy filling wrapped in a buttery crust.
The filling combines tender turkey, hearty vegetables, and a velvety sauce that’s both savory and soothing. I’ve perfected the crust to stay crisp on the outside while remaining tender inside—no soggy bottoms here.
What makes this version special is the personal touch. Individual servings mean everyone gets their own perfect portion, with edges that brown beautifully in the oven.
Serve it fresh for the best texture, with steam rising as you cut into that first bite. Here’s how to make it at home.
Ingredients for Personal Turkey Pot Pie
Flaky crust meets tender turkey and hearty vegetables in pure comfort food form.
| Ingredient | Amount | Notes |
|---|---|---|
| All-Purpose Flour 🌾 | 2 ½ cups | Plus extra for dusting |
| Unsalted Butter 🧈 | 1 cup | Cold, cubed for crust |
| Ice Water 💧 | ½ cup | For pie dough |
| Salt 🧂 | 1 tsp | Divided for crust and filling |
| Cooked Turkey Breast 🦃 | 2 cups | Shredded or diced |
| Carrots 🥕 | 2 whole | Peeled and diced |
| Celery Stalks 🌿 | 2 whole | Finely chopped |
| Yellow Onion 🧅 | 1 whole | Small dice |
| Frozen Peas 🌱 | 1 cup | No need to thaw |
| Unsalted Butter 🧈 | ¼ cup | For filling sauce |
| All-Purpose Flour 🌾 | ¼ cup | For thickening sauce |
| Chicken Broth 🥣 | 1 ½ cups | Low-sodium preferred |
| Whole Milk 🥛 | ½ cup | Or half-and-half |
| Fresh Thyme Leaves 🌿 | 1 tbsp | Or 1 tsp dried |
| Black Pepper 🌶️ | ½ tsp | Freshly ground |
The crust is everything here. Use European-style butter like Plugrá for superior flakiness—it has less water content. Keep it ice-cold until the moment it hits the oven. For the flour, King Arthur’s all-purpose is consistent, but any trusted brand works. The turkey should be pre-cooked (leftover Thanksgiving turkey is perfect) and not dried out.
No cooked turkey? Rotisserie chicken works just as well. Swap the thyme for rosemary if that’s what you’ve got. Fresh out of peas? Green beans or corn add great texture. The milk can be whole or half-and-half—just don’t use skim (it’ll thin out the sauce). For a richer filling, replace 2 tbsp of broth with dry white wine.
Assemble these just before baking—don’t let the crust sit filled for more than 10 minutes or it’ll get soggy. Baked pies keep 2-3 days in the fridge, or freeze for 1 month. Reheat in the oven to revive that flaky crust.
Why You’ll Love This Recipe
- One Pan Wonder: I love that the flaky crust comes together with just flour, butter, and ice water—no fancy equipment or extra bowls.
- That Crispy Edge: The buttery pastry wrapped around tender turkey breast is pure comfort, especially with a pinch of salt to make it pop.
- My Go-To Meal Prep: These individual pies freeze beautifully, so I always have a quick lunch or dinner ready when I need it.
- Budget Stretcher: Using leftover cooked turkey means nothing goes to waste, and the ingredients are pantry staples I already have on hand.
Step-by-Step Instructions for Personal Turkey Pot Pie
Here’s the method for creating a comforting pie with a perfectly flaky crust every time.
Step 1: Prepare the Flaky Pie Crust
In a large bowl, combine the 2.5 cups All-Purpose Flour with ½ tsp Salt. Add the 1 cup Unsalted Butter, cold and cubed, and work it into the flour using your fingers or a pastry cutter until the mixture resembles coarse crumbs with pea-sized butter pieces visible.
Gradually drizzle in the 0.5 cup Ice Water, 1 tablespoon at a time, mixing gently with a fork until the dough just begins to come together. Turn it out onto a lightly floured surface and knead lightly—just enough to form a cohesive ball. Overworking the dough will make it tough, not flaky.
Divide the dough into 4 equal portions for individual pies, flatten into discs, wrap in plastic, and refrigerate for at least 30 minutes. Chilling relaxes the gluten and firms the butter, which is essential for achieving those coveted flaky layers.
Step 2: Make the Creamy Turkey Filling
In a large skillet, melt the 0.25 cup Unsalted Butter over medium heat. Add the diced Yellow Onion, Carrots, and Celery Stalks, cooking for 5-6 minutes until the vegetables soften and the onion becomes translucent.
Sprinkle the 0.25 cup All-Purpose Flour over the vegetables and stir for 1-2 minutes to cook off the raw flour taste. Slowly whisk in the 1.5 cups Chicken Broth and 0.5 cup Whole Milk, ensuring no lumps remain.
Add the 2 cups Cooked Turkey Breast, 1 cup Frozen Peas, 1 tbsp Fresh Thyme Leaves, remaining ½ tsp Salt, and 0.5 tsp Black Pepper. Simmer for 5-7 minutes until the filling thickens and coats the back of a spoon. Remove from heat and let it cool slightly.
Step 3: Assemble and Bake the Individual Pies
On a lightly floured surface, roll out each dough portion into a 7-inch circle. Place a generous portion of the turkey filling on one half of each circle, leaving a ½-inch border around the edge. Fold the dough over the filling to create a half-moon shape.
Crimp the edges with a fork to seal, then cut a small slit in the top of each pie to allow steam to escape. Brush the tops with a bit of milk or beaten egg for a golden finish. Place the pies on a parchment-lined baking sheet.
Bake in a preheated 375°F oven for 30-35 minutes, or until the crust is golden brown and the filling is bubbling. Let them rest for 5 minutes before serving to allow the filling to set slightly.
Pro Tips For Making Personal Turkey Pot Pie
- Chill the Dough: After mixing your flour, butter, and ice water, let the dough rest in the fridge for at least 30 minutes—I learned this the hard way after my first few crusts shrank in the oven.
- Dry the Turkey: Shred or chop your cooked turkey breast and pat it dry with a paper towel to avoid a soggy filling. Sounds tedious, but it actually changes the outcome.
- Skip Overworking: Handle the dough as little as possible when rolling it out—overworking makes it tough, and your pot pie deserves a flaky crust.
- Use Cold Butter: Keep your unsalted butter ice-cold until the moment you cut it into the flour. My grandmother swore by this, and she was right: it guarantees a crust that’s crisp, not chewy.
Pro Cooking Tips for This Dish
Butter Temperature Control
Your crust’s flakiness depends on keeping the 1 cup Unsalted Butter ice-cold until it hits the oven. I freeze my butter for 15 minutes before cubing, then chill the cubed butter again for 10 minutes. Work quickly when incorporating it into the flour. 🌡️
Dough Chilling Time
Don’t rush the 30-minute rest in the fridge. This step relaxes the gluten and firms the butter, preventing shrinkage and ensuring those perfect layers. I often chill mine for 45 minutes if I’m working in a warm kitchen.
Filling Thickness Test
The sauce should coat the back of a spoon when done. If it’s too thin, simmer for 2-3 extra minutes. Too thick? Add 1-2 tbsp Chicken Broth to loosen. The filling will thicken more as it bakes.
Sealing the Edges
Use a fork to crimp the edges tightly—this prevents leaks and ensures a sturdy seal. Press firmly but don’t overwork the dough. A small slit in the top lets steam escape without bursting the crust.
Oven Position Matters
Bake on the lower-middle rack for even heat distribution. Rotate the baking sheet halfway through for uniform browning. I check at 25 minutes to ensure the bottoms aren’t over-browning.
Rest Before Serving
The 5-minute rest after baking lets the filling set, so it doesn’t spill out when sliced. This also lets the crust crisp up fully. Serve while still warm for the best experience. 💛
Nutrition Facts
Frequently Asked Questions
Can I use store-bought pie crust?
Yes, but homemade tastes better. Store-bought works in a pinch—just thaw it first. For best results, brush with egg wash before baking for extra flakiness.
How do I prevent a soggy bottom crust?
Pre-bake the crust for 8-10 minutes before adding filling. Also, ensure the filling isn’t too wet when assembling. A hot baking sheet helps crisp the bottom.
Can I make this ahead of time?
Assemble uncooked pies and freeze for up to 1 month. Bake straight from frozen, adding 5-10 minutes to the cooking time. Let cool before freezing.
What if my filling is too thin?
Simmer it longer to reduce. Mix 1 tbsp cornstarch with 1 tbsp water and stir in if needed. The filling will thicken as it cools.

- 6 Oz Chocolate Chip Cookie Recipe: Perfectly Balanced Crispy Edges and Chewy Hearts - September 25, 2026
- 6-Inch Coffee Cake Recipe: Vanilla Bean Swirls and Buttery Streusel Topping - September 25, 2026
- 1 Hour Soup Recipe: Velvety Richness Without the Wait - September 25, 2026