
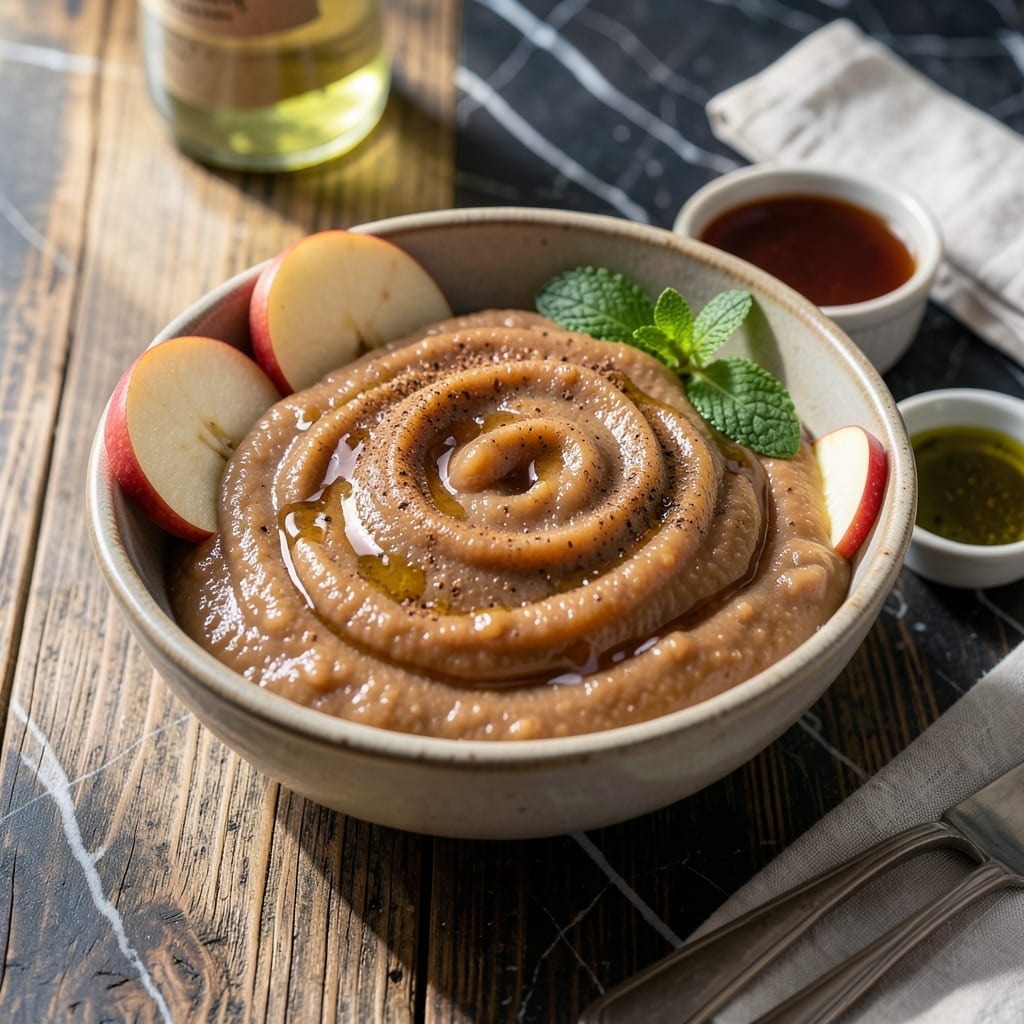
This no-peel method transforms fresh apples into smooth, cinnamon-infused applesauce with minimal effort. The Instant Pot handles all the work, preserving natural flavors while softening the fruit to perfection.
I developed this technique to skip tedious peeling without sacrificing texture. A quick pressure cook cycle breaks down the apples completely, and a simple mash is all it takes to achieve the ideal consistency.
What you get is homemade applesauce that’s fresher and more flavorful than store-bought versions. The cinnamon adds warmth, while the natural sweetness of the apples shines through.
Use it as a topping, snack, or ingredient in baking. Here’s how to make it.
Ingredients for Insta Pot Applesauce
Fresh apples and warm spices create this effortless homemade applesauce in the Instant Pot.
| Ingredient | Amount | Notes |
|---|---|---|
| Sweet Apples 🍎 | 3 lb | Honeycrisp or Fuji preferred |
| Water 💧 | ½ cup | Or apple juice for extra sweetness |
| Ground Cinnamon 🌿 | 1 tsp | Ceylon or Cassia variety |
| Lemon Juice 🍋 | 1 tbsp | Freshly squeezed preferred |
| Pure Maple Syrup 🍁 | 1 tbsp | Optional, adjust to taste |
| Vanilla Extract 🌿 | ½ tsp | Pure vanilla, not imitation |
| Salt 🧂 | ¼ tsp | Fine sea salt preferred |
| Nutmeg 🌰 | 0.125 tsp | Freshly grated if possible |
| Allspice 🌿 | 0.125 tsp | Optional for depth of flavor |
| Cardamom 🌿 | 0.125 tsp | Ground, for complexity |
The apples are key here. Honeycrisp or Fuji break down perfectly without peeling—avoid Granny Smith as they’re too tart for this method. Most supermarkets carry these varieties year-round, but farmers markets have the freshest picks in season. Look for firm apples with smooth skin (no bruises). Organic isn’t necessary, but wash them well since you’re keeping the peels on.
No maple syrup? Agave nectar or date syrup works just as well. Missing a spice? Pumpkin pie spice at half the amount covers cinnamon, nutmeg, and allspice in one go. If you’re out of fresh lemon juice, bottled works in a pinch (just use the same amount). The water can be swapped for apple cider—adds a little extra depth without overpowering.
Applesauce keeps beautifully. Store in an airtight container in the fridge for up to 1 week, or freeze for 6 months. Portion into small containers for easy grab-and-go snacks (the freezer is your friend for big batches).
Why You’ll Love This Recipe
- Set It and Forget: I toss in the apples, cinnamon, and a splash of water, then walk away—no stirring, no babysitting.
- Warm Cinnamon Hug: The maple syrup and cinnamon turn the apples into this cozy, just-sweet-enough sauce I could eat by the spoonful.
- Snack or Side: It’s my toddler’s lunchbox staple and my husband’s pancake topping—works for both.
- Pantry Staple: Six apples and ten minutes later, I’ve got a week’s worth of homemade applesauce without spending a fortune.
Step-by-Step Instructions for Insta Pot Applesauce
This method guarantees smooth, spiced applesauce with minimal effort and no peeling required.
Step 1: Prepare and Core the Apples
Begin by thoroughly washing the 3 lb sweet apples under cool running water to remove any wax or residue. I prefer Honeycrisp or Fuji for their natural sweetness and balanced texture. Use an apple corer or sharp knife to remove the cores and stems, but leave the skins intact—they’ll soften during cooking and add fiber and color.
Quarter the apples for even cooking. If any apples are particularly large, cut them into sixths. This ensures uniform breakdown and prevents uneven texture in your final product. Place the apple pieces directly into the Insta Pot insert as you work to save time.
Step 2: Add Liquids and Aromatics
Pour the 0.5 cup water into the Insta Pot with the apples. This creates the necessary steam for pressure cooking. Add the 1 tbsp lemon juice—this brightens the flavor and prevents browning. The 1 tbsp pure maple syrup adds subtle sweetness, though you can adjust this to taste after cooking.
Sprinkle in the 1 tsp ground cinnamon, 0.25 tsp salt, 0.125 tsp nutmeg, 0.125 tsp allspice, and 0.125 tsp cardamom. Stir gently to distribute the spices evenly. The warm spices will bloom during cooking, creating that signature cozy flavor. Finally, add the 0.5 tsp vanilla extract for depth.
Step 3: Pressure Cook to Perfection
Secure the lid on your Insta Pot and set the valve to sealing. Cook on high pressure for 8 minutes. The apples will soften completely, breaking down into a chunky sauce. You’ll notice the kitchen fill with the aroma of cinnamon and warm apples as it cooks.
Once the cooking cycle completes, allow a natural pressure release for 10 minutes before switching to quick release. This prevents splattering from the hot fruit. The apples should be completely tender when pierced with a fork, with skins easily separating from the flesh.
Step 4: Mash and Adjust to Desired Consistency
Using a potato masher or large fork, gently break down the cooked apples to your preferred texture. For smooth applesauce, use an immersion blender directly in the pot, pulsing until completely silky. The skins will integrate seamlessly into the sauce.
Taste and adjust seasoning if needed. If you prefer a sweeter sauce, add more pure maple syrup 1 tsp at a time. For a brighter flavor, a splash more lemon juice works wonders. The sauce will thicken slightly as it cools to room temperature.
Pro Tips For Making Insta Pot Applesauce
- Peel After Cooking: Skip peeling the apples beforehand—just core and chop. After pressure cooking, the skins slip right off with a spoon, saving time and keeping more flavor.
- Use Tart Apples Too: I learned this the hard way: mixing in 1-2 tart apples (like Granny Smith) with your sweet ones balances the flavor without needing extra lemon juice.
- Avoid Overfilling: Resist the urge to pack in too many apples—the Instant Pot should never be more than 2/3 full, or you risk a messy, uneven cook.
- Natural Release Only: Let the pressure release naturally for 10 minutes—quick-release makes the applesauce splatter and can turn it watery. Patience pays off here.
Flavor Customization for This Recipe
Spice Variations
For a pumpkin pie spice twist, replace individual spices with 1 tsp pumpkin pie spice. This blend typically includes cinnamon, nutmeg, ginger, and cloves. I find it adds a deeper, more complex flavor profile to the sauce. 🌿
Sweetener Swaps
Swap pure maple syrup for honey or brown sugar at the same 1 tbsp measurement. Each brings a unique taste—honey adds floral notes, while brown sugar gives a molasses-like depth. Adjust to taste after cooking.
For a sugar-free option, use 1-2 pitted Medjool dates added with the apples. They’ll dissolve completely during cooking, adding natural sweetness without refined sugar.
Fruit Additions
Add 1 cup blueberries or 1 diced pear along with the apples for a mixed-fruit sauce. Blueberries create a purple-hued sauce with extra antioxidants, while pears add a silky texture. Both pair beautifully with the cinnamon. 💜
Citrus Boost
Enhance brightness by adding 1 tsp orange zest or 1 tbsp orange juice with the lemon juice. The citrus oils elevate the apple flavor and add a refreshing zing. I love this variation for a more vibrant, tangy sauce.
Savory Option
Skip the sweet spices entirely and go savory with 1 tsp fresh rosemary, ½ tsp black pepper, and a pinch of sage. This version pairs wonderfully with pork dishes or as a unique side for roasted meats.
Nutrition Facts
Frequently Asked Questions
Do I need to peel the apples first?
Nope! The skins soften completely during pressure cooking and blend right in. They also add fiber and a natural pink hue to your sauce.
Can I use tart apples like Granny Smith?
I’d avoid them—they’re too sour for this recipe. Stick with sweeter varieties like Honeycrisp or Fuji for balanced flavor without extra sugar.
How do I make it smoother?
Use an immersion blender right in the pot after cooking. Pulse until silky—30 seconds usually does the trick. For chunkier sauce, a potato masher works great.
How long does it keep in the fridge?
Store in an airtight container and it’ll stay fresh for up to 1 week. For longer storage, freeze for up to 6 months.

- 4C Bread Crumbs Meatballs Recipe: Crispy Crust and Juicy Centers - September 25, 2026
- 6 Oz Chocolate Chip Cookie Recipe: Perfectly Balanced Crispy Edges and Chewy Hearts - September 25, 2026
- 6-Inch Coffee Cake Recipe: Vanilla Bean Swirls and Buttery Streusel Topping - September 25, 2026