
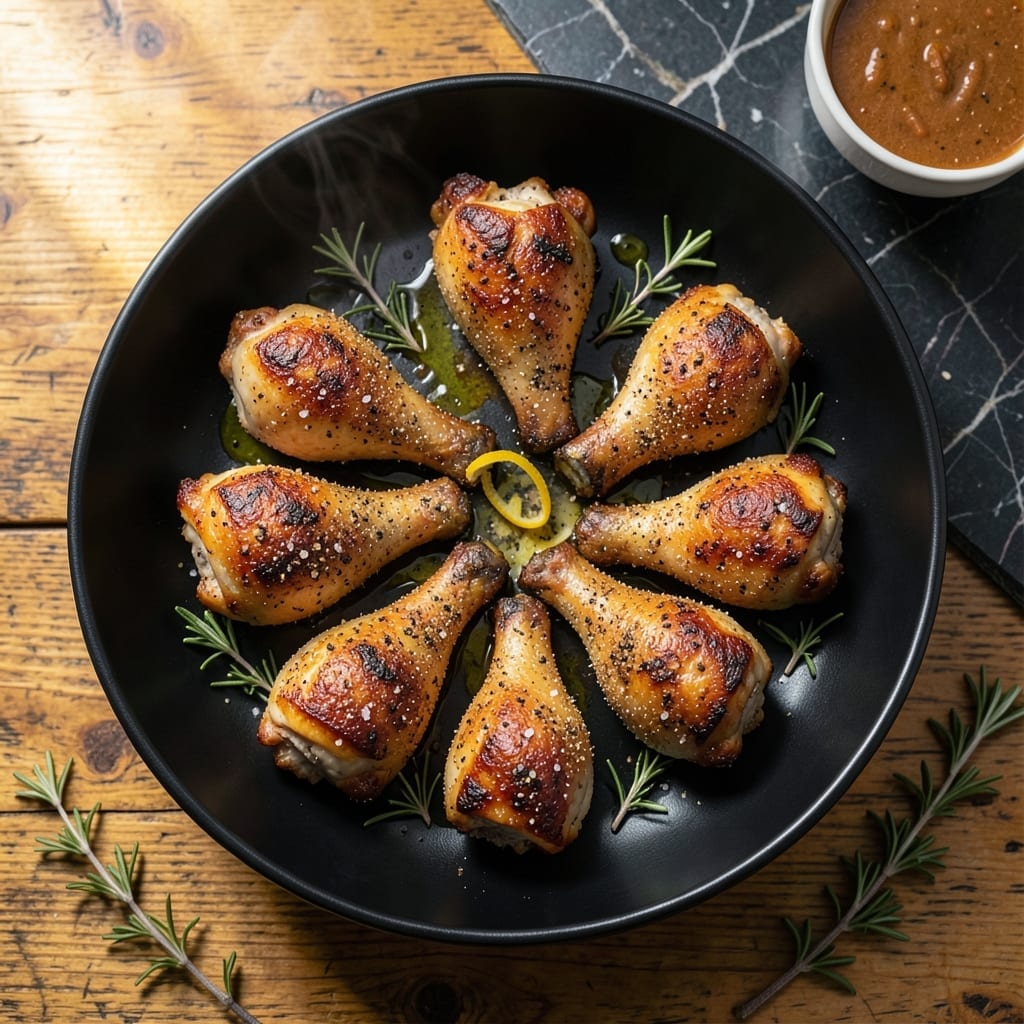
This Insta Pot method transforms chicken legs into a tender masterpiece with minimal effort. The pressure cooker locks in moisture while breaking down the meat to perfect doneness.
I developed this technique to achieve restaurant-quality results without the long braising time. The secret lies in the precise cooking time and natural release method.
You’ll end up with meat so tender it nearly falls off the bone, with rich, developed flavors in the juices. The skin stays intact while the inside becomes fork-tender.
This approach works for both fresh and frozen legs, making it a reliable option for any weeknight. Here’s how to make it happen.
Ingredients for Insta Pot Chicken Leg
Simple ingredients for pressure-cooker magic. Nothing complicated, just flavor-packed results every time.
| Ingredient | Amount | Notes |
|---|---|---|
| Chicken Legs 🍗 | 8 pieces | Bone-in, skin-on preferred |
| Olive Oil 🫒 | 1 tbsp | For searing chicken |
| Kosher Salt 🧂 | 1 ½ tsp | Divided for seasoning |
| Black Pepper 🌶️ | 1 tsp | Freshly ground preferred |
| Garlic Powder 🧄 | 1 tsp | For depth of flavor |
| Onion Powder 🧅 | 1 tsp | Enhances savory base |
| Dried Thyme 🌿 | 1 tsp | Or use fresh thyme |
| Dried Rosemary 🌿 | 1 tsp | Crushed for better release |
| Chicken Broth 🥣 | 1 cup | Low-sodium preferred |
| Tomato Paste 🍅 | 2 tbsp | For richness and color |
| Apple Cider Vinegar 🍏 | 1 tbsp | Balances the flavors |
| Brown Sugar 🍚 | 1 tbsp | Optional for caramelization |
The chicken legs are key here. Bone-in, skin-on thighs or drumsticks hold up best to pressure cooking. I recommend Costco for bulk purchases or Whole Foods for organic options. Look for pieces with even sizing—this ensures consistent cooking. Fresh or frozen both work, but frozen may need an extra 5 minutes under pressure (no need to thaw).
No chicken broth on hand? Water with a bouillon cube works in a pinch. Tomato paste can be swapped for 1/4 cup tomato sauce if that’s what you’ve got. The vinegar adds brightness—lemon juice at the same amount is a great alternative. For the herbs, 1 tbsp fresh equals 1 tsp dried, so adjust accordingly if using fresh thyme or rosemary.
Leftovers keep beautifully. Store in an airtight container for up to 4 days in the fridge or freeze for 3 months. The flavors actually deepen overnight, making this taste even better as leftovers. Reheat in the microwave or on the stovetop with a splash of broth.
Why You’ll Love This Recipe
- Minimal Effort: Set it and forget it—just toss the chicken legs with olive oil, salt, pepper, and garlic powder, then let the Instapot do the work.
- Garlic-Kissed Crisp: The garlic powder sears into the skin, giving every bite that savory punch without overpowering.
- Weeknight MVP: I throw this together after work and it’s ready before the kids finish their homework.
- Stretches Far: One batch feeds us for two meals, and the leftovers taste even better the next day.
Step-by-Step Instructions for Pressure-Cooked Chicken Legs
This method guarantees tender meat with rich flavor and minimal effort.
Step 1: Season the Chicken Legs
Pat the 8 pieces chicken legs dry with paper towels to ensure a good sear. In a small bowl, combine 1.5 tsp kosher salt, 1 tsp black pepper, 1 tsp garlic powder, 1 tsp onion powder, 1 tsp dried thyme, and 1 tsp dried rosemary. This blend creates a robust, aromatic crust that infuses every bite.
Rub the seasoning evenly over all sides of the chicken legs, pressing gently so it adheres. Let the seasoned chicken sit at room temperature for 10 minutes—this allows the spices to penetrate the surface and enhances the overall flavor profile.
Step 2: Sear the Chicken in the Insta Pot
Set the Insta Pot to the Sauté function and add 1 tbsp olive oil. Once the oil is hot and shimmering, add the chicken legs in a single layer, working in batches if necessary to avoid overcrowding. Sear for 4-5 minutes per side until the skin is golden brown and crispy.
The searing step locks in juices and builds a flavorful fond at the bottom of the pot, which will deepen the sauce later. Don’t rush this—you want a deep, even color on both sides. Remove the chicken and set aside temporarily.
Step 3: Deglaze and Build the Sauce
With the Sauté function still on, pour 1 cup chicken broth into the pot and use a wooden spoon to scrape up all the browned bits from the bottom. This deglazing step is crucial—it incorporates all those rich, caramelized flavors into the cooking liquid.
Stir in 2 tbsp tomato paste, 1 tbsp apple cider vinegar, and 1 tbsp brown sugar. The tomato paste adds depth and a slight tang, while the brown sugar balances the acidity with a subtle sweetness. Let this mixture simmer for 2 minutes to meld the flavors.
Step 4: Pressure Cook to Perfection
Return the chicken legs to the pot, arranging them in a single layer if possible. Secure the lid and set the valve to Sealing. Cook on High Pressure for 12 minutes. The pressure cooking process breaks down the connective tissue, ensuring the meat becomes fork-tender and nearly falls off the bone.
Once the cooking time is complete, allow the pressure to release naturally for 10 minutes, then carefully switch the valve to Venting to release any remaining pressure. This gradual release helps the chicken retain its moisture and tenderness.
Step 5: Finish and Serve
Open the lid and use a spoon to skim off any excess fat from the surface of the sauce. If you prefer a thicker sauce, set the Insta Pot back to Sauté and simmer for 2-3 minutes until it reduces slightly. The sauce should coat the back of a spoon with a rich, velvety texture.
Serve the chicken legs hot, spooning the sauce generously over the top. The meat should pull away from the bone effortlessly, delivering the promised fall-off-the-bone tenderness in every serving.
Pro Tips For Making Insta Pot Chicken Leg
- Sear First: I learned this the hard way—skipping the sear leaves the skin rubbery. Use the sauté function with 1 tbsp olive oil to brown the legs for 3-4 minutes per side before pressure cooking.
- Pat Them Dry: Sounds tedious, but it works: drying the chicken legs with paper towels before seasoning guarantees a better sear and crispier skin under pressure.
- Don’t Overfill: Resist the urge to crowd the pot—arrange the legs in a single layer with space between them, or they’ll steam instead of brown properly.
- Use Natural Release: After cooking, let the pressure release naturally for 10 minutes—this keeps the meat juicy and prevents tough, dried-out chicken.
Troubleshooting This Recipe
Burn Notice Prevention
If you see the Burn error, immediately release pressure and check the pot. This usually happens when food sticks to the bottom. Add ½ cup extra broth and stir well to release any browned bits. I always deglaze thoroughly after searing to prevent this. 🔥
Undercooked Chicken
If the meat isn’t tender after 12 minutes, return it to the pot with ¼ cup broth and cook for another 3-5 minutes. This often happens with larger drumsticks. Always check the thickest piece at the bone.
Sauce Too Thin
For a thicker sauce, remove the chicken and set the pot to Sauté. Simmer uncovered for 3-5 minutes until reduced. A cornstarch slurry (1 tbsp cornstarch + 1 tbsp water) can also help, but I prefer reducing naturally for better flavor.
Skin Not Crispy
Pressure cooking softens the skin. For crispiness, transfer chicken to a baking sheet and broil for 3-4 minutes after cooking. Alternatively, air-fry at 400°F for 5 minutes. This extra step makes a noticeable difference.
Overcrowding Issues
Never stack chicken legs in the pot. Cook in batches if needed, using 1 cup broth per batch. Overcrowding prevents even cooking and can lead to uneven doneness. I learned this lesson the hard way with my first attempt.
Valves and Sealing
Always ensure the silicone ring is properly seated and the float valve isn’t stuck. If pressure isn’t building, check these first. A quick visual inspection before starting saves time and frustration. 💡
Nutrition Facts
Frequently Asked Questions
Can I use frozen chicken legs directly?
Yes, but add 5 extra minutes to the cooking time. No need to thaw first. Always ensure they’re not stuck together before adding to the pot.
Why sear the chicken first?
Searing develops deep flavor and creates a fond that enriches the sauce. It also gives the skin a head start on browning before pressure cooking.
How do I know when it’s done?
The meat should reach 165°F internally and pull away from the bone easily. If unsure, cook for another 3-5 minutes under pressure.
What if my sauce is too thin?
Simmer uncovered on the Sauté setting for 3-5 minutes to reduce. For quicker results, mix 1 tbsp cornstarch with water and stir in.

- 4C Bread Crumbs Meatballs Recipe: Crispy Crust and Juicy Centers - September 25, 2026
- 6 Oz Chocolate Chip Cookie Recipe: Perfectly Balanced Crispy Edges and Chewy Hearts - September 25, 2026
- 6-Inch Coffee Cake Recipe: Vanilla Bean Swirls and Buttery Streusel Topping - September 25, 2026