
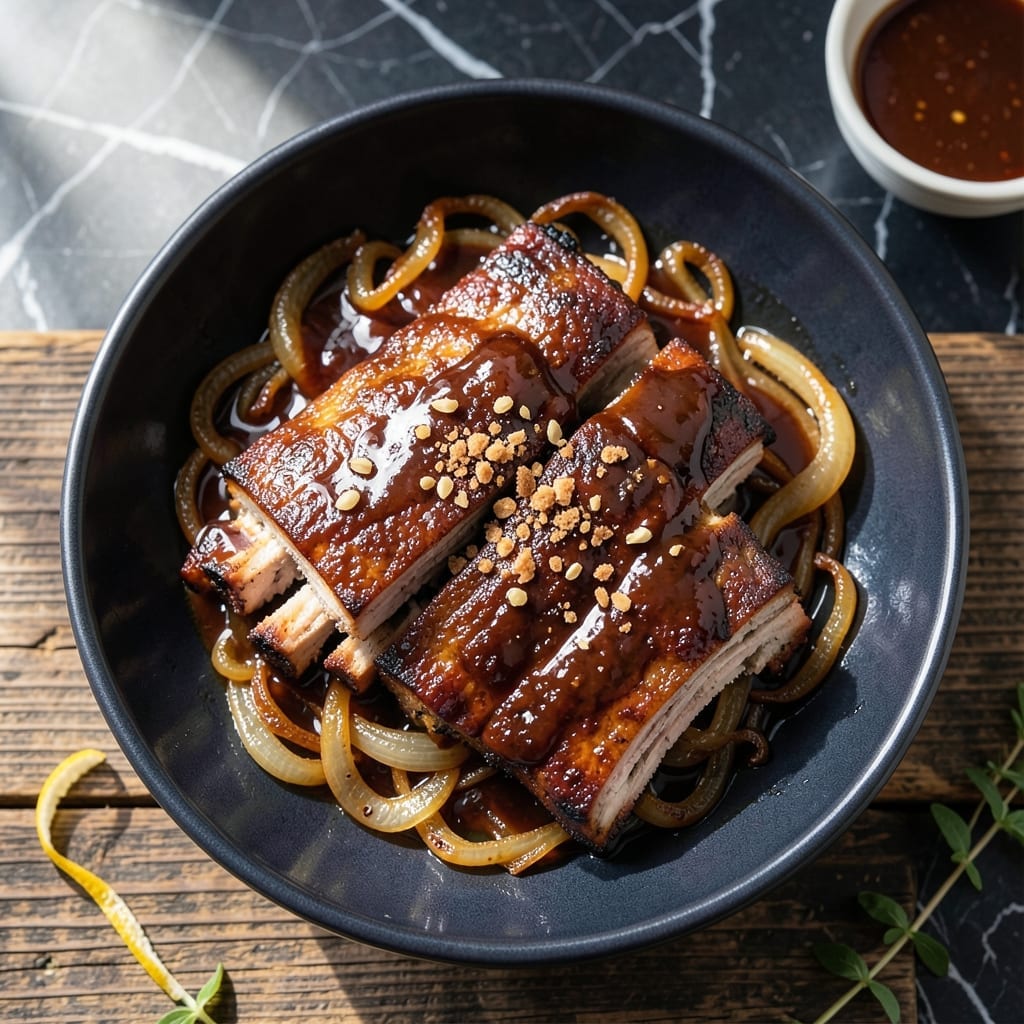
Achieving fall-off-the-bone ribs typically takes hours, but this method delivers the same results in just 60 minutes. The Instant Pot transforms tough cuts into tender, flavorful meat with minimal effort.
This approach uses a two-step process: pressure cooking to break down the collagen, then finishing under the broiler for that essential caramelized crust. The result is ribs that pull apart effortlessly while maintaining juicy texture.
What sets this recipe apart is its reliability. Even without smoking or slow-roasting, you’ll get consistently perfect ribs every time. The meat absorbs the seasoning deeply during the pressure cooking phase.
Serve these with classic barbecue sides for a complete meal. Here’s how to make them.
Ingredients for Insta Pot Ribs
These ingredients transform tough ribs into tender, flavorful meat with minimal effort and maximum impact.
| Ingredient | Amount | Notes |
|---|---|---|
| Baby Back Ribs 🥩 | 2 lb | Full rack, membrane removed |
| Barbecue Sauce 🍯 | 1 ½ cups | Divided for cooking and serving |
| Apple Cider Vinegar 🍏 | ¼ cup | For tenderizing and balance |
| Brown Sugar 🍚 | ¼ cup | Light or dark variety |
| Worcestershire Sauce 🍶 | 2 tbsp | Adds umami depth |
| Garlic Powder 🧄 | 1 tbsp | Not garlic salt |
| Onion Powder 🧅 | 1 tbsp | For aromatic base |
| Smoked Paprika 🌶️ | 1 tsp | Essential for smoky flavor |
| Kosher Salt 🧂 | 1 tbsp | Diamond Crystal preferred |
| Ground Black Pepper 🌶️ | 1 tsp | Freshly ground for best flavor |
| Beef Broth 🥩 | 1 cup | Low-sodium recommended |
| Liquid Smoke 🔥 | ½ tsp | Optional for extra smokiness |
The ribs are the star, so choose baby back ribs with good marbling—they’ll break down faster under pressure. Most Costco locations carry full racks at a great price, or check your local butcher for pre-trimmed options. Look for racks with even fat distribution and avoid any with a strong odor (a sign they’re past their prime). The membrane must be removed before cooking—it prevents seasoning from penetrating properly.
No apple cider vinegar? White vinegar works in a pinch, though the flavor will be slightly sharper. For a deeper smoky note without liquid smoke, add one-third the amount of chipotle powder. If using a sweeter barbecue sauce, reduce the brown sugar by half. Low-sodium beef broth is ideal, but vegetable broth can substitute if needed—just adjust seasoning at the end.
Ribs are best cooked immediately, but you can prep the dry rub up to 24 hours ahead. Leftovers keep in the fridge for 4-5 days or freeze for 3 months. Reheat in the oven covered with foil to prevent drying out, then finish under the broiler to crisp up the sauce.
Why You’ll Love This Recipe
- Set and Forget: I toss the ribs in with the sauce and vinegar, then the Instant Pot does all the work. No babysitting required.
- Sticky, Sweet Perfection: The brown sugar caramelizes with the barbecue sauce, and the apple cider vinegar cuts through for that ideal tangy-sweet balance.
- Crowd-Pleasing Meal: I serve these at summer BBQs or a cozy family dinner—everyone cleans their plate. Even my picky nephew asks for seconds.
- Meals for Days: One batch makes enough for dinner, leftovers for sandwiches, and maybe a sneaky midnight snack. Honestly, it’s the gift that keeps giving.
Step-by-Step Instructions for Insta Pot Ribs
This method delivers fall-off-the-bone results with minimal hands-on time and maximum flavor.
Step 1: Prepare and Season the Ribs
Pat the 2 lb Baby Back Ribs dry with paper towels after removing the membrane. In a small bowl, combine the 1 tbsp Kosher Salt, 1 tsp Ground Black Pepper, 1 tbsp Garlic Powder, 1 tbsp Onion Powder, and 1 tsp Smoked Paprika.
Rub this mixture evenly over all surfaces of the ribs, pressing it into the meat. This dry rub creates a flavorful crust while the spices penetrate during cooking. Let the seasoned ribs sit for 10 minutes to allow the salt to begin breaking down the proteins.
Step 2: Create the Cooking Liquid
Pour the 1 cup Beef Broth, 0.25 cup Apple Cider Vinegar, 2 tbsp Worcestershire Sauce, 0.25 cup Brown Sugar, and 0.5 tsp Liquid Smoke into the Insta Pot. Stir until the brown sugar dissolves completely—this prevents burning during pressure cooking.
The vinegar and Worcestershire add tang and depth, while the sugar balances the acidity. The beef broth provides a rich, savory base that will infuse into the meat as it cooks under pressure.
Step 3: Pressure Cook to Tender Perfection
Place the trivet in the Insta Pot and arrange the ribs in a circular pattern, meat-side up. If the rack doesn’t fit, cut it into two sections and stack them slightly offset. Secure the lid, set the valve to sealing, and cook on high pressure for 25 minutes.
After cooking, allow for a natural pressure release for 10 minutes, then quick-release any remaining pressure. The ribs should be fork-tender at this stage, with the meat pulling away from the bone slightly when tested. Avoid overcooking, as this can make the meat mushy.
Step 4: Finish with Barbecue Sauce
Carefully remove the ribs from the Insta Pot and place them on a foil-lined baking sheet. Brush generously with 1 cup of the 1.5 cups Barbecue Sauce, reserving the rest for serving. For a caramelized finish, broil for 3-4 minutes until the sauce bubbles and thickens slightly.
Alternatively, return the ribs to the Insta Pot with the sauce, seal, and cook on high pressure for an additional 5 minutes to infuse the flavor deeply. Either method ensures a sticky, finger-licking glaze that clings to the ribs.
Let the ribs rest for 5 minutes before slicing between the bones. Serve with the remaining 0.5 cup of barbecue sauce on the side for dipping.
Pro Tips For Making Insta Pot Ribs
- Pre-Sear the Ribs: I learned this the hard way—skipping the sear leaves the ribs pale and lacking depth. A quick 2-3 minutes per side in the Instant Pot on “Sauté” mode gives them color and locks in flavor before pressure cooking.
- Trim the Membrane: Sounds tedious, but it works: peel off that tough silver skin on the back of the ribs before cooking. It takes 30 seconds and keeps the sauce from sliding right off the meat.
- Use Natural Release: Resist the urge to quick-release the pressure—突如 otherwisecooked ribs can turn tough. Let it sit for a full 10-minute natural release, then finish with a quick release if needed.
- Sauce at the End: Add the barbecue sauce only after pressure cooking to avoid burning. Toss the ribs in the sauce and broil for 3-4 minutes for that sticky, caramelized finish.
Make-Ahead Tips for Leftovers
Prep the Dry Rub
You can mix the 1 tbsp Kosher Salt, 1 tsp Ground Black Pepper, 1 tbsp Garlic Powder, 1 tbsp Onion Powder, and 1 tsp Smoked Paprika up to 24 hours ahead. Store it in an airtight container at room temperature.
Pre-Cook the Ribs
Season the 2 lb Baby Back Ribs with your pre-mixed dry rub and let them sit covered in the fridge for up to 12 hours. This step enhances flavor penetration without over-curing the meat.
Pre-Mix the Sauce
Combine 1 cup Barbecue Sauce, 0.25 cup Apple Cider Vinegar, and 0.25 cup Brown Sugar in a bowl. This blend can be refrigerated for up to 3 days before using. 💡
Partial Cooking Method
Pressure cook the ribs for 20 minutes instead of 25 minutes, then refrigerate them in their cooking liquid for up to 2 days. Finish under the broiler when ready to serve.
Sauce Infusion
After pressure cooking, transfer ribs and 1 cup Barbecue Sauce to a baking dish. Cover and refrigerate for up to 24 hours. This allows the flavors to meld deeply before final cooking. 🔥
Reheating Tip
To serve pre-cooked ribs, place them on a foil-lined tray, brush with reserved sauce, and broil for 5-7 minutes until heated through and caramelized. Always check internal temperature reaches 165°F.
Nutrition Facts
Frequently Asked Questions
Can I use spare ribs instead of baby back?
Yes, but adjust the cooking time. Spare ribs are larger and need 30 minutes under pressure instead of 25 minutes. They’ll still turn out tender and flavorful.
What if my ribs aren’t falling apart after cooking?
If they’re not tender, seal the pot again and cook for another 5-10 minutes. Check the liquid level first—add 1/2 cup broth if needed to prevent burning.
Can I skip the broiler step?
You can, but the sauce won’t caramelize as nicely. For best results, broil for 3-4 minutes or sauté the sauced ribs in the pot for 5 minutes to thicken.

- 4C Bread Crumbs Meatballs Recipe: Crispy Crust and Juicy Centers - September 25, 2026
- 6 Oz Chocolate Chip Cookie Recipe: Perfectly Balanced Crispy Edges and Chewy Hearts - September 25, 2026
- 6-Inch Coffee Cake Recipe: Vanilla Bean Swirls and Buttery Streusel Topping - September 25, 2026