
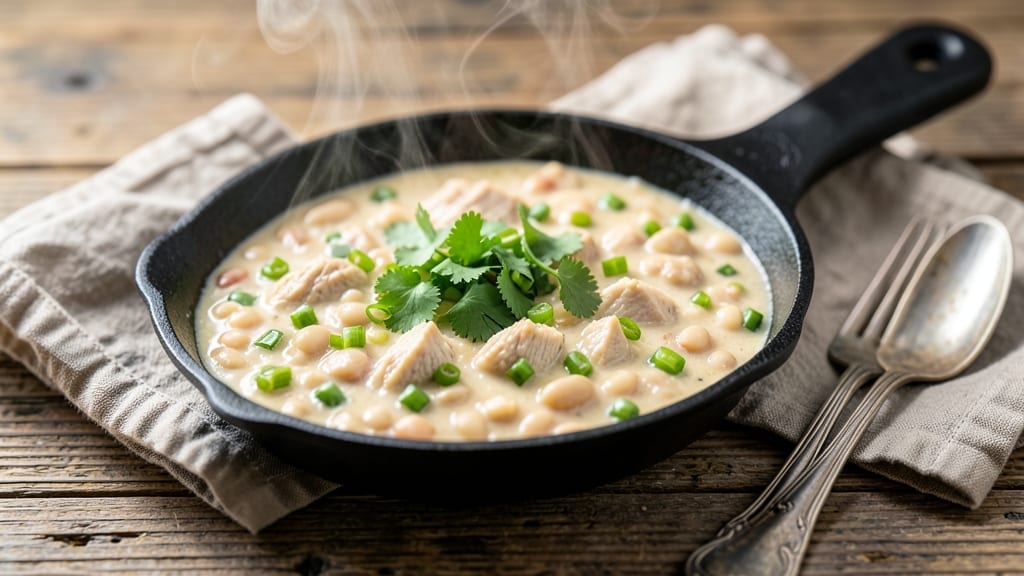
This Insta Pot white chicken chili recipe delivers restaurant-quality comfort in just one pot—creamy, spiced, and packed with tender chicken and hearty beans. The secret lies in pressure cooking, which transforms tough chicken into melt-in-your-mouth bites while infusing every ingredient with deep, aromatic flavors.
I’ve perfected this method over countless batches, ensuring the perfect balance of creaminess and warmth without requiring hours at the stove.
What makes this recipe truly special is how it combines traditional chili flavors with modern convenience. The Insta Pot handles all the heavy lifting—building rich, velvety texture from scratch while keeping the process simple.
You’ll start with a base of chicken broth and white beans, then layer in spices like cumin and paprika for that signature chili warmth. The chicken cooks until fork-tender, absorbing all the savory goodness around it.
By the time you’re ready to serve, you’ll have a steaming bowl of creamy white chicken chili with perfectly seasoned chicken and beans that hold their shape. The texture is velvety yet substantial, with just enough creaminess to make it feel indulgent.
Top it with your favorite garnishes—sour cream, shredded cheese, or fresh cilantro—and you’ve got a meal that’s hearty enough for a cold evening but quick enough for any weeknight.
This recipe scales beautifully for feeding a crowd or meal prepping for the week, making it a versatile addition to your slow-cooker rotation. The one-pot method means minimal cleanup, while the rich flavors ensure everyone at the table will ask for seconds. Let’s get cooking!
Ingredients for insta pot white chicken chili
Pantry staples plus a few specialty touches make this creamy chili magic happen.
| Ingredient | Amount | Notes |
|---|---|---|
| Boneless, Skinless Chicken Breast 🍗 | 1 ½ lb | Cut into 1-inch pieces |
| Canned White Beans 🍲 | 15 oz | Drained and rinsed |
| Chicken Broth 💧 | 4 cups | Low-sodium preferred |
| Yellow Onion 🧅 | 1 whole | Diced, medium size |
| Garlic Cloves 🧄 | 3 cloves | Minced, fresh preferred |
| Ground Cumin 🌿 | 1 tbsp | Toasted for deeper flavor |
| Smoked Paprika 🌶️ | 1 tbsp | For authentic chili warmth |
| Dried Oregano 🍃 | 1 tsp | Mexican preferred if available |
| Chicken Bouillon Cube 🧂 | 1 whole | Dissolved in broth |
| Heavy Cream 🥛 | ½ cup | Full-fat for creaminess |
| Cream Cheese 🧀 | 4 oz | Cut into small cubes |
| Salt 🧂 | 1 tsp | Adjust to taste |
| Black Pepper 🌶️ | ½ tsp | Freshly ground preferred |
| Lime Juice 🍋 | 1 tbsp | Freshly squeezed |
The chicken is key here—boneless, skinless breasts cook perfectly in the pressure cooker, but thighs work too if you want extra richness. Grab the white cannellini beans from the international aisle at Whole Foods or Trader Joe’s for that authentic texture. The broth matters too—low-sodium lets you control the seasoning better. I always toast my spices (cumin and paprika) in a dry pan for 30 seconds before adding—they smell amazing and deepen the flavor. The heavy cream and cream cheese combo gives that velvety texture without making it too heavy.
No smoked paprika? Regular paprika plus a pinch of liquid smoke works in a pinch. Short on cream? Coconut milk at half the amount keeps it dairy-free. The bouillon cube can be swapped for 1 tsp chicken bouillon powder. For a spicier kick, add 1/2 tsp cayenne with the other spices. The lime juice at the end brightens everything up—don’t skip it. If you’re meal prepping, the chili actually tastes better the next day as flavors meld together.
This reheats beautifully—just stir in a splash of broth or water if it gets too thick. Keeps for 4-5 days in the fridge or 3 months frozen. I portion mine into containers with a dollop of sour cream on top for easy grab-and-go lunches. The cream cheese separates when reheated, but just stir it in—it’ll come back together. For serving, I like to add fresh cilantro and a squeeze of lime right before eating.
Why You’ll Love This Recipe
- One-Pot Magic: I swear by this recipe when I’m too tired to wash another dish. Dump everything into the Instant Pot—chicken, beans, broth, onions, garlic—and walk away. The pressure cooker does all the work while you sip wine (or tea, no judgment).
- Garlic Bomb Flavor: That raw garlic and onion combo caramelizes into something rich and deep, but it’s balanced by the creamy beans and tender chicken. It’s the kind of flavor that makes you pause mid-bite—honestly, I’ve caught myself doing it twice.
- Meal Prep MVP: This chili reheats beautifully for lunches all week. I double the batch on Sundays, portion it into containers, and still have leftovers by Thursday. Add a sprinkle of cheese or avocado when you reheat—suddenly, it’s a whole new meal.
- Budget-Friendly Powerhouse: Canned beans and chicken breast stretch this recipe into five servings without breaking the bank. Between us, this is how I feed my family for under $10. The broth adds richness, so you don’t even miss the fancy ingredients.
Step-by-step instructions for Insta Pot white chicken chili
Here’s how to create a lusciously creamy, spiced chili that comes together in your Instant Pot.
Sauté the Aromatics and Chicken
Set your Instant Pot to “Sauté” mode and add the diced yellow onion. Cook for 3-4 minutes until softened and translucent, stirring occasionally. Here’s the thing—you want it to caramelize just slightly, which builds deep flavor in the chili.
Add the minced garlic cloves and cook for 30 seconds until fragrant. Don’t let it brown or it’ll turn bitter. Push the garlic to one side of the pot and add the 1.5 lb boneless, skinless chicken breast cut into 1-inch pieces. Cook for 4-5 minutes, stirring occasionally, until the chicken loses its raw color and begins to brown slightly.
Add Spices and Liquids
Stir in the 1 tbsp ground cumin, 1 tbsp smoked paprika, and 1 tsp dried oregano, making sure all the chicken pieces are well coated. The spices will bloom and release their aromatic oils, creating that signature chili warmth. Add the 15 oz drained and rinsed canned white beans and stir to combine.
Pour in the 4 cups chicken broth and drop in the 1 whole chicken bouillon cube. Stir until fully dissolved. The broth should cover all the ingredients completely. Here’s where it gets good—this is the foundation that will transform into your creamy chili.
Pressure Cook Until Chicken is Tender
Secure the lid on your Instant Pot and set the valve to “Sealing.” Cook on High Pressure for 12 minutes. This time ensures the chicken becomes fork-tender while keeping the beans intact. When the cooking time is complete, allow a natural release for 10 minutes before quick-releasing any remaining pressure.
Open the lid and use two forks to shred the chicken directly in the pot. You’ll see it pull apart easily, which means it’s perfectly cooked. Stir the chicken back into the mixture with the beans and broth. This step is crucial for distributing all those flavors evenly throughout the chili.
Create the Creamy Base
Reduce the heat to “Low” and stir in the 4 oz cream cheese cut into small cubes. Let it melt completely, stirring until smooth. This is where the chili transforms from hearty to velvety. Add the 0.5 cup heavy cream and stir until fully incorporated. The mixture should begin to thicken noticeably.
Season with 1 tsp salt and 0.5 tsp black pepper, then stir in the 1 tbsp freshly squeezed lime juice. Taste and adjust the seasoning if needed—this is your chance to balance all those rich, creamy flavors. The lime juice adds a bright contrast that cuts through the richness beautifully.
Simmer and Serve
Continue cooking on “Low” for 5-7 minutes until the chili reaches your desired consistency. You want it thick enough to coat the back of a spoon but still spoonable. If it’s too thick, add 1-2 tablespoons of water to loosen it up.
Ladle the creamy white chicken chili into bowls and serve immediately. The contrast of the warm, spiced chili with cool lime notes makes this dish truly special. You’ll love how the cream cheese and heavy cream create that luxurious texture without overpowering the chicken and bean flavors.
Pro Tips For Making Insta Pot White Chicken Chili
- Sear Chicken First: Toss those chicken breasts in a hot pan with a little oil for 2-3 minutes per side before dumping them in the Instant Pot. I learned this the hard way—raw chicken in broth just sits there like sad, pale dumplings. A quick sear adds depth and keeps the meat from turning into rubbery mush.
- Drain and Rinse Beans: Skip the “just open and dump” routine—rinse canned white beans in a colander before adding them. The starchy water makes your chili gluey, and nobody wants a soup that clings like wallpaper paste. Takes 10 seconds, saves you from regret.
- Don’t Skip the Sauté: Onion and garlic deserve more than a quick toss—they need 3-4 minutes in the Instant Pot’s sauté function until soft and fragrant. Rushing this step means your chili will taste flat, like someone forgot to season it. (Yes, even if you’re impatient like me.)
- Pressure Cook 12 Minutes: Set the timer for 12 minutes, not the “auto” setting. Chicken breast hits 165°F at 12 minutes, and anything less risks dry, overcooked meat. The pot will naturally release pressure afterward, and your chicken stays juicy—no guessing games.
Perfect pairings for insta pot white chicken chili
Creamy Toppings
This chili practically begs for cool, creamy toppings to contrast its warm, spiced base. I always keep a tub of Mexican-style sour cream at the ready—its tangy richness balances the chili’s creaminess beautifully.
For extra indulgence, add a dollop of Mexican crema or a sprinkle of crumbled queso fresco for a bright, salty finish. 🥛
Crunchy Garnishes
Freshness is key here, so I reach for cilantro and green onions to add brightness and texture. Roughly chop about 2 tbsp cilantro and 1 green onion per serving, then scatter them over the top right before eating.
For a bit of heat, add diced jalapeños or a pinch of chili powder to taste.
Cheesy Finishes
No white chili is complete without cheese! I love a mix of shredded Monterey Jack and cotija cheese for a perfect balance of melty and crumbly textures. Sprinkle about 2 tbsp per bowl right before serving so it stays crisp.
For a dairy-free option, try nutritional yeast or vegan cheese shreds—they add a nutty, cheesy flavor without the dairy.
Bread Pairings
This chili pairs perfectly with warm corn tortillas or crusty sourdough bread for dipping. I often serve it with homemade flour tortillas lightly toasted and cut into triangles.
For extra flair, brush the tortillas with garlic butter before serving. A side of avocado slices adds a creamy, fresh contrast that rounds out the meal.
Drink Recommendations
A cold Mexican lager like Modelo Especial or Pacifico cuts through the richness of the chili beautifully. For something lighter, try a sparkling lime soda—the bubbles and citrus notes refresh your palate.
If you prefer wine, a dry Riesling or Sauvignon Blanc offers crisp acidity that complements the creamy, spiced flavors.
Meal Prep Extras
When meal prepping, I store the chili in glass containers with a layer of sour cream on top—it keeps the chili from drying out and adds a creamy element when reheated. For extra flavor, pack individual lime wedges and small bags of tortilla chips on the side.
This way, you can add fresh toppings whenever you’re ready to eat, keeping the dish vibrant and delicious.
Nutrition facts
Frequently asked questions about Instant Pot white chicken chili
Can I use chicken thighs instead of breasts for this recipe?
Chicken thighs work beautifully—they stay juicier and add extra richness to the chili. Use 1.5 lbs bone-in, skin-on thighs instead of breasts, and increase the cooking time to 14 minutes on high pressure. The skin will render fat that enhances the creamy texture, but remove it before serving if preferred.
Why did my chili turn out too thick or too thin?
Thickness depends on the cream-to-broth ratio. If it’s too thick, stir in 1-2 tablespoons of water or broth until smooth. Too thin? Simmer uncovered on “Sauté” mode for 3-5 minutes to reduce. The heavy cream and cream cheese are key—measure them carefully for perfect consistency.
Can I make this recipe dairy-free?
Yes! Replace the heavy cream with ½ cup coconut milk and swap cream cheese for 4 oz cashew cream (blend soaked cashews with water). For extra richness, add 1 tbsp nutritional yeast. The texture will be slightly lighter but still creamy and delicious.
How long will this chili keep in the fridge or freezer?
Store in an airtight container for up to 5 days in the fridge. For freezing, portion into containers and freeze for up to 3 months. Thaw overnight in the fridge, then reheat on “Sauté” mode with 1-2 tablespoons of water to restore creaminess. The flavors actually deepen over time!
What’s the best way to reheat leftovers?
Use the “Sauté” function on “Normal” setting for 2-3 minutes, stirring frequently. If it separates, add 1-2 tablespoons of water or broth and stir until smooth. For microwave reheating, cover and heat in 30-second bursts, stirring between each interval to prevent overcooking.

- Crock Pot Round Steak Recipe: Slow-Sear Crust With Juicy Center - November 6, 2026
- Candied Sweet Potatoes Crock Pot Recipe: Caramelized Sweetness With Zero Effort - November 6, 2026
- Steak Recipe Crock Pot: Juicy, Caramelized Crust in 4 Hours - November 6, 2026