
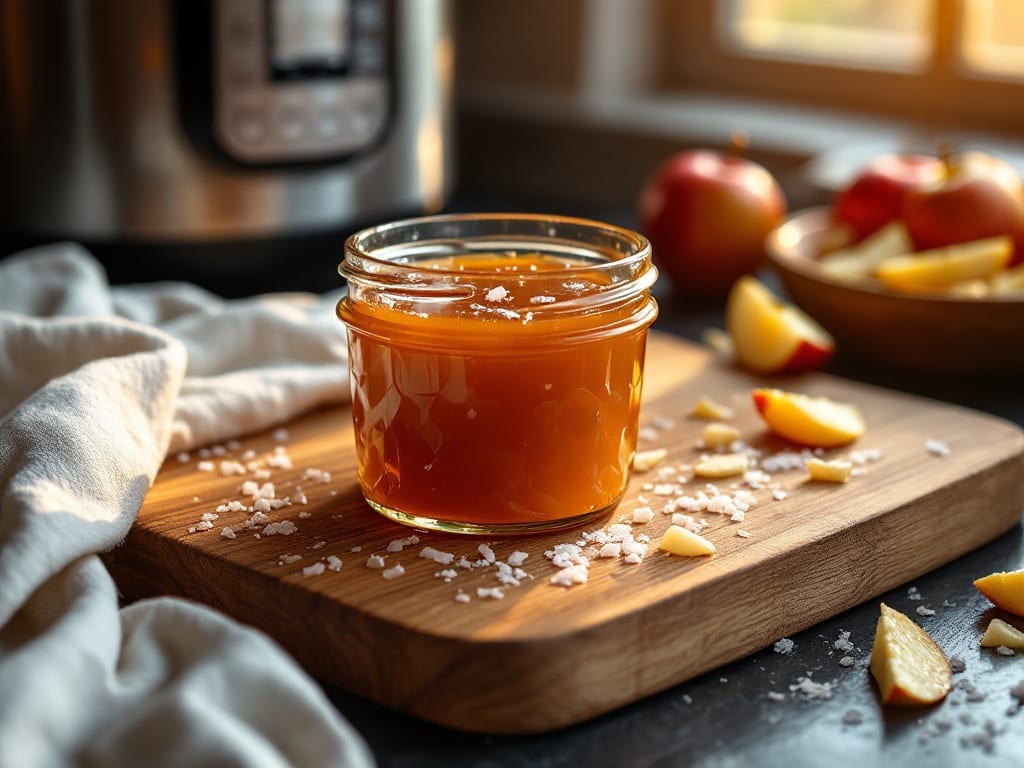
This instant pot apple jam recipe transforms fresh apples into spiced jam in just 20 minutes—so simple, you’ll wonder why you ever bought store-bought. The Instant Pot handles all the work—simmering, reducing, and thickening—while you focus on the spices that turn ordinary jam into something extraordinary.
I’ve perfected this recipe over years of testing, and the key lies in balancing natural pectin from the apples with just enough sugar to create a smooth, spreadable jam that tastes like autumn in every bite.
What sets this recipe apart is the hands-off approach: no constant stirring, no risk of burning, and no need for a candy thermometer. The Instant Pot’s pressure cooking function does the heavy lifting, reducing the cooking time dramatically while preserving the fruit’s natural flavors and vibrant color.
You’ll need just five simple ingredients—apples, sugar, lemon juice, cinnamon, and a pinch of salt—to create a jam that’s smooth, fragrant, and perfectly balanced between sweet and spiced.
The result is a jam that’s smooth yet vibrant, with a glossy sheen and a texture that’s neither too runny nor too thick.
The cinnamon infuses warmth without overpowering, while the lemon juice brightens the flavor, making this jam ideal for toast, yogurt, or even as a glaze for meats. It’s the kind of jam that makes you feel like you’ve just picked the apples yourself, straight from a farmstand.
Best of all, this recipe makes enough for gifting or meal prep—just store it in sterilized jars for up to a year. The Instant Pot’s efficiency means you can have a batch ready in less time than it takes to drive to the grocery store.
Let’s get started on making jam that’s worth every spoonful.
Ingredients for instant pot apple jam
Five simple ingredients transform into jam that tastes like autumn in minutes.
| Ingredient | Amount | Notes |
|---|---|---|
| Fresh Apples 🍎 | 3 lb | Peeled, cored, sliced into 1/4-inch pieces |
| Granulated Sugar 🍚 | 2 cups | White or light brown preferred |
| Lemon Juice 🍋 | ¼ cup | Freshly squeezed, unsweetened |
| Ground Cinnamon 🌿 | 1 ½ tbsp | Freshly ground for best flavor |
| Sea Salt 🧂 | ½ tsp | Fine grain preferred |
| Water 💧 | ½ cup | For Instant Pot pressure cooking |
| Pectin Powder (optional) 🍬 | 1 tbsp | For extra thickening if needed |
The apples are the star—Honeycrisp or Fuji work best for their natural sweetness and pectin, but any firm variety will do. Costco or Trader Joe’s usually have great deals on bulk apples, and I always grab a few extra for snacks. If you’re using pre-sliced apples (like from the salad bar), they’ll work in a pinch, but peeling and slicing fresh gives you the best texture. The sugar is non-negotiable here—white or light brown adds just enough caramel notes without overpowering the apple flavor. I keep a jar of sugar on hand year-round because it’s used in so many recipes, but organic or raw sugar works too if that’s what you prefer.
No fresh lemon juice? Bottled lemon juice works fine, but it might be a tad sweeter—adjust the sugar down by 1 tbsp if needed. Want more spice? Add a pinch of nutmeg or cardamom (about 1/4 tsp each). The cinnamon is key—Penzeys or Spicewalla have excellent ground cinnamon if you want to splurge, but the regular grocery store stuff is fine too. If you’re worried about the jam being too runny, the optional pectin powder is your secret weapon—it’s especially helpful if you’re using lower-pectin apples like Gala. The water is just to help with the pressure cooking process, so don’t stress about quality here.
This jam keeps beautifully—up to 1 year in the fridge if stored in sterilized jars. I always make a double batch because it disappears faster than I can say ‘spread it on toast.’ For gifting, use Ball or Mason jars—they’re sturdy and look great on a kitchen shelf. The jam thickens as it cools, so if it seems too thick right after cooking, let it sit for 10 minutes before tasting. Freezes well too if you want to make it ahead for holiday gifts—just thaw at room temperature before serving.
Why You’ll Love This Recipe
- No Peel, No Stress: I’ll admit, I used to dread peeling apples for jam—until I realized this recipe works perfectly with skins on. The Instant Pot handles the texture magic while keeping that bright apple flavor intact, and honestly? The tiny specks of cinnamon clinging to the skins just make it feel extra cozy.
- Sweet-Spiced Magic: That first spoonful of jam—warm, glossy, with a whisper of lemon tang cutting through the sugar—is what keeps me coming back. The cinnamon and sea salt do something special: they deepen the apple’s natural sweetness without overpowering it, like a hug for your taste buds.
- Gift-Worthy in Minutes: Between us, this jam is my go-to hostess gift. It’s ready in under 30 minutes, fits neatly in small jars, and people always ask for the recipe. Slap a ribbon on it, and suddenly you’ve got a homemade present that costs pennies but feels luxurious—especially when paired with toasted sourdough or yogurt.
- Zero Waste, All Win: I used to toss apple cores and peels, but now they all go into this jam. The Instant Pot turns scraps into something delicious, and the leftovers? They last months in the fridge. Plus, sugar is cheap, and a single batch stretches across breakfast, toast, and even oatmeal for days—meaning fewer grocery runs for me.
Step-by-step instructions for Instant Pot apple jam
Here’s how to make this spiced, smooth jam in record time—no canning skills required.
Prepare the Apples and Instant Pot
Peel, core, and slice the 3 lb fresh apples into ¼-inch pieces—thin, even slices ensure consistent cooking. I like to use a mandoline for precision, but a sharp knife works too. Place the sliced apples directly into your Instant Pot, giving them a gentle stir to distribute evenly.
Add the 2 cups granulated sugar, 1.5 tbsp ground cinnamon, and 0.5 tsp sea salt right over the apples. Sprinkle the 0.25 cup lemon juice evenly on top. The lemon juice brightens the flavor while preventing the jam from browning too quickly. If using, sprinkle the 1 tbsp pectin powder evenly over everything—this optional step helps thicken the jam if your apples are particularly juicy.
Pour the 0.5 cup water over the mixture and give it one final stir. You’ll notice the apples immediately start releasing their juices. This is normal—the water helps create the perfect balance of fruit and liquid for pressure cooking.
Pressure Cook Until Soft
Secure the Instant Pot lid and set the valve to “Sealing.” Select the “High Pressure” setting and cook for 10 minutes. This time ensures the apples break down completely while retaining their natural sweetness. Don’t be tempted to peek—the pressure needs to build fully for even cooking.
Once the cooking time ends, allow the Instant Pot to release pressure naturally for 10 minutes. I know it’s tempting to quick-release, but this gradual release prevents the jam from becoming too runny. After the natural release, carefully move the valve to “Venting” to release any remaining pressure.
Open the lid and use a wooden spoon to mash the apples against the sides of the pot. You’re looking for a smooth, chunk-free consistency. If you prefer some texture, leave it slightly chunky—this is entirely up to your preference. The mixture should be thick but still pourable.
Simmer to Thicken and Finish
Return the Instant Pot to the “Sauté” setting and let the jam simmer for 5-7 minutes on “Medium” heat. Stir frequently to prevent sticking—this is where the magic happens. The jam will thicken as the liquid evaporates, and you’ll see it transform from a loose puree to a glossy, spreadable consistency.
Here’s the thing—if the jam isn’t thick enough after simmering, you can always return it to the pot and cook it down further. But if it’s too thick, add a splash of water or apple juice to loosen it. Taste as you go and adjust the sweetness or spice if needed. The 0.5 tsp sea salt enhances all the flavors, so don’t skip it.
Once you’re happy with the texture, remove the pot from heat. Let the jam cool for 10 minutes before transferring it to sterilized jars. This cooling period allows the jam to set properly, ensuring it holds its shape when you spread it on toast or pair it with cheese.
Store and Enjoy
Fill clean, sterilized jars with the warm jam, leaving about ¼-inch headspace at the top. Seal the jars tightly and let them cool completely at room temperature. Once cooled, they’ll keep in the refrigerator for up to 3 weeks or in the freezer for 6 months. The flavor only gets better with time!
This jam is perfect for toast, yogurt, or even as a glaze for roasted pork. The ground cinnamon adds warmth, while the lemon juice keeps the flavor bright and balanced. You’ll love how smooth and naturally sweet it tastes—no artificial additives needed.
Pro Tips For Making Instant Pot Apple Jam
- Peel and Core First: DESCRIPTION: Cut apples into even ½-inch chunks before adding them to the pot—this speeds up cooking and prevents half-raw bits. I used to toss in whole apples, and they’d turn to mush in some spots while staying tough in others.
- Use High Heat: DESCRIPTION: Start the Instant Pot on high pressure for 15 minutes, not low. The jam needs that initial burst to break down the pectin fast—low heat just makes you wait longer for the same result.
- Strain the Jam: DESCRIPTION: After cooking, press the apples through a fine-mesh sieve to remove skins and seeds—it makes the jam silky smooth. I skipped this once and ended up with a chunky, weird texture that tasted off.
- Add Lemon Last: DESCRIPTION: Stir in the lemon juice and salt only after the jam has thickened, not at the start. This keeps the acid from breaking down the fruit too early, which can turn your jam watery.
Dietary considerations for these flavors
Natural Sugar Options
Skip refined sugar entirely by using 1½ cups honey or 1½ cups maple syrup instead—both add natural sweetness and subtle depth. Honey works best with tart apples like Granny Smith, while maple syrup pairs beautifully with sweeter varieties like Honeycrisp.
Adjust cooking time by 2 minutes if using honey, as it thickens faster due to its lower water content. 🍯
Low-Sugar Adaptation
For a lighter version, reduce sugar to 1 cup and add 1 tbsp chia seeds or 1 tbsp arrowroot powder to help thicken naturally. The chia seeds also add a pleasant texture and extra fiber.
Taste as you go—you may need to simmer longer to reach your desired consistency. This version works well with yogurt or oatmeal.
Vegan-Friendly Swap
Replace the optional pectin powder with 1 tbsp agar-agar powder for a vegan-friendly thickener. Agar-agar is plant-based and works beautifully in pressure cooking. For extra richness, stir in 1 tbsp coconut oil at the end—it adds a velvety texture without altering the flavor.
This version keeps all the warmth of cinnamon while being completely plant-based. 🌱
Gluten-Free Assurance
This recipe is naturally gluten-free since it contains no wheat-based ingredients. Always double-check your ground cinnamon and sea salt labels to ensure they’re certified gluten-free, as some brands process spices in shared facilities. The Instant Pot’s stainless steel interior prevents any cross-contamination, making this a safe option for gluten-sensitive diets.
Diabetic Considerations
For a diabetic-friendly version, reduce sugar to ½ cup and add 1 tsp vanilla extract and ½ tsp cinnamon for enhanced flavor without added sweetness. Use monk fruit sweetener (about 1 tbsp) if you want to maintain some sweetness while keeping carbs low.
This version is perfect for spreading lightly on toast or mixing into Greek yogurt. 🍓
Nutrition facts
Frequently asked questions
Can I use frozen apples instead of fresh?
Yes, but thaw them completely first and drain excess liquid. Frozen apples work in a pinch, though fresh apples yield a smoother texture. If using frozen, reduce the water by 2 tablespoons since thawed fruit releases more moisture during cooking.
Why did my jam turn out too runny?
This usually happens if the natural release time was skipped or if the apples weren’t cooked long enough. Return the jam to the Instant Pot on “Sauté” mode and simmer uncovered for 5-10 minutes, stirring frequently. For extra thickness, add 1 tbsp chia seeds or 1 tbsp cornstarch mixed with water.
How do I know when the jam is done?
Test for doneness by placing a small spoonful on a chilled plate. If it wrinkles slightly when pushed with your finger, it’s ready. The jam should also coat the back of the spoon thickly but still be pourable. If it’s too thick, add 1 tablespoon water and simmer longer.
Can I make this jam without an Instant Pot?
Simmer the apples, sugar, and spices in a saucepan over medium-low heat for 30-45 minutes, stirring often. The key is patience—keep the heat low to prevent burning. Add lemon juice at the end to brighten the flavor. This method takes longer but works just as well.
What’s the best way to sterilize jars for storage?
Wash jars and lids in hot, soapy water, then boil them in water for 10 minutes before filling. Alternatively, run them through a 200°F oven for 10 minutes. Sterilized jars prevent spoilage and keep your jam fresh for months.

- Baked Potatoes in Crock Pot Recipe: Buttery Interiors and Crispy Top Magic - November 1, 2026
- Braised Beef Short Ribs Recipe: Crock Pot Fall-Off-Bone Magic in 6 Hours - November 1, 2026
- Crock Pot Cocoa Recipe: Velvety Warmth With Hidden Spice Magic - November 1, 2026