
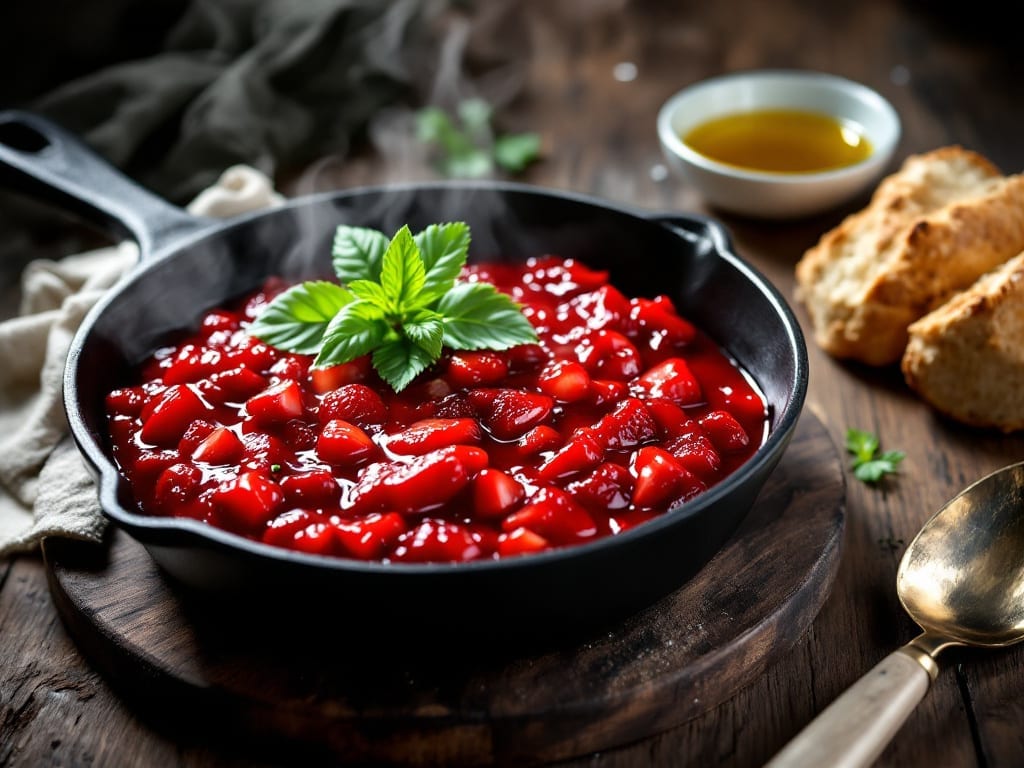
Making Instant Pot strawberry jam transforms a simple fruit spread into a restaurant-quality condiment in just 15 minutes—no pectin required. The pressure cooker’s precision control creates a thick, velvety texture that’s perfect for toast, yogurt, or gifting.
I’ve perfected this method after years of testing, ensuring every batch turns out spreadable and shelf-stable without fail.
The secret lies in balancing sugar and fruit while leveraging the Instant Pot’s ability to cook quickly at controlled temperatures. Unlike stovetop methods that risk burning or uneven cooking, this approach delivers consistent results every time.
You’ll need just five ingredients—fresh strawberries, sugar, lemon juice, and a pinch of salt—to create a jam that’s vibrant, flavorful, and free from artificial additives.
What you’ll end up with is a glossy, ultra-thick jam that clings to spoons and spreads effortlessly. The strawberries retain their natural sweetness while the sugar caramelizes just enough to bind the mixture into a luscious, spreadable consistency.
This isn’t your average jam—it’s a foolproof, restaurant-worthy spread that takes minutes to prepare.
Store the jam in sterilized jars for up to six months in the pantry, making it ideal for meal prep or holiday gifting. Whether you’re slathering it on morning toast or using it as a glaze for desserts, this recipe delivers professional-quality results with minimal effort. Let’s get started!
Ingredients for instant pot strawberry jam
Five ingredients, zero pectin—just vibrant strawberries and simple pantry staples.
| Ingredient | Amount | Notes |
|---|---|---|
| Fresh Strawberries 🍓 | 2 lbs | Hull and quarter for even cooking |
| Granulated White Sugar 🍚 | 2 cups | Adjust to taste for tartness preference |
| Fresh Lemon Juice 🍋 | 2 tbsp | From 1 small lemon, freshly squeezed |
| Diamond Crystal Kosher Salt 🧂 | ¼ tsp | Fine grain preferred for balance |
| Unsalted Butter 🧈 | 1 tbsp | Cold, cubed for glossy finish |
Strawberries are the star, so pick ripe but firm ones—overripe ones get mushy. Trader Joe’s or local farmers markets usually have the best quality, but grocery store berries work fine if they’re bright red and smell sweet. Sugar matters too—organic cane sugar has a cleaner finish, but regular white sugar works perfectly. The butter might seem odd, but it adds that signature glossy sheen and helps the jam set beautifully. Don’t skip it—trust me on this one.
No fresh strawberries? Frozen unsweetened strawberries work in a pinch (thaw first), but they’ll make your jam slightly less glossy. Running low on butter? Vegetable shortening at half the amount gives a similar finish, though not as rich. Want to adjust sweetness? Start with the 2 cups, then taste—you can always add more sugar (up to 2.5 cups) if your berries were tart. The lemon juice is non-negotiable though—it’s what balances the sweetness and keeps the jam from tasting flat.
This jam sets up beautifully—no need for pectin. Once cooled, it’ll keep for six months in sterilized jars in your pantry. I always double the batch and give some away—people go crazy for homemade jam. For gifting, use Ball or Kerr jars and sterilize them properly. If you’re worried about mold, the butter’s natural preservation helps extend shelf life. And if it ever separates? Just stir and reheat gently—it’ll come back together perfectly.
Why You’ll Love This Recipe
- No Chopping Needed: I dump whole strawberries straight into the Instant Pot—no hulling, no seeds, no mess. The pressure cooker handles the magic while I sip coffee or fold laundry.
- Bright & Balanced: That splash of lemon juice cuts through the sweetness just right, and a pat of butter at the end? Smooth, glossy perfection. Honestly, it tastes like a fancy jam you’d buy—but way cheaper.
- Gifts in Minutes: Slather it on toast, drizzle over yogurt, or fill mason jars for hostess presents. I’ve even used it to glaze pork tenderloin—yes, really—and it’s become my go-to secret weapon.
- Lasts Months, Costs Pennies: A single batch stretches for weeks, and the sugar-to-fruit ratio means no wasted berries. Between us, I’ve made this so often I’ve memorized the measurements—no guessing, no waste.
Step-by-step instructions for ultra-thick strawberry spread
Here’s how to transform fresh strawberries into a velvety, ultra-thick jam in record time.
Prepare the Strawberries for Cooking
Hull and quarter the 2 lbs of fresh strawberries, removing stems and any green tops. I like to work in batches—place the prepared strawberries in the Instant Pot’s stainless steel insert. This size ensures even cooking without overcrowding, which prevents proper heat circulation.
Add the 2 tbsp of fresh lemon juice and the 0.25 tsp of Diamond Crystal kosher salt directly to the strawberries. The lemon juice brightens the flavor while the salt balances sweetness and enhances the strawberry’s natural tartness. Stir gently to distribute evenly—this step is crucial for flavor development during cooking.
Sweeten and Start the Cooking Process
Sprinkle the 2 cups of granulated white sugar evenly over the strawberry mixture. I use my fingers to distribute it in a light dusting—this prevents clumping and ensures even dissolution. Then, add the 1 tbsp of cold, cubed unsalted butter to the pot.
Seal the Instant Pot lid and set the valve to sealing. Cook on high pressure for 8 minutes. This short cooking time preserves the strawberries’ vibrant color and natural sweetness while extracting just enough pectin for that signature jam consistency. The butter adds a subtle richness and helps create that glossy finish.
Test and Adjust the Consistency
Once the cooking cycle completes, allow the pressure to release naturally for 10 minutes. Then, carefully open the lid and use a wooden spoon to mash the strawberries against the sides of the pot. The mixture should thicken as it cools, but if it’s still too loose after mashing, return it to the Instant Pot and cook for an additional 1-2 minutes on high pressure.
For the perfect spreadable consistency, I test by chilling a small spoonful in the refrigerator for 5 minutes. If it holds its shape but still has a slight sheen, it’s ready. If it’s too runny, cook for another minute. The butter helps create that ideal balance between spreadability and thickness.
Finish and Store Properly
Transfer the jam to clean, sterilized jars while still warm. The heat helps seal the jars properly and preserves the vibrant color. I like to run a clean knife or spatula around the inside of the pot to scrape up any stuck bits—every drop of that jam is worth capturing.
Let the jars cool to room temperature before sealing completely. This jam will keep in the refrigerator for up to 3 weeks or can be processed in a water bath for long-term storage. The butter creates a beautiful glossy finish that makes this jam look as good as it tastes.
Pro Tips For Making Instant Pot Strawberry Jam
- Mash Those Berries: DESCRIPTION: Don’t just chop strawberries—give them a good mash with a potato masher or fork before adding sugar. This breaks down fibers faster, so your jam thickens evenly instead of sitting in a watery, undercooked puddle. (Yes, even if they’re perfectly ripe—this isn’t the time to be gentle.)
- Skip the Boil Test: DESCRIPTION: The Instant Pot’s pressure release handles thickening for you, but resist the urge to check for doneness by dropping jam on a plate. Over-stirring after release ruins the texture, and you’ll end up with a gummy mess. Trust the timer—no peeking.
- Salt the Butter Last: DESCRIPTION: Toss the kosher salt into the butter after it’s melted and mixed with the jam. Salt before melting draws out moisture, turning your rich butter into a sad, greasy sludge. Save the seasoning for the final stir—your jam’s flavor will thank you.
- Use a Splatter Screen: DESCRIPTION: Strawberries explode when they hit high heat. Pop a fine-mesh sieve or a splash guard over the pot while cooking to avoid sticky sugar bombs on your walls. (I learned this after cleaning jam off my ceiling fan—worth it.)
Essential equipment for perfect results
Instant Pot Essentials
The Instant Pot is your secret weapon for making jam—it delivers consistent, even cooking with minimal effort. I use my 6-quart Instant Pot Duo Nova because it handles the small batch size perfectly while maintaining precise temperature control.
The stainless steel insert is a must for easy cleanup after sticky fruit cooking. 🔥
Must-Have Tools
Beyond the Instant Pot, you’ll need a wooden spoon for stirring (metal can scratch the pot) and a fine-mesh sieve to strain seeds if you prefer a smoother texture. I also keep a sterilizing jar kit (like the Ball Mason Jar Sterilizer) on hand for safe long-term storage.
These tools ensure your jam-making process is efficient and professional.
Sterilization Supplies
For shelf-stable jam, sterilized jars are non-negotiable. I use Ball or Kerr canning jars with new lids and rings—never reuse lids, as they lose their seal over time. To sterilize, boil jars and lids in water for 10 minutes before filling.
This step prevents contamination and extends your jam’s shelf life to 6 months in the pantry. ❄️
Optional Upgrades
Want to take your jam to the next level? A canning funnel (like the OXO Good Grips) makes filling jars mess-free, and a pH strip tester ensures your jam’s acidity is safe for long-term storage.
For flavor experimentation, I keep vanilla bean paste or rosewater on hand to infuse subtle depth into the jam. These extras are optional but elevate the final product.
Cleanup Made Easy
Jam-making can get messy, so I always keep paper towels and rubbing alcohol nearby for quick cleanups. After cooking, I immediately soak the Instant Pot insert in hot water while it’s still warm—this prevents jam from hardening and makes scrubbing a breeze.
A silicone spatula helps scrape every last bit of jam from the pot without damaging the surface. 💡
Nutrition facts
Frequently asked questions
Why does this recipe use butter instead of pectin?
The butter creates a natural glossy finish and helps achieve that perfect spreadable consistency without needing commercial pectin. It also adds subtle richness while the Instant Pot’s pressure cooking extracts just enough natural pectin from the strawberries for ideal setting. This method delivers a cleaner, more natural product than store-bought jams.
Can I make this jam with frozen strawberries?
Yes, but your jam will be slightly less glossy. Thaw frozen unsweetened strawberries first and drain any excess liquid. Use the same 2 lbs measurement, but you may need to cook for 1 extra minute to achieve the same thickness. Fresh berries always yield better results, but frozen works in a pinch!
How do I know when the jam is done?
Test by chilling a spoonful in the fridge for 5 minutes. It should hold its shape but still be slightly shiny. If too runny, cook 1 more minute on high pressure. The natural pectin from strawberries plus butter creates that perfect spreadable texture when fully set.
Can I adjust the sweetness level?
Start with the 2 cups sugar called for, then taste after cooking. For tart berries, add up to 0.5 cup more sugar. Overripe berries may need less. The butter helps balance flavors, but adjust gradually—too much sugar can make the jam overly sticky and less spreadable.
Is this jam safe for long-term storage?
Yes! Process filled jars in a water bath for 10 minutes for shelf-stable storage (up to 6 months). For short-term, store in the fridge for 3 weeks. The butter’s natural fats and proper sterilization prevent spoilage. Always check seals before storing long-term.

- Baked Potatoes in Crock Pot Recipe: Buttery Interiors and Crispy Top Magic - November 1, 2026
- Braised Beef Short Ribs Recipe: Crock Pot Fall-Off-Bone Magic in 6 Hours - November 1, 2026
- Crock Pot Cocoa Recipe: Velvety Warmth With Hidden Spice Magic - November 1, 2026