
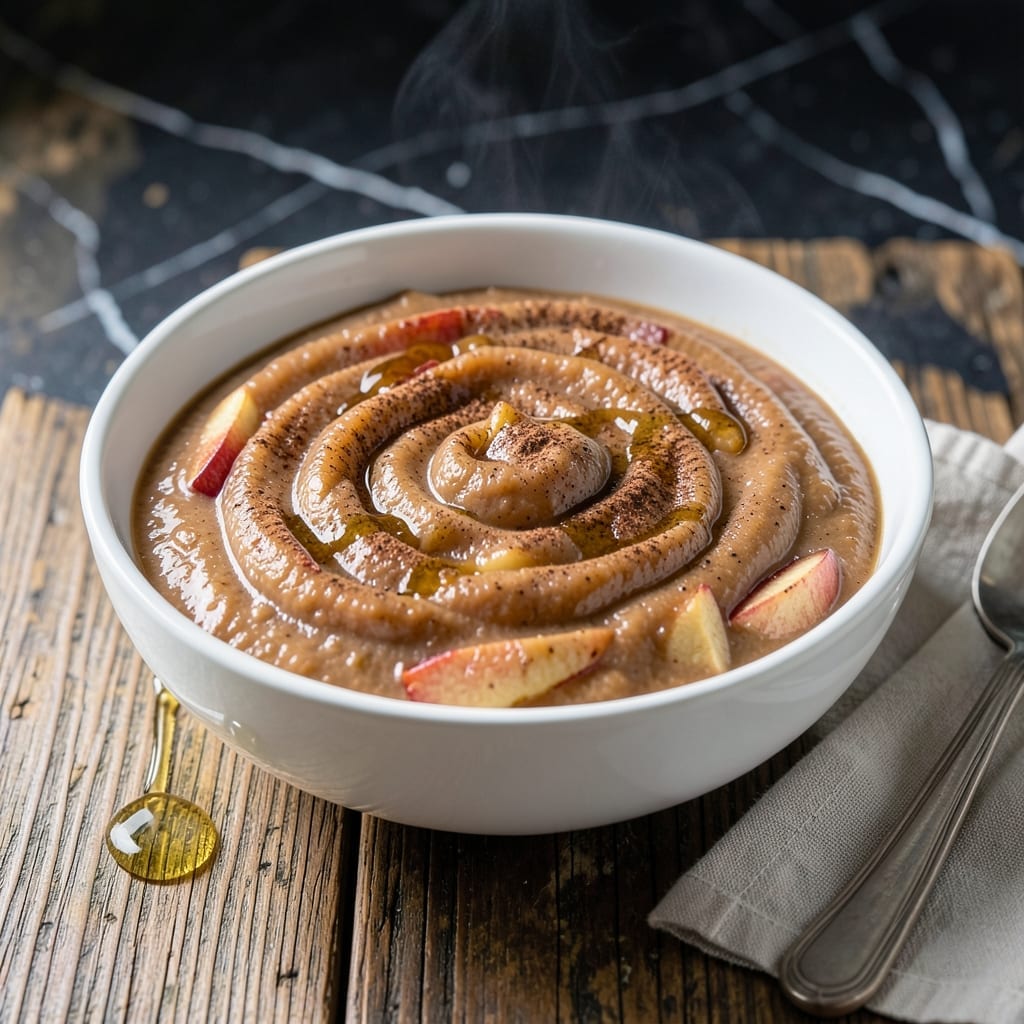
There’s nothing like homemade applesauce for its pure, fresh apple flavor without added sugars or preservatives. This method leverages the Instant Pot to create a smooth, naturally sweet sauce in a fraction of the traditional cooking time.
The process is simple yet precise: apples cook down quickly under pressure, breaking into a velvety consistency. A touch of cinnamon enhances the natural sweetness, while a splash of lemon juice brightens the flavor profile.
What you get is a chunky-free, smooth applesauce that’s perfect for eating fresh, canning, or using in baking recipes. The Instant Pot locks in the apple’s natural juices, resulting in a sauce that’s both thick and perfectly balanced.
Store in airtight containers for up to two weeks, or freeze for longer preservation. This sauce works equally well as a snack, side dish, or ingredient in other recipes.
Ingredients for Instant Pot Apple Sauce
Six simple ingredients create this naturally sweet, velvety applesauce with ease.
| Ingredient | Amount | Notes |
|---|---|---|
| Sweet Apples 🍎 | 8 whole | Peeled, cored, and quartered |
| Water 💧 | ½ cup | For pressure cooking |
| Ground Cinnamon 🌿 | 1 tsp | Adjust to taste preference |
| Lemon Juice 🍋 | 1 tbsp | Freshly squeezed preferred |
| Pure Vanilla Extract 🌿 | ½ tsp | Optional for depth |
| Pinch of Salt 🧂 | 1 pinch | Enhances natural flavors |
Apples are the foundation here. Sweet varieties like Fuji or Gala work beautifully—avoid tart ones like Granny Smith for this preparation. Trader Joe’s or Whole Foods often carry organic options that require less peeling. Look for apples that are firm and free of bruises. If using a mix of varieties, the flavor becomes more complex and balanced.
No cinnamon? A pinch of nutmeg or allspice can substitute. Short on apples? Pears blend in seamlessly and add natural sweetness. The water amount is flexible—use just enough to prevent burning (1/4 to 1/2 cup). For a smoother texture, ensure your apples are fully peeled and cored before cooking.
This keeps beautifully in the fridge for up to 2 weeks in airtight containers. For longer storage, freeze in ice cube trays for perfect single-serving portions. The sauce thickens slightly as it cools, so don’t worry if it seems thin at first.
Why You’ll Love This Recipe
- Dump and Go: I just toss in peeled apples, a splash of water, and let the Instant Pot do the work—no stirring, no babysitting.
- Warm Cinnamon Hug: The cinnamon and vanilla make it taste like fall in a jar, with just enough lemon to keep it bright.
- Meal Prep Hero: I make a double batch on Sunday and it’s ready for lunches, snacks, or pancake topping all week.
- Pantry Savior: Five ingredients I always have on hand, and it’s cheaper than store-bought with no weird preservatives.
Step-by-Step Instructions for Instant Pot Apple Sauce
This method delivers smooth, naturally sweet applesauce with minimal effort and maximum flavor.
Step 1: Prepare and Season the Apples
Peel, core, and quarter all 8 whole Sweet Apples into uniform pieces. I recommend keeping the quarters roughly the same size to ensure even cooking. This step is crucial for achieving that perfect, consistent texture without lumps.
As you work, place the apple pieces directly into the Instant Pot insert. Immediately drizzle them with 1 tbsp Lemon Juice and toss gently to coat. This prevents browning and preserves the fresh apple color. Add 1 tsp Ground Cinnamon, 1 pinch Pinch of Salt, and 0.5 tsp Pure Vanilla Extract, then stir to distribute the spices evenly throughout the fruit.
Step 2: Add Liquid and Pressure Cook
Pour in the 0.5 cup Water and give everything a final stir. The liquid is essential for building the necessary steam to create pressure. Without it, you risk burning the apples or failing to reach pressure at all.
Secure the lid on your Instant Pot, making sure the valve is set to Sealing. Select the Pressure Cook function and set the timer for 8 minutes on high pressure. The pot will take approximately 10-15 minutes to come to pressure before the cooking time begins, depending on your specific model. You’ll know pressure has been reached when the float valve pops up.
Step 3: Release Pressure and Mash
Once the cooking cycle completes, allow the pressure to release naturally for 10 minutes. This gradual release helps prevent apples from foaming up through the valve. After the 10 minutes have passed, carefully switch the valve to Venting to release any remaining pressure.
Remove the lid once the float valve drops. The apples should be completely soft and falling apart when pierced with a fork. If they seem undercooked, simply replace the lid and allow them to sit for an additional 5 minutes to steam further. Use a potato masher to break down the apples to your desired consistency. For ultra-smooth applesauce, I use an immersion blender directly in the pot.
Step 4: Adjust Seasoning and Serve
Taste the applesauce and adjust the seasoning if needed. The natural sweetness of the fruit should shine through, but you might want to add a touch more Ground Cinnamon for warmth or a bit more Lemon Juice for brightness.
Transfer the applesauce to airtight containers and let it cool to room temperature before refrigerating. It will continue to thicken slightly as it cools. The applesauce keeps well in the refrigerator for up to 10 days or can be frozen for up to 3 months for longer storage. Serve warm or chilled, depending on your preference.
Pro Tips For Making Instant Pot Apple Sauce
- Skip the Peel: I learned this the hard way—peeling the apples first makes a silky texture, while leaving skins on gives a slightly bitter aftertaste.
- Add Lemon Last: Stir in the lemon juice after cooking to preserve its bright flavor, rather than letting it mellow during pressure cooking.
- Use Natural Release: Resist the urge to quick-release—the apples need those extra 10-15 minutes to soften fully under natural pressure release.
- Double the Cinnamon: Sounds like a lot, but 1 teaspoon of cinnamon per pound of apples actually changes the outcome—any less and it tastes flat.
Common Mistakes When Making Great instant pot apple sauce
Skipping the Liquid
Never omit the 0.5 cup Water—this is critical for building steam and pressure. Without it, your apples may burn or the pot might fail to reach pressure. I’ve seen this mistake ruin a batch. 🔥
Overfilling the Pot
Stick to 8 whole Sweet Apples or less. Overfilling prevents proper pressure buildup and can lead to uneven cooking. The apples need room to steam and soften properly.
Incorrect Pressure Release
Always let pressure release naturally for 10 minutes after cooking. Quick-releasing can cause apples to foam and clog the valve. Patience here ensures safety and perfect texture.
Using Tart Apples
Avoid tart varieties like Granny Smith for this recipe. Fuji or Gala apples deliver the natural sweetness you want. Tart apples can make your sauce require added sugar.
Under-Seasoning
Don’t skip the 1 tsp Ground Cinnamon and 1 tbsp Lemon Juice. These small additions enhance flavor depth. Taste and adjust if needed, but start with the full amounts.
Skipping the Mash
For ultra-smooth sauce, use an immersion blender. A potato masher works but may leave some texture. I prefer blending for that velvety consistency mentioned in the intro. 💫
Nutrition Facts
Frequently Asked Questions
Can I use any type of apple?
Sweet varieties like Fuji or Gala work best for natural sweetness. Tart apples like Granny Smith may require added sugar to balance the flavor.
How long does it keep?
Stored in an airtight container, it stays fresh in the fridge for up to 10 days. For longer storage, freeze for up to 3 months.
What if my sauce is too thin?
Simmer uncovered on the sauté function for 5-10 minutes to thicken. The sauce naturally thickens as it cools, so check again after refrigerating.
Can I skip the cinnamon?
Yes, but it adds warmth. Try nutmeg or allspice instead, or omit entirely for a pure apple flavor.

- 6 Oz Chocolate Chip Cookie Recipe: Perfectly Balanced Crispy Edges and Chewy Hearts - September 25, 2026
- 6-Inch Coffee Cake Recipe: Vanilla Bean Swirls and Buttery Streusel Topping - September 25, 2026
- 1 Hour Soup Recipe: Velvety Richness Without the Wait - September 25, 2026