
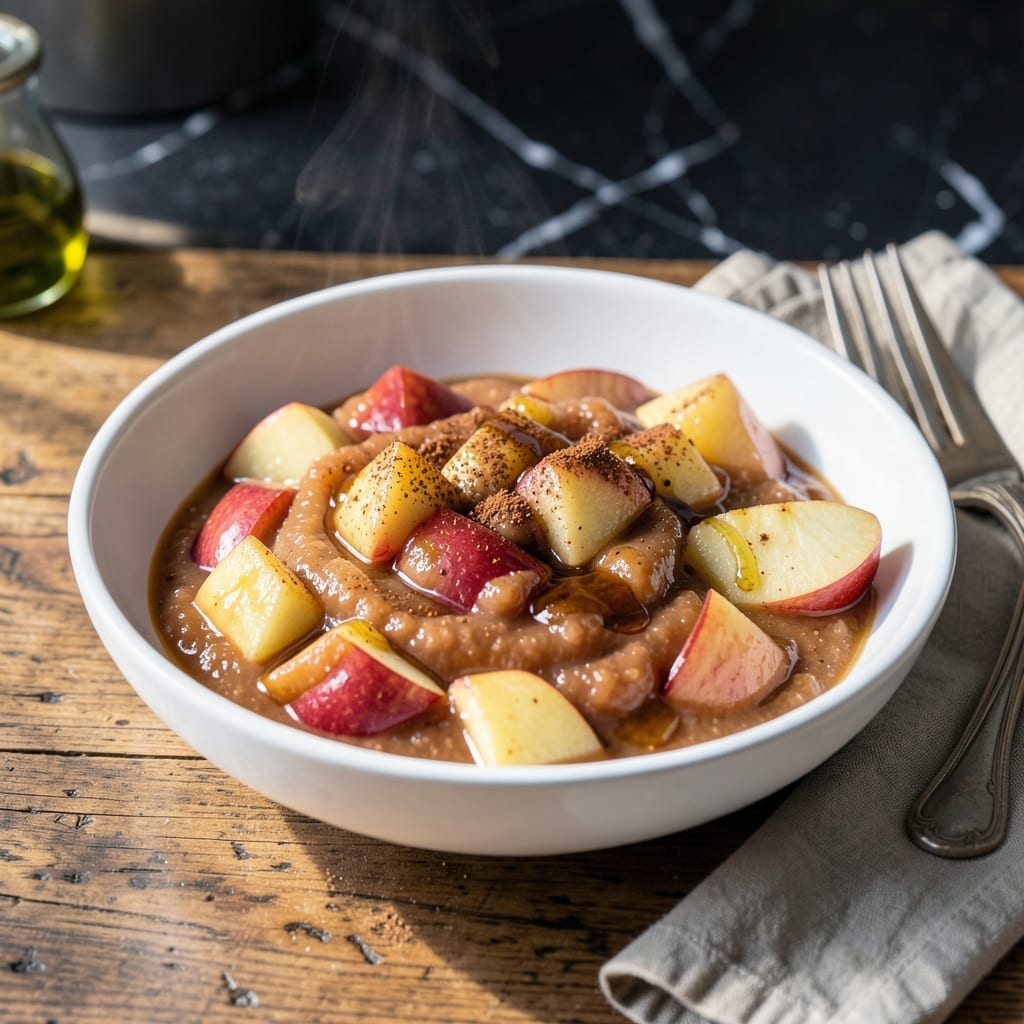
This one-pot method delivers smooth, naturally sweet applesauce with minimal effort. The Instant Pot transforms fresh apples into tender perfection without added sugar, preserving their natural flavor and nutrients.
I developed this recipe to streamline the traditional stovetop process, eliminating the need for constant stirring. The pressure cooker softens the fruit in just 10 minutes, while a quick release ensures vibrant color and fresh taste.
The beauty of this homemade version lies in its versatility. Adjust the texture from chunky to silky by mashing or blending, and customize with cinnamon or a touch of maple syrup if desired.
Ready in under 30 minutes, this recipe makes preserving apple season effortless. The result is fresh, flavorful applesauce that tastes far superior to store-bought versions.
Ingredients for Instant Pot Applesauce
Fresh apples and a few pantry staples create this smooth, naturally sweet dish.
| Ingredient | Amount | Notes |
|---|---|---|
| Sweet Apples 🍎 | 3 lb | Cored, peeled, and chopped |
| Water 💧 | ½ cup | For pressure cooking |
| Lemon Juice 🍋 | 1 tbsp | Freshly squeezed preferred |
| Ground Cinnamon 🌿 | 1 tsp | Optional for spiced flavor |
| Maple Syrup 🍯 | 2 tbsp | Optional, for added sweetness |
| Vanilla Extract 🌾 | ½ tsp | Pure extract for depth |
| Sea Salt 🧂 | ¼ tsp | Fine grain for balance |
| Fresh Ginger 🌱 | ½ tsp | Peeled and grated |
| Apple Cider Vinegar 🍏 | ½ tsp | For brightness |
| Nutmeg 🌰 | ¼ tsp | Freshly grated if possible |
The apples are the star here. Honeycrisp or Fuji work beautifully—naturally sweet with great texture. Trader Joe’s or your local farmers market are ideal spots for peak-season fruit. Look for firm apples without bruises; they’ll hold up better during cooking. Organic isn’t mandatory, but it’s worth it if you’re leaving the peels on for extra fiber (and less waste).
No maple syrup? Date syrup or agave work at a one-to-one ratio. Skipping cinnamon? Cardamom or allspice add warmth at half the amount. If you’re out of fresh ginger, ground ginger at one-quarter the quantity is fine. The lemon juice is key for brightness—bottled works, but fresh tastes cleaner. Want it smoother? A quick blend after cooking does the trick.
This keeps beautifully in the fridge for up to 10 days in an airtight container. For longer storage, freeze for 6 months—portion into jars first (leave headspace). Thaw overnight in the fridge before serving. The flavor actually deepens after a day or two.
Why You’ll Love This Recipe
- Set It and Forget: I toss in chunked apples with a splash of water, press a button, and walk away—no stirring, no babysitting.
- Warm Cinnamon Hug: The apples cook down with maple syrup and cinnamon into this cozy, naturally sweet sauce that tastes like fall in a bowl.
- Breakfast to Snack: I spoon it over oatmeal in the morning and pack it in lunches for a no-sugar-added treat the kids actually finish.
- Pantry Stretch: Between us, a 3-pound bag of apples turns into a week’s worth of applesauce for less than the cost of one jar at the store.
Step-by-Step Instructions for Instant Pot Applesauce
This streamlined method delivers perfectly smooth, naturally sweet applesauce with minimal effort.
Step 1: Prepare the Sweet Apples
Begin by coring, peeling, and chopping the 3 lb sweet apples into uniform 1-inch chunks. Consistency in size ensures even cooking and a uniform texture in the final applesauce. I recommend using a mix of apple varieties for depth of flavor, but any sweet variety will work beautifully.
As you work, transfer the chopped apples to the Instant Pot insert to prevent browning. This step is crucial—exposed apple flesh oxidizes quickly, which can affect both color and flavor. The preparation should yield about 8 cups of chopped fruit, perfect for 4 servings.
Step 2: Add Aromatics and Liquids
Pour the 0.5 cup water into the Instant Pot with the apples. This liquid is essential for pressure cooking, creating the steam needed to cook the fruit efficiently. Add the 1 tbsp lemon juice, 0.5 tsp apple cider vinegar, and 0.5 tsp fresh ginger to the pot.
The lemon juice and vinegar provide brightness and balance, while the fresh ginger adds a subtle warmth. Stir gently to distribute the liquids, ensuring the apples are mostly submerged but not packed down—this prevents uneven cooking and potential burning.
Step 3: Incorporate Sweet and Spiced Elements
Sprinkle the 1 tsp ground cinnamon, 0.25 tsp nutmeg, and 0.25 tsp sea salt evenly over the apples. These spices enhance the natural sweetness and complexity of the fruit without overpowering it. The sea salt is particularly important—it heightens all the other flavors.
Drizzle the 2 tbsp maple syrup and 0.5 tsp vanilla extract over the top. The maple syrup adds a rich, caramelized depth, while the vanilla extract rounds out the flavor profile with its warm, floral notes. Do not stir at this stage; the pressure cooking process will distribute these flavors evenly.
Step 4: Pressure Cook to Perfection
Secure the lid on the Instant Pot and set the valve to the sealing position. Cook on high pressure for 5 minutes. The short cook time might seem surprising, but the pressure infuses the apples with all the added flavors while breaking them down into a soft, mashable consistency.
Once the cooking cycle completes, allow the pressure to release naturally for 10 minutes, then carefully switch the valve to venting to release any remaining pressure. This natural release prevents the applesauce from becoming too thin by avoiding sudden pressure changes.
Step 5: Finish and Adjust Texture
Open the lid and use a potato masher or immersion blender to achieve your desired consistency. For chunky applesauce, a few pulses with the masher will suffice. For smooth applesauce, blend until silky. The apples should break down easily, yielding about 6 cups of applesauce.
Taste and adjust seasoning if needed, though the initial balance of sweet, tart, and spiced elements should be perfect. Serve warm or chilled—the flavors deepen as it cools. Store in an airtight container in the refrigerator for up to 1 week.
Pro Tips For Making Instant Pot Applesauce
- Peel After Cooking: Skip peeling the apples first—just core and chop them. After pressure cooking, the skins slip right off with a spoon, saving you 10 minutes of prep.
- Use Natural Release: I learned this the hard way—quick releasing can make your applesauce foamy and thin. Let the pressure drop naturally for 10 minutes to keep the texture smooth and thick.
- Add Lemon Last: Stir in the lemon juice after cooking, not before. This keeps the apples from browning during prep and brightens the flavor without making the sauce bitter.
- Double the Cinnamon: Sounds like overkill, but ground cinnamon mellows during cooking. Use 1 full teaspoon per 3 pounds of apples—it’s the thing that matters most for that warm, spiced flavor.
Storing and Reheating instant pot applesauce
Fridge Storage
Let the applesauce cool completely before transferring to airtight containers. I use glass mason jars for easy portioning. It stays fresh in the fridge for up to 10 days, and the flavors actually improve after 24 hours as they meld together. ❄️
Freezer Storage
For longer storage, freeze in 1-cup portions in freezer-safe containers or heavy-duty zip-top bags. Leave 1 inch of headspace to allow for expansion. Squeeze out excess air to prevent freezer burn. It keeps beautifully for up to 6 months without losing quality.
Thawing Methods
The best way is overnight in the fridge. For quick thawing, place the sealed container in a bowl of cold water, changing the water every 30 minutes. Never thaw at room temperature—this can promote bacterial growth. A 1-cup portion typically thaws in about 2 hours in the fridge.
Reheating Options
Gently warm on the stovetop over low heat in a small saucepan, stirring occasionally. Add 1-2 tbsp water or apple juice if it seems too thick. Avoid boiling to preserve the fresh apple flavor.
Microwave Reheating
Transfer a single portion to a microwave-safe bowl and heat on 50% power in 30-second intervals, stirring between each. This prevents hot spots and maintains the smooth texture. 🔥
Nutrition Facts
Frequently Asked Questions
Do I need to peel the apples first?
Peeling is optional! Leaving the skin on adds fiber and a slight texture, but peeling creates a smoother result. If using skins, wash apples thoroughly first.
What if my applesauce is too thin?
Simmer uncovered on the stovetop for 5-10 minutes to thicken. For immediate use, stir in 1 tsp cornstarch mixed with cold water.
Can I use a different sweetener?
Swap maple syrup for honey, agave, or brown sugar. Start with half the amount and adjust to taste.
How do I make it chunkier?
Mash with a potato masher instead of blending. For extra texture, reserve 1 cup of cooked apple chunks to stir in at the end.

- 4C Bread Crumbs Meatballs Recipe: Crispy Crust and Juicy Centers - September 25, 2026
- 6 Oz Chocolate Chip Cookie Recipe: Perfectly Balanced Crispy Edges and Chewy Hearts - September 25, 2026
- 6-Inch Coffee Cake Recipe: Vanilla Bean Swirls and Buttery Streusel Topping - September 25, 2026