
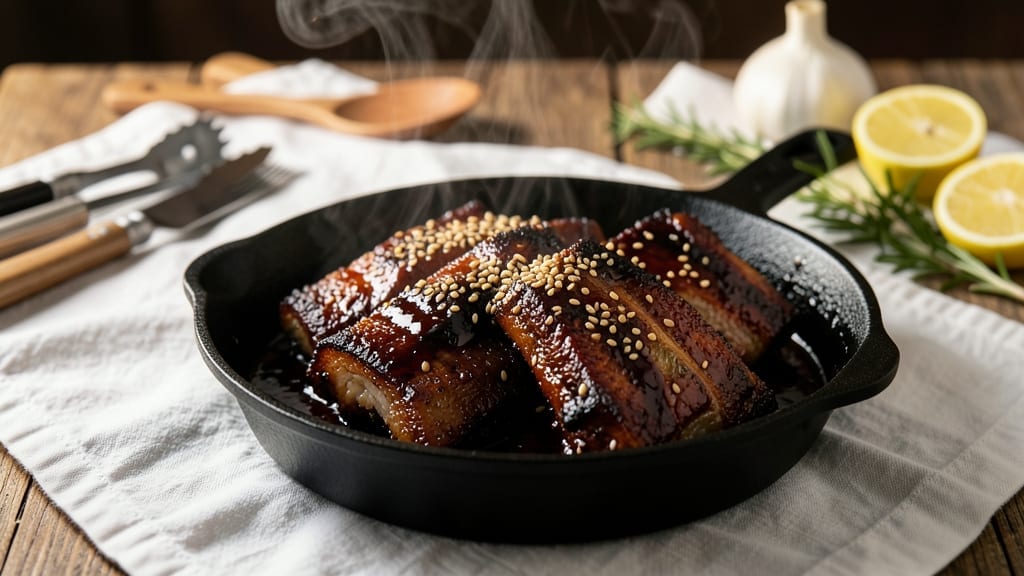
This Instant Pot barbeque ribs recipe delivers fall-off-the-bone tenderness with crispy edges—no smoker or long oven time required. After years of testing pressure cooker methods, I’ve perfected a technique that transforms tough pork ribs into restaurant-quality ribs in just 3 hours.
The secret lies in the right combination of pressure cooking and finishing touches that create that coveted bark.
What sets this method apart is the two-step process: ribs cook low and slow under pressure to tenderize the meat, then finish in the broiler for that signature crispy texture. No need for a dry rub or complicated sauces—just a simple marinade and a straightforward barbecue sauce application.
The Instant Pot handles the heavy lifting while you focus on preparing sides or enjoying the process.
By the time you’re done, you’ll have ribs that are juicy, smoky, and perfectly caramelized—ready to serve with classic sides like coleslaw or cornbread. The best part?
No babysitting required. This method ensures consistent results every time, making it ideal for weeknight dinners or hosting gatherings where you want impressive results with minimal effort.
The recipe includes a foolproof marinade and sauce pairing that enhances the natural sweetness of the meat without overpowering it. Whether you’re feeding a family or hosting a game day crowd, these ribs will be the star of the meal.
Let’s get started with a method that’s both efficient and foolproof.
Ingredients for instant pot barbeque ribs
Quality cuts and simple seasonings transform tough ribs into tender, smoky perfection in minutes.
| Ingredient | Amount | Notes |
|---|---|---|
| Pork Baby Back Ribs 🍖 | 4 lb | Bone-in, meaty cuts preferred |
| Yellow Onion 🧅 | 1 whole | Large, roughly chopped |
| Garlic Cloves 🧄 | 6 cloves | Fresh, minced for marinade |
| Apple Cider Vinegar 🍏 | ½ cup | For tangy marinade base |
| Brown Sugar 🍚 | ½ cup | Light or dark variety |
| Smoked Paprika 🌶️ | 1 tbsp | For authentic smoky flavor |
| Ground Black Pepper 🌶️ | 1 tsp | Freshly cracked for heat |
| Kosher Salt 🧂 | 1 ½ tbsp | Diamond Crystal preferred |
| Barbecue Sauce 🍯 | 1 ½ cups | Store-bought or homemade |
| Apple Juice 🍎 | 1 cup | For pressure cooking liquid |
| Unsalted Butter 🧈 | 2 tbsp | For finishing crispy edges |
| Fresh Thyme Leaves 🌿 | ¼ cup | Chopped, optional garnish |
The ribs are the foundation—baby back cuts with generous meat yield work best. Look for thick, meaty slabs at your local butcher or Costco for bulk purchases. Freshness matters: the meat should have a vibrant pink color and firm texture. If buying pre-cut, avoid thin or overly bony pieces. For the marinade ingredients, Whole Foods or Trader Joe’s carry reliable brands of apple cider vinegar and smoked paprika. The brown sugar should be light unless you prefer a deeper caramelization during cooking. Always measure your kosher salt precisely—Diamond Crystal has a coarser grain, so adjust if using another brand.
No apple cider vinegar? White vinegar or lemon juice work in a pinch, though flavor will differ slightly. Substitute maple syrup for brown sugar if needed, though it adds a distinct sweetness. For the barbecue sauce, Stubb’s or Sweet Baby Ray’s are reliable store-bought options, but homemade versions with tomato paste, molasses, and spices elevate the dish further. The apple juice acts as a tenderizer and moisture source—avoid substitutes like orange juice, which can alter the flavor profile. Fresh thyme can be swapped for dried thyme at one-third the amount, though fresh imparts superior aroma. Always toast your spices lightly before using to enhance their aromatic compounds.
Store raw ribs in the coldest part of your fridge, wrapped in parchment paper, for up to 3 days before cooking. The marinade can be prepped 24 hours ahead and stored in an airtight container. Cooked ribs reheat beautifully—warm in the Instant Pot on high pressure for 5 minutes or broil for 3-4 minutes to restore crispiness. Leftovers keep for 4 days in the fridge or 3 months frozen. For serving, arrange ribs on a platter with pickled onions and a drizzle of extra barbecue sauce for presentation. The crispy edges are best enjoyed immediately, so plan to serve shortly after finishing.
Why You’ll Love This Recipe
- Foolproof Pressure Cook: The Instant Pot handles the tenderizing magic while I chop one onion and mince garlic—no babysitting the oven, no foil tenting. Honestly, I’ve burned ribs before; this method doesn’t judge my timing.
- Sweet-Smoky Magic: That apple cider vinegar and brown sugar combo? It caramelizes into a glossy, sticky sauce that clings to every rib like it’s been slow-smoked for hours. My kids fight over the last piece—no joke.
- Weeknight Crowd Pleaser: Double the ribs, halve the effort. I make this for game day, potlucks, or just because I’m lazy (no shame). Leftovers? They disappear faster than my willpower to resist seconds.
- Budget-Friendly Feast: A whole rack of ribs costs less than takeout, and the sauce stretches to coat every bite. Between us, this is how I feed my family for under $15—no fancy shortcuts, just honest flavor.
Step-by-step instructions for Instant Pot barbeque ribs
Here’s how to transform tough ribs into fall-off-the-bone tender meat with crispy edges using your pressure cooker.
Prepare the Dry Rub and Marinade
In a medium bowl, combine the 0.5 cup brown sugar, 1 tbsp smoked paprika, 1.5 tbsp kosher salt, and 1 tsp ground black pepper. Mix thoroughly until the sugar crystals dissolve and the spices are evenly distributed. This dry rub will create that signature caramelized bark while penetrating the meat for deep flavor.
In a separate container, whisk together the 0.5 cup apple cider vinegar, 1 cup apple juice, and the 6 cloves minced garlic cloves. This tangy marinade will tenderize the ribs during the pressure cooking process. Use a pastry brush to generously coat both sides of the 4 lb pork baby back ribs with the marinade, pressing it into the meat. Then, apply the dry rub mixture evenly over the entire surface, including the cut sides.
Sear the Ribs for Maximum Flavor
Set your Instant Pot to “Sauté” mode and allow it to heat for 3-4 minutes until the base is hot. Add the 1 whole yellow onion, cut into large chunks, and sear for 5 minutes until softened and lightly browned. Remove the onions and set aside for later use.
Working in batches to avoid crowding, place the ribs in the Instant Pot and sear for 2-3 minutes per side until they develop a deep golden-brown crust. This step is crucial for building flavor through the Maillard reaction. The ribs should release easily from the pot when ready to move. Transfer the seared ribs back to their plate and set aside.
Pressure Cook to Perfect Tenderness
Return the seared onions to the Instant Pot and add the ribs back in, bone-side down. Pour in the 1.5 cups barbecue sauce and spread it evenly over the ribs. Secure the lid and set the valve to “Sealing.” Cook on “High Pressure” for 60 minutes—this ensures the connective tissue breaks down completely while maintaining moisture.
Once the cooking cycle completes, allow a 10-minute natural release before quick-releasing any remaining pressure. The ribs should be fork-tender at this stage, with meat that easily pulls apart between the bones. If they’re not quite there, you can return them to the pot with an additional 10 minutes of pressure cooking, but they’ll be perfect after the initial 60 minutes for most cuts.
Finish with Crispy Edges and Sauce
Remove the ribs from the Instant Pot and transfer them to a baking sheet lined with foil. Spread the 2 tbsp unsalted butter evenly over the ribs, focusing on the meaty portions. Broil on “High” for 3-5 minutes until the butter melts and the edges become crispy and golden. Watch closely to prevent burning—this step should take just minutes.
Return the ribs to the Instant Pot and add the 0.25 cup fresh thyme leaves and any accumulated juices. Stir gently to combine, then spoon the sauce over the ribs. Let them rest for 5 minutes before serving to allow the juices to redistribute. The result should be ribs with tender meat, crispy edges, and a glossy, flavorful sauce.
Pro Tips For Making Instant Pot Barbeque Ribs
- Trim the Membrane First: That thin, papery membrane on the bone side of the ribs is the real enemy of tender results. Use a butter knife or your fingers to peel it off before cooking—it’s sticky, stubborn, and will keep your ribs from falling apart, no matter how long you cook them.
- Sear Ribs in Batches: Don’t crowd the pot when searing—work in two batches if needed. Overcrowding steams the ribs instead of browning them, and you’ll end up with pale, soggy edges instead of that deep caramelized crust that holds onto the sauce.
- Deglaze with Vinegar Early: After searing the onions and garlic, splash in the apple cider vinegar right away. It cuts through the fond (those stuck-on bits) and adds tang before the ribs go in, so the sauce isn’t just sweet—it’s balanced.
- Skip the Crowded Pot: Pile those ribs in too tight, and you’re trapping steam instead of letting them cook evenly. Arrange them in a single layer, bone-side down first, then flip halfway. Yes, it takes a minute, but it guarantees even cooking and no dry spots.
Creative variations of this dish
Spicy Carolina Twist
Transform your ribs into a Carolina-style masterpiece by adding 2 tbsp Carolina Gold vinegar-based sauce (like Sweet Baby Ray’s Carolina Gold) to the marinade. Boost the heat with 1 tbsp cayenne pepper in the dry rub and finish with a sprinkle of hot honey before serving.
This variation delivers a tangy, vinegar-forward flavor with a kick that pairs perfectly with classic coleslaw. 🌶️
Honey-Glazed Sticky Ribs
Swap the barbecue sauce for a ½ cup honey and ¼ cup soy sauce mixture in the pressure cooker. After the 60-minute cook, brush the ribs with an extra 2 tbsp honey and broil for 2-3 minutes to create a glossy, caramelized glaze.
Garnish with sesame seeds for a sweet-savory fusion inspired by Korean BBQ techniques. This version works beautifully with steamed jasmine rice.
Smoked Paprika & Coffee Rub
For a deep, smoky flavor profile, replace the brown sugar with ½ cup finely ground coffee (I use Peet’s Major Dickason’s Blend) and add 2 tbsp extra smoked paprika to the dry rub. The coffee grounds add complexity while enhancing the smokiness.
After pressure cooking, finish with a sprinkle of coarse sea salt for texture contrast. This variation is perfect for serving with charred corn on the cob.
Asian-Inspired Five-Spice Ribs
Infuse your ribs with global flavors by adding 1 tsp Chinese five-spice powder to the dry rub and replacing the apple cider vinegar with ½ cup rice vinegar in the marinade. After pressure cooking, glaze with a mixture of 2 tbsp hoisin sauce and 1 tbsp sriracha before broiling.
Garnish with thinly sliced scallions and serve with cucumber salad for a refreshing contrast. This fusion variation offers a sweet, spicy, and aromatic twist.
Dry-Rubbed Competition Style
For a smoker-style experience without the smoker, create a dry rub with 1 tbsp brown sugar, 1 tbsp smoked paprika, 1 tbsp chili powder, and ½ tsp cayenne.
Apply this generously to the ribs before searing, then pressure cook with just ¼ cup apple juice for moisture. After cooking, brush with 2 tbsp unsalted butter mixed with 1 tbsp hot sauce and broil until deeply caramelized. This method delivers intense, concentrated flavors ideal for BBQ competitions.
Sweet & Tangy Fruit Ribs
Add a fruity twist by marinating the ribs in ½ cup pineapple juice and ¼ cup orange juice instead of apple juice. After pressure cooking, glaze with a mixture of 2 tbsp apricot jam and 1 tbsp Dijon mustard, then broil for a glossy finish.
Garnish with fresh mint leaves** for brightness. This variation is perfect for summer gatherings and pairs wonderfully with grilled pineapple slices.
Nutrition facts
Frequently asked questions
Can I use regular oven-baked ribs instead of baby back ribs for this recipe?
Yes, but with adjustments! St. Louis-style ribs (slab cuts) require 90 minutes of pressure cooking instead of 60. The meat will be more tender but slightly tougher due to more connective tissue. For best results, trim excess fat and increase the apple juice to 1.5 cups to compensate for the larger surface area.
Why do my ribs turn out too saucy instead of having crispy edges?
The broiling step is critical—don’t skip it! For extra crispiness, pat ribs dry with paper towels before broiling and use 2 tbsp butter per pound of ribs. If the sauce is too runny, reduce it on the stovetop before applying. The Instant Pot’s steam can make sauces more liquid than expected during pressure cooking.
Can I make these ribs ahead of time for a party?
Cook the ribs completely (including pressure cooking) up to 2 days ahead and refrigerate. Reheat by placing them in a cold Instant Pot with ½ cup apple juice, sealing, and cooking on high pressure for 10 minutes. Finish with 3-4 minutes under the broiler to restore crispiness. Store cooked ribs in an airtight container with sauce to keep them moist.
What’s the best way to shred the ribs if I prefer pulled pork?
After pressure cooking, let ribs rest for 10 minutes before handling. Use two forks to pull the meat away from the bone in the bone cavity, then separate into ½-inch chunks. For extra tenderness, return the meat to the Instant Pot with ¼ cup barbecue sauce and cook on high pressure for 5 minutes more. The meat should shred effortlessly with minimal force.
Do I need a special Instant Pot model for this recipe?
No special model required! Any 6-quart Instant Pot with pressure cooking functions will work. The recipe was tested on both Duo Crisp+ and standard models. If your pot lacks a “Sauté” function, use the “Keep Warm” setting for searing. For even crispier edges, transfer ribs to an oven-safe dish after pressure cooking and broil at 500°F for 4-5 minutes.

- Crock Pot Round Steak Recipe: Slow-Sear Crust With Juicy Center - November 6, 2026
- Candied Sweet Potatoes Crock Pot Recipe: Caramelized Sweetness With Zero Effort - November 6, 2026
- Steak Recipe Crock Pot: Juicy, Caramelized Crust in 4 Hours - November 6, 2026