
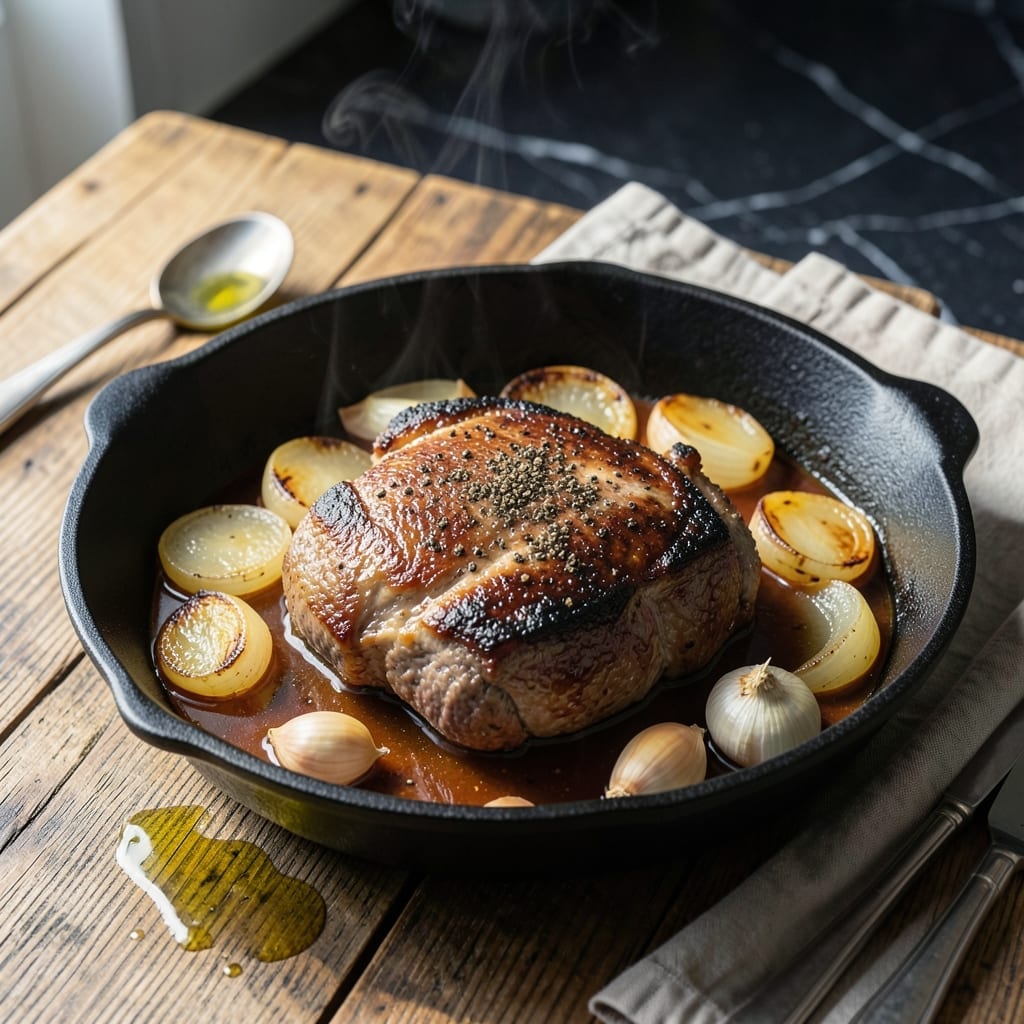
Pressure cooking transforms tough beef into tender, fall-apart pieces in a fraction of traditional time. This method guarantees consistent results without sacrificing flavor or texture.
I developed this approach after years of experimenting with different cuts and cooking times. The Instant Pot creates an ideal environment for breaking down collagen while sealing in natural juices.
You’ll achieve perfectly cooked beef that’s ready for tacos, sandwiches, or hearty stews. The process requires minimal hands-on time yet delivers professional-quality results every time.
This technique works with various beef cuts, making it versatile for weeknight dinners or weekend meal prep. The secret lies in proper timing and liquid ratios.
Ingredients for Instant Pot Beef
Transform tough beef into melt-in-your-mouth perfection with these carefully selected ingredients.
| Ingredient | Amount | Notes |
|---|---|---|
| Beef Chuck Roast 🥩 | 2 lb | Cut into 2-inch cubes, well-marbled |
| Kosher Salt 🧂 | 1 ½ tsp | Diamond Crystal preferred for even seasoning |
| Freshly Ground Black Pepper 🌶️ | 1 tsp | Coarse grind for texture |
| Olive Oil 🫒 | 2 tbsp | Divided for searing and finishing |
| Yellow Onion 🧅 | 1 whole | Large, diced into 1/2-inch pieces |
| Garlic Cloves 🧄 | 5 cloves | Minced for even distribution |
| Beef Broth 💧 | 1 ½ cups | Low-sodium preferred for control |
| Tomato Paste 🍅 | 2 tbsp | For depth of flavor |
| Worcestershire Sauce 🍶 | 1 tbsp | Adds umami complexity |
| Dried Thyme 🌿 | 1 tsp | Crushed between fingers to release oils |
| Bay Leaves 🍃 | 2 pieces | Whole, removed before serving |
| Red Wine Vinegar 🍷 | 1 tbsp | Balances richness of beef |
| Carrots 🥕 | 2 whole | Peeled and cut into 1-inch chunks |
| Celery Stalks 🌿 | 2 pieces | Cut into 1-inch pieces |
The beef selection is critical for optimal results. Chuck roast with visible marbling (at least 20% fat content) yields the most tender outcome after pressure cooking. Source from Whole Foods or Costco for consistent quality. The collagen content in chuck breaks down beautifully under pressure, creating that fall-apart texture. Avoid lean cuts like sirloin—they’ll emerge dry and stringy regardless of cooking time.
For the broth, low-sodium beef stock allows precise seasoning control, though Better Than Bouillon paste (dissolved in hot water) works excellently. No Worcestershire sauce? Soy sauce plus a pinch of sugar provides similar depth. The tomato paste can be substituted with 1/4 cup crushed tomatoes reduced by half. Fresh herbs may be used, but dried offer more concentrated flavor in pressure cooking.
Prepared beef stores well in its cooking liquid for up to 5 days refrigerated. The flavors intensify overnight, making this ideal for meal prep. Freeze portions for 3 months in airtight containers. Reheat gently to preserve texture—microwaving tends to make the beef dry out. Always remove bay leaves before storage.
Why You’ll Love This Recipe
- I’ll be real: this tastes like a fancy Sunday dinner but costs less than takeout and uses ingredients I already have.
- Set and Forget: I toss in the beef chuck roast, onions, salt, and pepper, then the Instant Pot does all the work while I do absolutely nothing.
- Melt-in-Your-Mouth Tender: The beef cooks so slowly under pressure that it practically dissolves on your tongue, and the onions turn into this sweet, silky sauce.
- Feeds the Whole Crew: Honestly, one batch makes enough for dinner tonight and sandwiches tomorrow—my family of five never complains.
Step-by-Step Instructions for Instant Pot Beef
This pressure-cooker method guarantees fall-apart tenderness with minimal hands-on time.
Step 1: Sear the Beef Chuck Roast
Set your Instant Pot to the sauté function on normal heat. Add 1 tbsp olive oil and allow it to shimmer. Pat the 2 lb beef chuck roast dry with paper towels, then season all sides with the 1.5 tsp kosher salt and 1 tsp freshly ground black pepper.
Working in batches if necessary, sear the beef cubes in a single layer for 3-4 minutes per side until deeply browned on all sides. This creates a flavorful fond that will enrich the sauce. Don’t crowd the pot—this lowers the temperature and steams the meat instead of searing it. Transfer the seared beef to a plate and set aside.
Step 2: Sauté the Aromatics
Add the remaining 1 tbsp olive oil to the pot. Stir in the diced yellow onion and cook for 3-4 minutes until softened and starting to turn translucent. Add the 5 cloves minced garlic cloves and cook for 30 seconds until fragrant, stirring constantly to prevent burning.
Stir in the 2 tbsp tomato paste, 1 tbsp Worcestershire sauce, 1 tsp dried thyme, and 1 tbsp red wine vinegar. Cook for 1 minute to deepen the flavors and remove the raw edge from the tomato paste. The mixture should be thick and aromatic, coating the bottom of the pot.
Step 3: Deglaze and Pressure Cook
Pour in ½ cup of the beef broth and use a wooden spoon to scrape up all the browned bits from the bottom of the pot. This step is critical—it prevents the “burn” notice and incorporates all the flavorful fond into the sauce. Add the remaining 1 cup beef broth, the 2 pieces bay leaves, 2 whole carrots, and 2 pieces celery stalks.
Return the seared beef to the pot, along with any accumulated juices. Secure the lid, set the valve to sealing, and cook on high pressure for 35 minutes. The beef will become fork-tender, absorbing all the rich flavors from the aromatics and liquid.
Step 4: Release Pressure and Finish
Allow the pressure to release naturally for 10 minutes, then switch the valve to venting to release any remaining pressure. Carefully open the lid and discard the 2 pieces bay leaves. The beef should be incredibly tender—easily pierced with a fork and nearly falling apart.
If you prefer a thicker sauce, set the Instant Pot back to sauté and simmer the liquid for 3-5 minutes until it reduces slightly. Taste and adjust seasoning if needed, though the initial salt and pepper should be perfectly balanced. Serve the beef hot, spooning the rich, flavorful sauce over the top.
Pro Tips For Making Instant Pot Beef
- Sear the Beef First: I learned this the hard way—skipping the sear leaves your beef bland. Use the Instant Pot’s sauté function with 2 tablespoons of olive oil to brown the chuck roast on all sides before pressure cooking.
- Cut Even Chunks: After burning one too many batches, I now cut the beef into 2-inch pieces so they cook evenly. Smaller pieces also absorb the onion and seasoning better.
- Deglaze Thoroughly: Sounds weird, but it works: after searing, add a splash of water or broth and scrape the bottom to avoid the “burn” error. Those browned bits are pure flavor.
- Use Natural Release: Resist the urge to quick-release—letting the pressure drop naturally (about 15 minutes) keeps the beef tender instead of tough. I skip this when I’m in a rush, but the texture suffers.
Health Benefits of These Flavors
Rich Protein Source
Beef is packed with high-quality protein, delivering all nine essential amino acids your body needs. A 4-ounce serving provides about 22 grams of protein, supporting muscle repair and immune function. This makes it ideal for active lifestyles and growing families. 💪
Iron Boost
This dish offers a significant dose of heme iron, the most easily absorbed form. A serving provides about 15% of your daily iron needs, helping prevent fatigue and supporting energy levels. Pair it with vitamin C-rich sides to maximize absorption.
Vitamin B Complex
Beef is naturally rich in B vitamins, particularly B12, which is crucial for nerve function and red blood cell production. You’ll also get B6 for metabolism support and niacin for skin health. These nutrients work together to keep your energy levels steady.
Zinc for Immunity
A 4-ounce portion contains about 35% of your daily zinc needs, a mineral vital for immune function and wound healing. This is especially important during cold and flu season. I notice I feel more resilient when I include beef in my diet regularly.
Collagen Benefits
Pressure cooking beef breaks down collagen into gelatin, which supports joint and skin health. The slow cooking process makes these nutrients more bioavailable. This is why the broth from this recipe is so nourishing.
Low-Carb Friendly
This creation fits perfectly into low-carb or keto diets, with virtually no carbs in the beef itself. The vegetables add minimal carbs while providing fiber and vitamins. It’s a satisfying way to stay on track with your nutritional goals. ✨
Nutrition Facts
Frequently Asked Questions
Can I use a different cut of beef?
Yes, but choose well-marbled cuts like brisket or short ribs. Avoid lean cuts such as sirloin, as they can become dry. Chuck roast remains the best choice for guaranteed tenderness in 35 minutes of pressure cooking.
Why do I need to sear the beef first?
Searing creates a flavorful crust and fond that enriches the sauce. Skipping this step results in less depth of flavor. It also enhances the appearance of the finished dish.
How do I prevent the burn notice?
Always deglaze the pot thoroughly after searing and before pressure cooking. Use at least ½ cup liquid and scrape up all browned bits. This ensures even heat distribution.
Can I cook frozen beef directly?
It’s not recommended. Thaw first for even cooking and to avoid potential food safety issues. If in a hurry, use the sauté function to partially thaw before pressure cooking.

- 4C Bread Crumbs Meatballs Recipe: Crispy Crust and Juicy Centers - September 25, 2026
- 6 Oz Chocolate Chip Cookie Recipe: Perfectly Balanced Crispy Edges and Chewy Hearts - September 25, 2026
- 6-Inch Coffee Cake Recipe: Vanilla Bean Swirls and Buttery Streusel Topping - September 25, 2026