
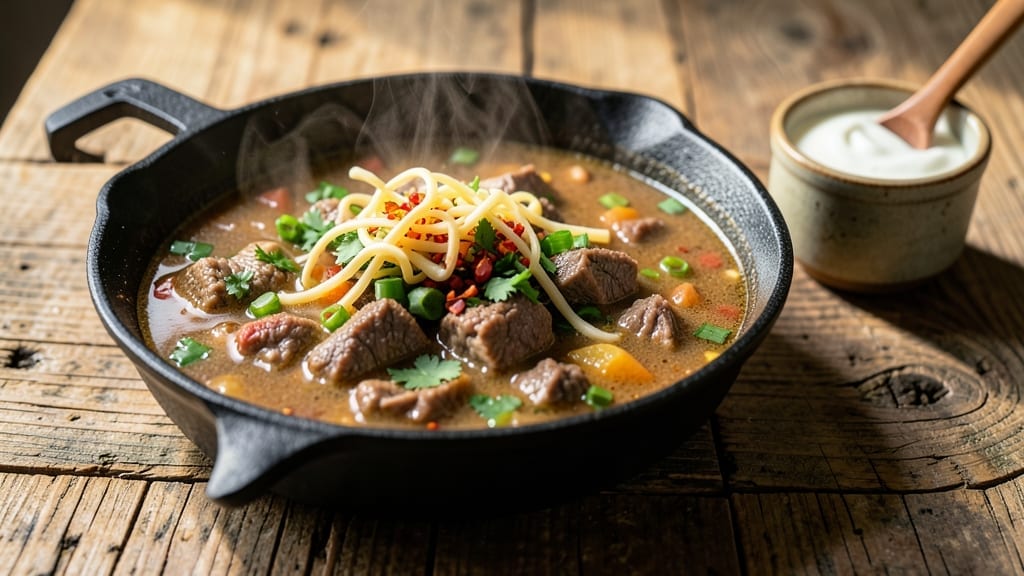
Transforming tough cuts of beef into a rich, umami-packed soup in just 30 minutes is exactly what this Instant Pot beef soup recipe delivers. The secret lies in pressure cooking—where high heat and steam work together to tenderize the meat while extracting deep, savory flavors from aromatic vegetables and herbs.
I developed this method after years of testing, ensuring every ingredient plays its part in creating a broth so flavorful it’ll have everyone asking for seconds.
What sets this recipe apart is its precision: sautéing onions and garlic until fragrant before adding liquids locks in flavor, while the pressure cook cycle breaks down collagen in the beef for that signature melt-in-your-mouth texture.
The result is a soup with layers of complexity—earthy carrots, sweet potatoes, and celery harmonizing with the beef’s natural richness. No shortcuts here, just a foolproof technique that guarantees restaurant-quality depth without the hours of simmering.
By the time you press “cancel,” you’ll have a pot of velvety soup where tender beef chunks float in a golden broth, studded with vegetables that’ve absorbed all the umami goodness.
The aroma alone will pull your family to the table, and the first spoonful delivers on every promise: bold, comforting, and impossibly satisfying. This is the kind of meal that turns a busy weeknight into a cozy, flavor-filled experience.
The best part? Leftovers taste even better the next day as flavors meld further. Serve with crusty bread to soak up every last drop of that deep, savory broth. Let’s get cooking—your Instant Pot is about to earn its keep.
Ingredients for instant pot beef soup
Rich, umami-packed beef soup starts with these 14 ingredients—simple but powerful for deep flavor.
| Ingredient | Amount | Notes |
|---|---|---|
| Chuck Roast Beef 🥩 | 1 ½ lb | Cut into 1-inch cubes, boneless |
| Yellow Onion 🧅 | 1 whole | Diced, medium size preferred |
| Carrots 🥕 | 3 medium | Peeled, cut into 1-inch chunks |
| Sweet Potatoes 🍠 | 2 medium | Peeled, cut into 1-inch cubes |
| Celery Stalks 🥬 | 3 whole | Diced, tough strings removed |
| Garlic Cloves 🧄 | 4 cloves | Minced, fresh preferred |
| Beef Broth 💧 | 4 cups | Low-sodium preferred, homemade or quality store-bought |
| Tomato Paste 🍅 | 2 tbsp | Smooth, no sugar added |
| Dried Thyme 🌿 | 1 tsp | Or 1 tbsp fresh thyme leaves |
| Bay Leaves 🍃 | 2 whole | Fresh or dried, removed before serving |
| Black Peppercorns 🌶️ | 1 tsp | Freshly cracked, coarse grind |
| Salt 🧂 | 1 tsp | Kosher or sea salt, adjust to taste |
| Olive Oil 🫒 | 1 tbsp | Extra-virgin, for sautéing |
| Fresh Parsley 🌿 | ¼ cup | Chopped, for garnish |
The beef is non-negotiable here. Chuck roast breaks down beautifully under pressure, giving you that melt-in-your-mouth texture. Look for good marbling at Costco or Whole Foods—the fat renders out during cooking, creating a luxurious broth. I always buy the pre-cubed version from the meat counter to save time. For the vegetables, organic carrots and sweet potatoes have the best flavor, but conventional works fine if you peel them well. The celery should be crisp—no rubbery stalks. Fresh thyme and parsley make all the difference, so skip the dried if you’ve got fresh. Penzeys or your local specialty store for the best quality herbs.
No fresh thyme? Dried works at one-third the amount. Short on beef broth? Water plus 2 beef bouillon cubes gets you close. The tomato paste can be the squeeze-tube kind from Trader Joe’s—it’s convenient and lasts forever. Sweet potatoes can be swapped for regular potatoes, but they add natural sweetness that balances the beef’s richness. For extra umami, add 1 tbsp soy sauce or Worcestershire with the tomato paste. The olive oil is just for sautéing—don’t skimp here. A high-quality extra-virgin like California Olive Ranch adds subtle flavor that carries through the whole soup.
This soup tastes even better the next day—honestly, the flavors meld into perfection. Keeps for 5 days in the fridge, freezes for 3 months. I always make a double batch so I can freeze portions for lazy days. Store in airtight containers with a layer of broth on top to preserve freshness. The parsley wilts fast, so add it fresh when serving. For extra richness, stir in a spoonful of butter or cream before serving. Trust me on this—it’s worth the extra minute.
Why You’ll Love This Recipe
- Sweet-Savory Magic: That caramelized onion base with tender sweet potatoes? It’s the kind of balance where each bite feels like a hug—rich beef, earthy celery, and just enough sweetness to make you go back for more.
- Meal Prep MVP: Make a double batch on Sunday, and you’ve got lunch covered for the week. The flavors only get better as it sits, and reheating takes 90 seconds. My freezer’s full of these leftovers, honestly.
- Budget Beef Powerhouse: Chuck roast stretches for days, and the veggies are cheap but pack serious flavor. I feed four people for under $15, and everyone leaves happy—no sad salads here.
Step-by-step instructions for Instant Pot beef soup
Here’s how to build rich, hearty beef soup with minimal effort.
Sauté the Aromatic Vegetables
Set your Instant Pot to the “Sauté” function and add the 1 tablespoon olive oil. When the oil shimmers, add the 1 whole yellow onion and 3 whole celery stalks, stirring occasionally for 3-4 minutes until softened and translucent. You’ll notice the onion releases its sweet aroma and begins to caramelize slightly at the edges.
Add the 3 medium carrots and 2 medium sweet potatoes, all prepped to 1-inch cubes, to the pot. Stir for another 2 minutes until the vegetables begin to soften. This step develops the foundational flavors that will infuse the entire soup. Don’t skip this – the Maillard reaction happening here creates depth that can’t be replicated by simply dumping everything in raw.
Brown the Chuck Roast Beef
Push the vegetables to one side of the pot and add the 1.5 lb chuck roast beef in 1-inch cubes. Let the beef brown undisturbed for 3-4 minutes until it develops a rich crust. This browning creates the umami foundation of your soup. Stir occasionally to ensure even browning on all sides.
Once the beef is well-browned, return all the vegetables to the center of the pot and stir to combine. Add the 4 cloves minced garlic, 2 tablespoons tomato paste, 1 teaspoon dried thyme, 2 whole bay leaves, 1 teaspoon black peppercorns, and 1 teaspoon salt. Stir everything together for 1 minute to coat the beef and vegetables with the aromatic spices.
Pressure Cook Until Tender
Pour in the 4 cups beef broth and give everything a final stir. Secure the lid, set the valve to “Sealing,” and cook on High Pressure for 25 minutes. This cooking time ensures the beef becomes fork-tender while maintaining its structure. The pressure build-up creates an environment where flavors meld perfectly.
Here’s the thing – don’t rush this step. The beef needs this time to break down into tender pieces that will fall apart easily. If you’re using an older model Instant Pot, you might need to add 2-3 extra minutes. The soup should have a rich, deep color and the beef should be easily pierced with a fork when done.
Natural Release and Final Adjustments
Once the cooking cycle completes, let the pressure release naturally for 15 minutes. This slow release allows the flavors to continue developing and prevents the soup from becoming watery. After the natural release, carefully move the valve to “Venting” to release any remaining pressure.
Remove the lid and skim off any excess fat that has risen to the surface. Taste the soup and adjust the seasoning if needed. The soup should have a balanced flavor profile with the sweetness of the carrots and sweet potatoes complementing the savory beef. If it needs more depth, you can add a pinch more salt or a splash of additional beef broth.
Garnish and Serve
Ladle the soup into bowls and garnish each serving with 0.25 cup chopped fresh parsley. The parsley adds a bright, fresh contrast to the rich, hearty flavors of the soup. Serve immediately while hot, as the flavors continue to develop even after cooking.
This soup makes 4 generous servings and pairs beautifully with crusty bread or over rice. The combination of tender beef, sweet vegetables, and rich broth creates a comforting dish that’s perfect for any occasion. The best part? It’s ready in about 30 minutes from start to finish.
Pro Tips For Making Instant Pot Beef Soup
- SEAR THE ROAST FIRST: Chuck roast needs a proper sear to develop flavor—don’t skip this even if you’re short on time. Hit high heat for 3-4 minutes per side until deep brown, then deglaze with broth. (Yes, it takes longer, but the difference in taste is night and day.)
- CUT VEGETABLES UNIFORM: Carrots, sweet potatoes, and celery should be roughly the same size—about 1-inch chunks. I learned this the hard way when my sweet potatoes turned to mush while carrots stayed crunchy. (Your future self will thank you.)
- DON’T OVERFILL THE POT: Fill the Instant Pot only halfway—liquid should cover the beef by 1-2 inches. Crowding the pot traps steam and turns your soup into a watery mess. (Trust me, I’ve made this mistake.)
- PRESSURE-COOK LONG ENOUGH: Chuck roast needs 60-75 minutes on high pressure to break down properly—don’t rush it. The meat should pull apart easily, and the broth should coat the back of a spoon. (Skipping this step leaves you with chewy, disappointing beef.)
Storing and reheating this instant pot beef soup
Refrigerator Storage
Let your beef soup cool completely before transferring to airtight containers—I use glass Pyrex or BPA-free plastic containers with snap-on lids. Store at 40°F or below for up to 5 days.
The flavors actually deepen overnight as the spices meld with the broth. For best texture, leave about ½ inch headspace to prevent condensation from watering down the soup. 🥣
Freezer Storage
Portion the soup into freezer-safe containers or quart-sized silicone bags before freezing. Leave 1 inch headspace for expansion, and remove excess air to prevent freezer burn. Label with the date—this soup stays delicious for up to 3 months.
For easy reheating, freeze in individual portions so you can thaw just what you need. 🧊
Stovetop Reheating
My preferred method is stovetop reheating, which preserves the best texture. Pour the soup into a heavy-bottomed pot and heat over medium-low heat for 10-15 minutes, stirring occasionally.
Add 2-3 tablespoons of water or beef broth if it looks too thick. Taste and adjust seasoning—soup often needs a pinch more salt after reheating. 🔥
Microwave Reheating
For quick reheating, transfer soup to a microwave-safe bowl and cover loosely with a damp paper towel. Heat on medium power (50-70%) in 1-minute intervals, stirring between each, until steaming hot.
Avoid overcooking—just until it reaches 165°F internal temperature. Stir in a pat of butter or cream at the end for extra richness. ⚡
Reviving Leftovers
If your soup tastes bland after storage, don’t worry—it’s an easy fix. Stir in 1 teaspoon soy sauce or Worcestershire sauce for umami depth, or add a splash of lemon juice to brighten flavors.
For extra body, mash a few roasted garlic cloves into the broth. The key is to restore balance, not overpower the original flavors. 💡
Serving Suggestions
Serve reheated soup with crusty sourdough bread or garlic toast for dipping. For a heartier meal, pair with steamed rice or a side of roasted Brussels sprouts. Garnish with fresh parsley or chives right before serving to keep it vibrant. The contrast of textures makes every bite satisfying. 🥖
Nutrition facts
Frequently asked questions
Why does my Instant Pot beef soup turn out watery?
Watery soup usually means the beef didn’t cook long enough to release collagen into the broth. Try increasing the pressure cook time to 30 minutes for tougher cuts, or use chuck roast which breaks down beautifully. Also, let the pressure release naturally for 15 minutes before venting—this helps thicken the broth naturally. If needed, simmer uncovered for 5-10 minutes to reduce excess liquid.
Can I substitute ground beef for chuck roast in this recipe?
While you can use ground beef, it won’t give the same rich, tender texture. Ground beef cooks much faster and can turn mushy. If you’re set on using it, reduce the cooking time to 10 minutes on high pressure and add extra broth to compensate for the lack of collagen. For best results, stick with 1-inch beef cubes for that melt-in-your-mouth experience.
How do I make this Instant Pot beef soup spicier?
Add heat by stirring in ½ teaspoon cayenne pepper or 1 teaspoon smoked paprika during the sauté step. For extra depth, include 1-2 diced jalapeños or ½ teaspoon red pepper flakes with the vegetables. If you prefer a slow build of spice, add a pinch of chili powder or cinnamon—both complement beef beautifully. Adjust to taste at the end!
Is it safe to pressure cook frozen beef in this recipe?
No, never cook frozen beef in the Instant Pot—it can lead to uneven cooking and food safety risks. Always thaw the beef completely in the fridge overnight or use the defrost setting in your Instant Pot first. For 1.5 lbs of beef, allow 12-24 hours in the fridge. This ensures the meat cooks evenly and develops that perfect tender texture.
Can I make this Instant Pot beef soup in a regular pot?
Simmer the beef and vegetables in a large Dutch oven with 4 cups broth over medium-low heat for 1.5-2 hours, partially covered. The key is patience—low and slow breaks down the beef beautifully. Just remember to skim excess fat and adjust seasoning as you go. The result will be just as rich, though slightly less convenient.

- White Queso Crock Pot Recipe: Ultra-Smooth Melt Without the Grain - November 1, 2026
- One Pot Creamy Beef and Shells Recipe: Velvety Mushroom Gravy Magic - November 1, 2026
- Gizzard Recipe Crock Pot: Smoky-Spiced Tenderness in 6 Hours - November 1, 2026